background image


                                                                                  74 / 84 

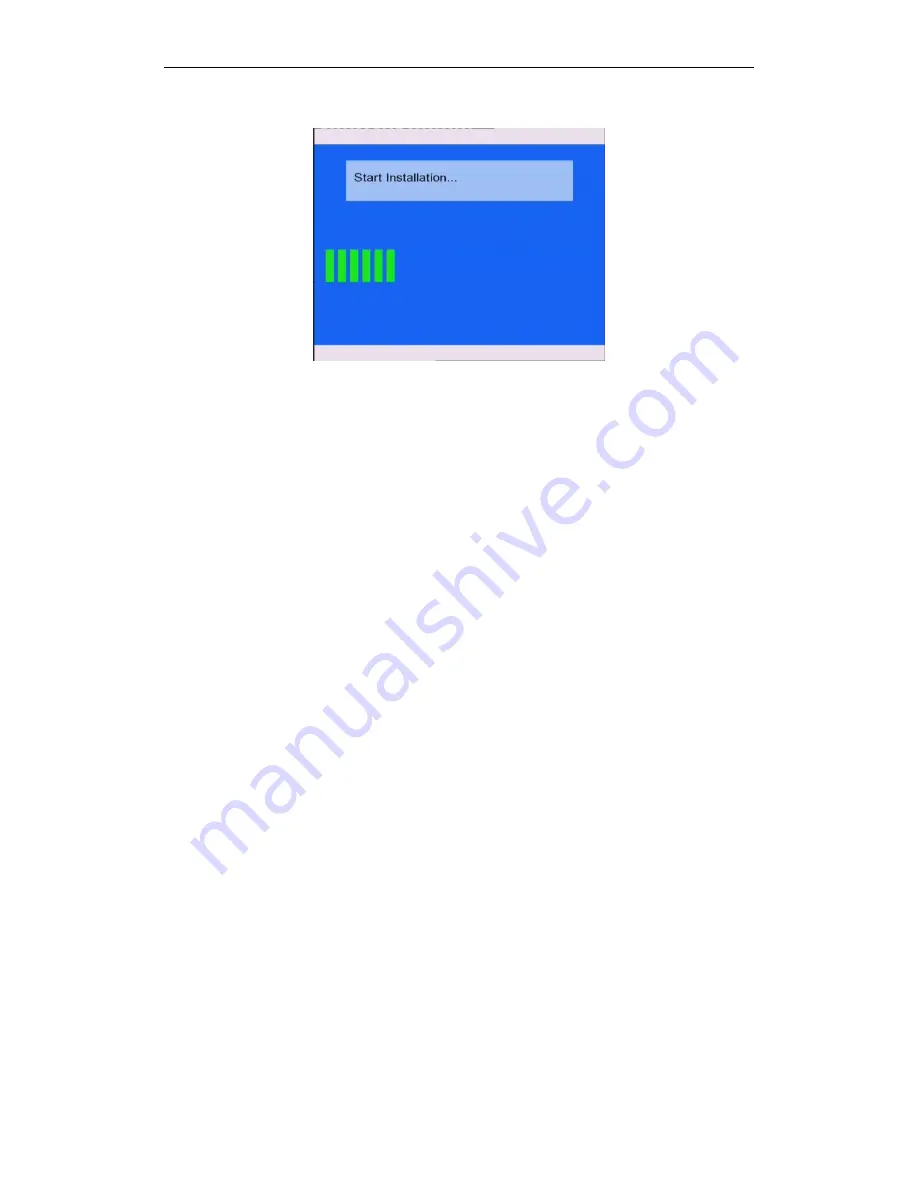
will appear on the TV screen.   


Please wait for several minutes, the installation will be completed, the LED indicators will go off, 

and the player will be powered off automatically. Then you can press the 

power

 / 

standby


button to turn on the player and enjoy. 


Note

Do not turn off the power during installation;   

The USB Pen Drive is not allowed to be unplugged during installation. 


Summary of Contents for Movie Cube S700

Page 1: ...Analog DVB T TV programs only for S800 21 4 1 Watching Analog TV programs only for S800 21 4 2 Watching DVB T TV programs only for S800 21 5 The Title List Menu for Recorded Videos 25 5 1 Title List Menu 25 5 2 Playing Back Titles 26 5 3 Deleting Titles 26 5 4 Renaming Titles 26 5 5 Sorting Files 27 5 6 Title Edit Menu 28 5 7 Tools 30 5 8 Saving Your Recorded Titles 30 6 Timer Record Menu 31 6 1 C...

Page 2: ...es 57 8 7 Managing the Playlist 58 9 Media Library 59 9 1 Music Library 59 9 2 Photo Library 62 9 3 Movie Library 64 10 File Copy Menu 67 11 NAS Function 69 12 Listening to Internet Radio 70 12 1 Station List Menu 70 12 2 Genre List Menu 71 12 3 My Favorite Station 72 13 Upgrading the Firmware 73 14 Appendixes 75 14 1 Specifications 75 14 2 Frequently Asked Questions 77 14 3 Copyrights and Tradema...

Page 3: ...ack Photo Playback supports digital camera JPEG and BMP files Data Storage works as a portable hard disk using USB 2 0 port USB HOST supports two USB 2 0 host ports Network Function Ethernet WLAN streaming playback and NAS function Wireless function supported by the optional Wireless LAN USB Adapter HDMI High Definition Multimedia Interface transmits the highest quality digital video and audio via...

Page 4: ...the environmental temperature should be within 5 35 1 3 2 Power The player s power voltage DC 12V When using this player please connect the supplied AC adapter or AC adapter cable to the player s power jack When placing the adapter cable make sure it can not get damaged or be subject to pressure To reduce the risk of electric shock unplug the adapter first before cleaning it Never connect the adap...

Page 5: ...gested to do defragment after a long period of usage Regularly backup the data in the hard disk so that it can be recovered in the event of data corruption or loss Our company takes no responsibility for loss of data stored on the hard disk 1 3 7 Others When using this player please do not let the player come into contact with water or other liquid if water is accidentally spilled on the player pl...

Page 6: ...computer 1 4 2 USB Mass Storage Device like USB stick MP3 USB HDD etc Connection 1 Make sure the player is powered on 2 Plug in the USB stick or USB HDD etc to one of the USB host ports of this player 1 4 3 TV connection 1 4 3 1 A V IN 1 Follow the picture and plug in the 3 color connector to the player s A V IN jack 2 Follow the picture and plug in the 3 color connector to the A V OUT jack of the...

Page 7: ...jack 2 Follow the picture and plug in the 3 color connector to the TV s A V IN jack In this way you can enjoy the content in the player on TV or other display devices 1 4 3 3 SCART OUT 1 Follow the picture and plug one connector on the SCART cable to the player s SCART socket 2 Follow the picture and plug the other connector on the SCART cable to the TV s SCART socket ...

Page 8: ...sing Y Pb Pr Video out First method use the audio output from the A V OUT jack Second method use the audio output from the S PDIF Coaxial or Optical jack In this way you can also enjoy videos music and photos in the player on TV 1 4 3 5 HDMI OUT 1 Follow the picture and plug one connector on your HDMI cable to the player s HDMI jack 2 Follow the picture and plug the other connector on your HDMI ca...

Page 9: ...plug a TV Aerial or analog TV cable to the ANT RF IN socket 1 4 4 Digital Audio Device connection 1 Follow the picture and plug in the RCA connector on your coaxial cable to the player s S PDIF Coaxial jack Or if you use optical fiber please plug in the Toslink connector on your optical fiber to the player s S PDIF Optical jack not supplied ...

Page 10: ...ptor to the player s DC IN jack 2 Follow the picture and plug in the AC adaptor to the power outlet 1 4 6 Ethernet connection To connect to a LAN Local Area Network you require a cat5 cat5e or cat6 network cable not supplied 1 Connect one of the crystal plugs on the cable to the player s RJ45 LAN socket 2 Connect the other crystal plug on the cable to a RJ45 LAN port on your router switch or hub d...

Page 11: ...11 84 1 4 7 WLAN connection 1 Make sure the player is powered on 2 Plug the Wireless LAN USB Adapter i e Wi Fi USB Dongle to the USB HOST port of the player ...

Page 12: ...dby button on the front panel or remote control the player will soon enter the main interface and the POWER indicator on the front panel will turn blue 2 Power off When the system is running press the power standby button on the front panel or remote control the player will enter standby mode and the POWER indicator on the front panel will turn red you can also press and hold the power standby but...

Page 13: ... The buttons marked ahead are for S800 only 1 shift 2 home 3 menu 4 setup display 5 resolution zoom 6 subtitle 7 record 8 stop 9 fr 10 vol 11 enter 12 vol 13 mute 14 numeric buttons 15 time shift 16 EPG green 17 red 18 TTX yellow 19 blue 20 audio 21 back 22 prev 23 navigational buttons 24 next 25 play 26 ff 27 source 28 pause 29 repeat timer 30 goto browser 31 music 32 copy 33 power standby ...

Page 14: ... appears showing track number and time elapsed remaining Press during recording and an on screen display appears showing the recording quality setting and time elapsed Press during live TV and an on screen display appears showing the current channel number and time Press during time shifting to turn the time shifting bar on off 5 resolution zoom resolution button Press to switch between NTSC PAL 4...

Page 15: ...h allows you to pause live TV and resume the program from the point you left it While paused the program is recorded to the internal HDD as long as the space is available Press to activate the time shift function and wait for the play arrow to appear on the screen Press the pause button and the program will be paused Press the play button to resume viewing the program Time shift mode remains activ...

Page 16: ... ff fast forward button Press to fast forward the current playback Press repeatedly to select speeds 27 source source button Reserved button No function has been assigned to it yet 28 pause pause step button Press to pause the current playback Press again to step to the next frame Press the play button to resume the playback 29 repeat timer repeat 1 all button Press to set repeat option Chapter Ti...

Page 17: ... enter standby mode or wake up 2 2 Front Panel No Name Function 1 LCD screen Menu icon information will be displayed on the screen 2 Infrared receiver window Receiving IR signals from the remote control 3 REC indicator Indicator blue turns on when the system is alive Indicator red turns on when recording starts 4 POWER STANDBY button Press to enter standby mode or wake up ...

Page 18: ...eft Channel 5 V1 Video IN jack 6 L1 Audio IN jack Left Channel 7 S PDIF COAXIAL jack 8 SCART TV socket 9 ANT RF IN socket 10 DC IN jack 11 RJ45 LAN socket 12 HDMI jack 13 S PDIF OPTICAL jack 14 R1 Audio IN jack Right Channel 15 R2 Audio OUT jack Right Channel 16 USB DEVICE port 17 USB HOST port x 2 ...

Page 19: ...menu you can watch and record Analog TV programs or have the time shift function Select the Analog TV icon on the main interface to enter this menu 3 3 Selecting A V In Signal from the A V IN jack In this menu you can watch and record audio visual signal from the A V IN jack on the rear panel of the unit or have the time shift function Select the A V In icon on the main interface to enter this men...

Page 20: ...e control or select the Browser icon on the main interface to browse movie photo and music files stored either on a HDD USB device or Network 3 6 Selecting Media Library In this menu you can search multimedia files stored on the internal HDD Select the Library icon on the main interface to enter this menu 3 7 Selecting Internet Radio In this menu you can listen to the SHOUTcast free radio programs...

Page 21: ...gram time shift Press to activate the time shift function timer Press to edit scheduled recordings zoom Press to zoom out the image 4 2 Watching DVB T TV programs only for S800 To enter the DVB T TV mode select the DVB T icon on the main interface The following are some functional buttons on the remote control available when watching Digital TV programs Name Function enter Press to view the progra...

Page 22: ...and press the enter button to confirm 4 2 2 Info Bar While switching channels by the up down button an info bar will be displayed to show the channel information There re 4 strings displayed on the bar Taking the info bar in the above photo for example N A Stands for TV rating ENG Stands for the voice language SS Stands for subtitle TT Stands for Teletext 480 Stands for resolution SD Standard Defi...

Page 23: ...he timer button to add delete scheduled recording 4 2 4 Teletext Menu If the broadcasted stream supports Teletext press the TTX button to enter the Teletext menu Press the navigational and numeric buttons to view the content in the Teletext menu 4 2 5 Subtitle List Menu Press the subtitle button when watching DVB T TV programs the Subtitle List menu will be displayed Press the left right button to...

Page 24: ...24 84 Press the up down button to select the subtitle and press the enter button to confirm ...

Page 25: ... or Analog TV programs 5 1 Title List Menu Number Function Description 1 Menu Bar Press the left right button to scroll through the menu Here you can Play Delete Rename Sort Edit a recorded title 2 Title Lists Here lists all recorded titles Here you can see thumbnail length quality recorded channel recorded date time of a title A sign shows this recorded title has not been watched A sign shows thi...

Page 26: ... Titles To delete a title do the following 1 Press the left right button on the remote control to select the Delete tab from the menu bar 2 Press the up down button on the remote control to select the title you wish to delete 3 Press the enter button to confirm and delete the file 4 A confirmation message appears Press the up down button and select OK 5 Press the enter button to delete the selecte...

Page 27: ...cess press the back button 5 5 Sorting Files Press the left right button on the remote control to select the Sorting tab from the menu bar Press the enter button and the menu appears Return Select to return to the main screen Title Number Select to sort all files according to title numbers Recording Time Select to sort all files according to the length of the recordings Title Name Select to sort a...

Page 28: ...umbnail Select to change a thumbnail of the selected video Press the up down button on the remote control to select Set Thumbnail an editing screen appears You can press the ff fr button to fast forward or fast rewind when searching a proper point When you reach the point at which you wish to insert a thumbnail press the left right button to select CONFIRM and press the enter button AB Erase Delet...

Page 29: ... them into one title A confirmation message appears Select CONFIRM to merge the files Add Chapter Mark Add a chapter mark to the selected file A chapter mark is a marker inserted into the title You can jump between marked sections by pressing the prev next button on the remote control An editing screen appears When you reach the point at which you wish to add the mark press the enter button to con...

Page 30: ...enter button and the menu appears Return Select to return to the main screen Delete All Title Select to delete all titles 5 8 Saving Your Recorded Titles All the recorded titles are stored temporarily in a recording disc partition UDF format which cannot be identified by personal computers If you want to share the recorded titles on your computer please copy the titles from the recording disc to t...

Page 31: ...ing Source Select the video source or TV channels for the recording Start Time Enter the date and time of the recording Length Enter the length of the recording Repeat Select how often you want the schedule to record Choose from Once Everyday Mon Fri Mon Sat or for an individual day of the week Quality Select the recording quality Choose from HQ SLP EP LP and SP The higher the quality the more spa...

Page 32: ...te control to select the Delete tab from the menu bar Select the schedule you want to delete and press the enter button A confirmation message appears Select CANCEL Delete the selected schedule or Delete all schedules Press the enter button to confirm 6 4 Viewing Schedule Status Press the left right button on the remote control to select the Status tab from the menu bar The schedule list is displa...

Page 33: ...setting or Pause the selected schedule Press the enter button to confirm 6 5 Viewing Recording History Press the left right button on the remote control to select the History tab from the menu bar Here you can view a complete history of all recordings that were set ...

Page 34: ... for S800 Press the left right button on the remote control to select the DVB T tab from the menu bar DVB T Region Select to set the region for Digital Terrestrial TV Press the up down button to select and the enter button to confirm Channel Scan Select to scan for available Digital Terrestrial TV channels Press the up down button to select from AUTO SCAN and MANUAL SCAN and press the enter button...

Page 35: ... Use the navigational and numerical buttons on the remote control to select or input Press the enter button to confirm Channel Set Select to edit channel information Press the up down button to select DVB T and press the enter button to confirm In this menu you can edit the Name and sequence for the DVB T TV channels Use the navigational buttons to select and modify the settings ...

Page 36: ...ly for S800 Press the left right button on the remote control to select the ATV tab from the menu bar Analog TV Region Select to set the region for Analog TV Press the up down button to select and the enter button to confirm Channel Scan Select to scan for available Analog TV channels Press the up down button to select from AUTO SCAN and press the enter button to confirm ...

Page 37: ...n button to select Analog TV In this menu you can edit the Status Name Fine Tune TV System and sequence for the Analog TV channels Use the navigational buttons to select and modify the settings and press the enter button to confirm 7 3 Changing Video Settings Press the left right button on the remote control to select the Video tab from the menu bar ...

Page 38: ... portions Select when a standard 4 3 TV is connected Letter Box 4 3 Display a wide picture with two black borders on the top and bottom of 4 3 screen Select when a standard 4 3 TV is connected 16 9 Compress the image to convert the whole image Select when a 16 9 TV is connected Brightness Select to set brightness levels Press the up down button to adjust brightness The new setting is previewed on ...

Page 39: ...he enter button to confirm TV System Select to adjust TV system Press the up down button to set the TV system depending on your viewing preferences Press the enter button to confirm 7 4 Changing Audio Settings Press the left right button on the remote control to select the Audio tab from the menu bar Night Mode Select to set night mode ...

Page 40: ...button to confirm Digital Output Select to set Digital Output S PDIF mode Press the up down button to select from RAW and LPCM Press the enter button to confirm 7 5 Changing Record Settings Press the left right button on the remote control to select the Record tab from the menu bar ...

Page 41: ... Chapter Select to add chapter marks automatically at set intervals Press the up down button to select the interval you require An automatic chapter mark will be added at each interval allowing you browse titles easily after recording Press the enter button to confirm Permanent Timeshift Select to set Time Shift mode Press the up down button to select from On and Off Press the enter button to conf...

Page 42: ...et settings Before using the network functions please check following items 1 Connect the player to network first 2 Please enable NetBIOS of TCP IP on computer 3 Please turn off your PC s firewall 4 Please enable your PC s Guest account 5 Please share the folders which you wish to browse on your PC and make sure that Everyone or Guest has the right to access Press the up down button to select DHCP...

Page 43: ...ove settings please contact the network administrator Use navigational and numeric buttons to enter IP address Press the enter button to confirm Wireless Setup Please refer to the user s guide to wireless function in the package of EMTEC Wi200 USB adapter for more details about these settings NAS Mode Select to turn the NAS mode on off Press the up down button to select from Off and On Press the e...

Page 44: ...u Language Select to choose the OSD On Screen Display language Press the up down button to select the language Press the enter button to confirm Text Encoding Select to set text encoding Press the up down button to select from Unicode Chinese GBK BIG5 and etc Press the enter button to confirm Time Select to set the system time ...

Page 45: ...ton to adjust each setting Press the enter button to confirm Parental Control Select to set the TV parental control options A password will be needed for the modification The default one is 0000 Press the numerical buttons to input and the enter button to confirm Lock System Press the up down button to turn on or off the parental system Press the enter button to confirm ...

Page 46: ...he region Press the enter button to confirm Password Press the numerical buttons to input and change the password Press the enter button to confirm Block Unrated TV Press the up down button to turn on or off Press the enter button to confirm TV Rating ...

Page 47: ...elect to format the HDD Press the up down button to select HDD Format Press the enter button to confirm Press the left right button to select OK Press the enter button to confirm Press the up down button to adjust the capacity of time shift buffer Press the left right button to select Next and the enter button to confirm ...

Page 48: ...st the capacities of FAT32 and NTFS partitions Press the left right button to select Next and the enter button to confirm Press the left right button to select Format Press the enter button to confirm And the formatting will start which will take for several minute please be patient to wait When formatting is completed press the enter button to reboot Restore Default Select to restore factory defa...

Page 49: ...Miscellaneous Press the left right button on the remote control to select the MISC tab from the menu Slide Show Timing Select to set the interval time for photo slide show Press the up down button to select Press the enter button to confirm Transition Effect Select to set the transition effect for photo slide show ...

Page 50: ...der and All Press the enter button to confirm HDD Information Select to view the HDD capacities The capacities of the recording time shift and multimedia partitions are listed here Press the enter button to confirm LCD Direction Select to set the direction of the LCD screen on the front panel Press the up down button to select from Horizontal Vertical and Auto Detect Press the enter button to conf...

Page 51: ...ed on a HDD an external USB device and Network To enter the menu select the Browser icon from the main interface Press the up down button to select the device on which the media is stored Choose from HDD USB NET and press the enter button When data on HDD USB device is connected or connect the system to Network you can also browse photos listen to music and watch movies 8 1 Browsing All Use the le...

Page 52: ...n to confirm 8 2 Browsing Music Use the left right button on the remote control to select the Music tab All directories and supported audio files in current directory will be displayed Press the up down button to select the file you want to play and press the enter button 8 3 Browsing Photos Use the left right button on the remote control to select the Photos tab ...

Page 53: ...tab All directories and supported video files in current directory will be displayed Press the up down button to select the movie you want to view and press the enter button The movie will be played in full screen mode This browsing movies function supports DAT VOB IFO MPG AVI and TS file formats While browsing a movie in full screen mode you can press the zoom button to zoom in out the image Four...

Page 54: ...imedia file that you want to browse Note 1 While browsing high definition video files resolution up to 720p 1080i 1080p via Ethernet or WLAN the video might be buffering It is normal due to the limit of network speed or signal strength 2 Due to different network conditions sometimes the workgroup might not be accessed or shown in the list And then you need to use My_Shortcuts to browse shared file...

Page 55: ...word and Specific File Server IP which enables to browse files on NET through My_Shortcuts Select Net User ID and the entry screen will appear Press the navigation buttons to select letters and numbers Select CAPS to toggle between uppercase and lowercase letters Press to delete a letter Press to insert a space Press the enter button to input each letter or number Select OK and press the enter but...

Page 56: ...gational and numeric buttons to enter IP address You can also select Detail to set the Label Domain and Host Name of the shortcut Then select OK and press the enter button to confirm Select the shortcut you added and press the enter button to confirm Then select the shared multimedia file that you want to browse ...

Page 57: ...o select from Return Rename and Delete And press the enter button to confirm 8 6 1 Renaming Files Press the navigation buttons to select letters and numbers Select CAPS to toggle between uppercase and lowercase letters Press to delete a letter Press to insert a space Press the enter button to input each letter or number Select OK and press the enter button to confirm all changes 8 6 2 Deleting Fil...

Page 58: ...laylist and enjoy them at any time 8 7 1 Adding files to the playlist Select the favorite file you wish to add press the red button on the bottom of the remote control and the file will be ticked Press the green button on the bottom of the remote control to confirm and then an on screen message Add selects to list will be shown Multiple selections are allowed See photo below 8 7 2 Browsing the pla...

Page 59: ...nfirm 9 Media Library Owning to a powerful search engine the library menu allows you to search and browse multimedia files stored on the internal HDD in most easy ways To enter this menu select the Library icon on the main interface 9 1 Music Library Use the left right button on the remote control to select the Music tab ...

Page 60: ... synchronize all the music stored on the internal HDD to the library Search Select to search for music files by their names Use the navigational buttons to select and press the enter button to confirm Select OK and press the enter button and then the files you desired will be displayed on the screen All Select to list all the music files in the library ...

Page 61: ...ch for music files by genre Press the up down button to select the genre and press the enter button to confirm Album Select to search for music files by album Press the up down button to select the album and press the enter button to confirm Quick Search You can also press the right button to turn on a Quick Search bar while browsing music files in the library ...

Page 62: ...t button to delete characters and press the back button to close the Quick Search bar 9 2 Photo Library Use the left right button on the remote control to select the Photos tab Press the up down button to select from Update Search All and Date And press the enter button to confirm Update Select to update and synchronize all the photos stored on the internal HDD to the library Search Select to sear...

Page 63: ...all the photos in the library Date Select to search for photos by date Press the up down button to select the date and press the enter button to confirm Quick Search You can also press the right button to turn on a Quick Search bar while previewing photos in the library Press the up down button to select characters on the Quick Search bar and press the enter button to confirm And then photos with ...

Page 64: ...e Movies tab Press the up down button to select from Update Search All Actor Genre and Year And press the enter button to confirm Update Select to update and synchronize all the movies stored on the internal HDD to the library Search Select to search for movies by their names Use the navigational buttons to select and press the enter button to confirm Select OK and press the enter button and then ...

Page 65: ... enter button to confirm Genre Select to search for movies by genre Press the up down button to select the genre and press the enter button to confirm Year Select to search for movies by year Press the up down button to select the year and press the enter button to confirm Quick Search You can also press the right button to turn on a Quick Search bar while ...

Page 66: ... be displayed onto the top Press the left button to delete characters and press the back button to close the Quick Search bar Note In order to use the search function more efficiently you are encouraged to use the following rules to name the movies stored on the internal HDD Syntax Name Actor Genre Year extension Examples Enchanted CD1 Amy Adams Love 2007 avi The Dark Knight CD1 Christian Bale Act...

Page 67: ...HDD USB devices and Network Step 1 Select the source device and destination device Press the up down button to select device Press the left button to cancel and the right button for next step Step 2 Select the source files you want to copy Press the play button to select files the left button to cancel and the right button to next step ...

Page 68: ...e above files Press the up down button to select folder Press the left button to cancel and the right button for next step Step 4 Proceed to copy selected files Press the up down button to select OK press the enter button to confirm And the copy will start ...

Page 69: ...ore details and then type NAS or IP Address in the Run window click Run in the start menu or the address bar of Internet Explorer on your PC For example if the IP address of the player is 192 168 0 9 please type 192 168 0 9 or NAS and click OK or press the Enter button on the keyboard Then you can view and edit the files stored on the hard disk installed on the player In this way you can also play...

Page 70: ...time it will take several seconds to download data from the Internet please be patient to wait 3 For more about SHOUTcast please refer to the website www shoutcast com 12 1 Station List Menu Press the up down button to select STATION and press the enter button to confirm Press the up down button to select the station you wish to visit from the list Press the enter button to confirm You can also pr...

Page 71: ...ess the menu button to add it to the favorite 12 2 Genre List Menu Press the up down button to select GENRE and press the enter button to confirm Press the up down button to select the genre you wish to visit from the list Press the enter button to confirm You can also press the prev next button to page up and down In this way you can search your favorite stations via genre ...

Page 72: ...press the enter button to confirm All the favorite stations you added from the station list menu can be found and managed here When a station is highlighted you can press the menu button to delete it from the favorite Note You can have a maximum of 20 favorite stations in the list ...

Page 73: ...en Drive for firmware upgrade Copy the files for upgrade to the root directory of your USB Pen Drive Step 2 Connect the USB Pen Drive Plug the USB Pen Drive into one of the USB HOST ports of the player Step 3 Hold the power standby button Press and hold the power standby button on the front panel and do not loosen Step 4 Connect the power cable Plug the power cable into the DC IN jack wait for abo...

Page 74: ... be completed the LED indicators will go off and the player will be powered off automatically Then you can press the power standby button to turn on the player and enjoy Note Do not turn off the power during installation The USB Pen Drive is not allowed to be unplugged during installation ...

Page 75: ... Pro Advanced Profile not supported PCM SUBTITLE FORMATS SURPORTED SRT SMI SSA IDX SUB SUB RECORDABLE DEVICES SUPPORTED Built in HDD USB HDD VIDEO RECORDING MODE Mode 80 GB HDD 120 GB HDD 160 GB HDD HQ 16hrs 24hrs 33hrs SP 32hrs 48hrs 66hrs LP 48hrs 72hrs 99hrs EP 64hrs 96hrs 132hrs SLP 96hrs 144hrs 198hrs VIDEO RECORDING FORMAT HQ SP LP EP SLP mode MPEG 2 MP ML AUDIO RECORDING FORMAT HQ SP LP EP ...

Page 76: ...5MHz 863 25MHz VHF I III UHF Video PAL B G D K I SECAM L and L Audio Stereo Mono Analog TV Tuner 75 Ohm VHF UHF TV Analog Antenna or cable DIGITAL TERRESTRIAL TV SYSTEM only for S800 Frequency Range 44 25MHz 863 25MHz VHF I III UHF COFDM 2K FFT or 8K FFT COFDM demodulator Fully DVB T compliant ETS 300 744 Code Rate 1 2 2 3 3 4 5 6 and 7 8 Guard Interval 1 4 1 8 1 16 1 32 Constellation QPSK 16QAM 6...

Page 77: ...e USB device I keep on getting The device Generic volume cannot be stopped right now Try stopping the device again later message what should I do Answer Close any program that might be accessing data on the player including Windows Explorer If it does not work close all programs and wait for another 20 seconds then try the green arrow icon again If it still does not work you should shut down the p...

Page 78: ...photo 2 Choose File then save as from the menu as the picture on the left hand side shows select the picture format as JPEG input the file name and click the save icon 3 After click on the save icon a new window will appear as the picture on the right hand side shows select Baseline standard or Baseline optimized 4 Click the OK icon Question 7 During power on why does the TV will have a short flas...

Page 79: ...unctions do not work properly on the player please change system settings to the default Refer to 6 6 for changing system settings Question12 While playing movies in the multimedia partition buttons like PREV NEXT A B etc sometimes could not be used Answer The above functions are designed for recorded video titles and IFO DVD files only You can find forums on the Internet where users responding to...

Page 80: ... You may also download the source code here http emcube emtec eu GNU GENERAL PUBLIC LICENSE TERMS AND CONDITIONS FOR COPYING DISTRIBUTION AND MODIFICATION 0 This License applies to any program or other work which contains a notice placed by the copyright holder saying it may be distributed under the terms of this General Public License The Program below refers to any such program or work and a wor...

Page 81: ...e program under these conditions and telling the user how to view a copy of this License Exception if the Program itself is interactive but does not normally print such an announcement your work based on the Program is not required to print an announcement These requirements apply to the modified work as a whole If identifiable sections of that work are not derived from the Program and can be reas...

Page 82: ...m the same place counts as distribution of the source code even though third parties are not compelled to copy the source along with the object code 4 You may not copy modify sublicense or distribute the Program except as expressly provided under this License Any attempt otherwise to copy modify sublicense or distribute the Program is void and will automatically terminate your rights under this Li...

Page 83: ...ion is intended to make thoroughly clear what is believed to be a consequence of the rest of this License 8 If the distribution and or use of the Program is restricted in certain countries either by patents or by copyrighted interfaces the original copyright holder who places the Program under this License may add an explicit geographical distribution limitation excluding those countries so that d...

Page 84: ...E OF THE PROGRAM IS WITH YOU SHOULD THE PROGRAM PROVE DEFECTIVE YOU ASSUME THE COST OF ALL NECESSARY SERVICING REPAIR OR CORRECTION 12 IN NO EVENT UNLESS REQUIRED BY APPLICABLE LAW OR AGREED TO IN WRITING WILL ANY COPYRIGHT HOLDER OR ANY OTHER PARTY WHO MAY MODIFY AND OR REDISTRIBUTE THE PROGRAM AS PERMITTED ABOVE BE LIABLE TO YOU FOR DAMAGES INCLUDING ANY GENERAL SPECIAL INCIDENTAL OR CONSEQUENTI...

Reviews: