background image

EC-M120  Quick Start Guide 

Important Note for Encrypted Models Only: 

You will be required to partition and format the hard drive disk (HDD) after 

installing it in the encrypted enclosure.    Always perform partition and format 

functions with the Secure Key plugged in.    If you are adding a new disk, then 

no backup is required.    Otherwise, you are advised to back up the disk.    WE 

ARE NOT RESPONSIBLE FOR ANY LOST DATA. 

There is no “back door” into the security system of the enclosure.    Without the 

Secure Key, you will not be able to access the data or operating system on the 

protected disk.    This means you must keep the backup key in a safe place at 

all times.    WE ARE NOT ABLE TO CREATE A SECURE KEY WITH THE 

SAME “SECRET KEY” WITHOUT YOUR BACKUP KEY.  Please contact 

your supplier immediately if you lose one of your Secure Keys.    If you lose all 

Secure Keys, you will NOT be able to decrypt your HDD 


Assembling the 3.5” HDD Enclosure Kit 


Install a hard disk drive in the Enclosure Kit by completing the following steps. 


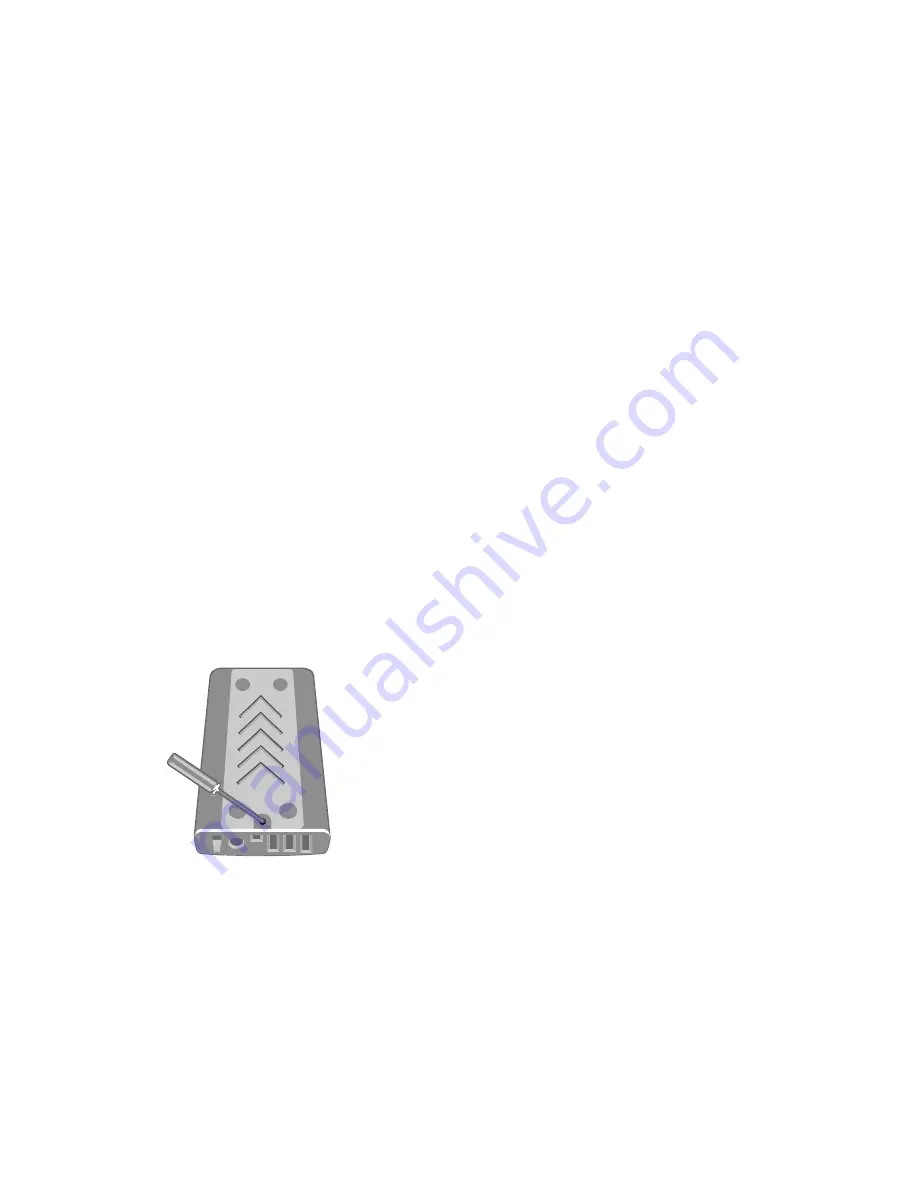
1.  Using a Phillips screwdriver, remove the screw from the rear panel of the 

Enclosure.  


2.  Carefully remove the rear panel. 


Summary of Contents for EC-M120

Page 1: ...enclosure Without the Secure Key you will not be able to access the data or operating system on the protected disk This means you must keep the backup key in a safe place at all times WE ARE NOT ABLE...

Page 2: ...3 Slide the bottom panel out of the housing ensuring that adequate pressure is applied 4 When disassembled the enclosure will appear as shown below...

Page 3: ...containing 4 auto limiting screws included in the package Auto limiting Screw 6 Ensure that the shock absorbers are installed in the mounting brackets with the thin side facing out 7 Insert the IDE c...

Page 4: ...the hard drive in the housing positioning it between the shock absorbers 10 Align the opening on the hard drive with the opening in the shock absorber and insert the first screw Tighten the first scre...

Page 5: ...d carefully slide the assembled platform into the enclosure housing 12 Ensure that the LED indicator is properly aligned with the opening on the front panel of the enclosure 13 Fasten the rear panel t...

Page 6: ...ow assembled and ready for connection to a computer OK Connecting the Enclosure Kit to a Computer For Standard models 1 Connect the AC DC power adapter then turn on the power switch ensure that the gr...

Page 7: ...into the security key port indicated by the secure key icon on the rear panel of the Enclosure Kit As the shape of the security key port is similar to the shape of the IEEE 1394 port ensure that the...

Page 8: ...the green LED indicator is active The orange LED indicator will blink during data transfer ON 3 Insert one end of the USB or IEEE 1394 b connector into a corresponding port on the enclosure 4 Insert t...

Page 9: ...Note If the LED indicator is red security is not enabled Ensure that the Secure Key is inserted before power on and USB FireWire cables are properly connected...

Page 10: ...ten oder ein Betriebssystem auf der gesch tzten Platte zuzugreifen Das bedeutet dass Sie einen Zweitschl ssel immer an einem sicheren Ort aufbewahren m ssen WIR SIND NICHT IN DER LAGE OHNE IHREN ZWEIT...

Page 11: ...use so dass der Boden nach oben zeigt und schieben Sie den Boden aus dem Geh use Zum Herausschieben des Bodenblechs muss ausreichend Druck angewendet werden 4 Auseinandergenommen wird das Geh use wie...

Page 12: ...tisch stoppenden Schrauben aus der Packung Automatisch stoppende Schraube 6 Stellen Sie sicher dass die Stossd mpfer mit der d nnen Seite nach Au en in den Befestigungsmulden montiert sind 7 Setzen Si...

Page 13: ...schen den Sto d mpfern 10 Richten Sie die ffnung an der Festplatte auf die ffnung im Sto d mpfer aus uns f hren Sie die erste Schraube ein Ziehen Sie die erste Schraube fest und stellen Sie sicher das...

Page 14: ...form auf die integrierten Schienen aus und schieben Sie die zusammengesetzte Plattform vorsichtig in das Festplattengeh use 12 Stellen Sie sicher dass die LED Anzeige richtig auf die ffnung in der Fro...

Page 15: ...en einsetzen 2 1 14 Setzen Sie die letzte 1 Schraube ein um die Bodenplatte wieder zu befestigen 15 Der Festplattengeh use Bausatz ist jetzt zusammengebaut und bereit an einen Computer angeschlossen z...

Page 16: ...sicher dass die gr ne LED Anzeige aktiv ist Die orange LED Anzeige wird w hrend des Datentransfers blinken ON 2 Stecken Sie den USB oder IEEE 1394 b Stecker in die zugeh rige Buchse 3 Stecken Sie den...

Page 17: ...y Schl sselloch eingef hrt wird Inkorrekte Einf hrung in eine andere Buchse als das vorgesehene Secure Key Schl sselloch kann zu Besch digungen des Secure Key oder anderer Buchsen Apparaturen f hren 2...

Page 18: ...Buchse am Computer an Hinweis Wenn die LED Anzeige rot ist ist die Sicherheitsfunktionalit t nicht aktiviert Stellen Sie sicher dass der Secure Key Hardwareschl ssel richtig vor dem Einschalten einges...

Page 19: ...e pourrez pas acc der aux donn es ou au syst me d exploitation sur le disque prot g sans la cl de cryptage Ceci signifie que vous devez garder la cl de sauvegarde dans un endroit s r NOUS NE POUVONS P...

Page 20: ...neau inf rieur du logement Utilisez un peu de force pour faire glisser le panneau 4 Une fois d mont e la baie appara t comme indiqu au dessous 5 Un sachet en plastique avec quatre vis segmentation aut...

Page 21: ...que les amortisseurs de chocs sont install s dans les plaques de fixation avec le c t mince vers l ext rieur 7 Ins rez le c ble IDE dans le disque dur 8 Ins rez le c ble d alimentation du tableau de c...

Page 22: ...que dur avec l ouverture de l amortisseur de chocs et ins rez la premi re vis Assurez vous de maintenir l alignement en serrant la vis R p tez pour les trois autres vis 11 Aligner les bords de la plat...

Page 23: ...que le voyant est bien align avec l ouverture sur le panneau avant de la baie 13 Fixez le panneau post rieur la baie en rempla ant les deux vis retir es l tape 1 2 1 14 Fixez la derni re vis sous le p...

Page 24: ...onnect e un ordinateur OK Connecter la baie externe un ordinateur Mod les standard 1 Connectez l adaptateur d alimentation CA CC et allumez le commutateur assurez vous que le voyant vert est allum Le...

Page 25: ...ur Mod les crypt s 1 Ins rez la cl de cryptage dans l entr e indiqu e par l ic ne sur le panneau post rieur de la baie externe La fiche de la cl de cryptage est tr s similaire celle du port IEEE 1394...

Page 26: ...ous que le voyant vert est allum Le voyant orange clignote pendant le transfert de donn es ON 3 Ins rez le connecteur USB ou IEEE 1394 b dans un port correspondant de la baie 4 Ins rez le connecteur U...

Page 27: ...Note Si le voyant est rouge la s curit n est pas activ e Assurez vous que la baie...

Reviews: