background image

10


 OPERATION 

BATTERY AND CHARGER


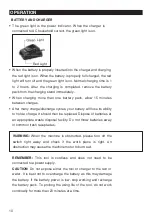
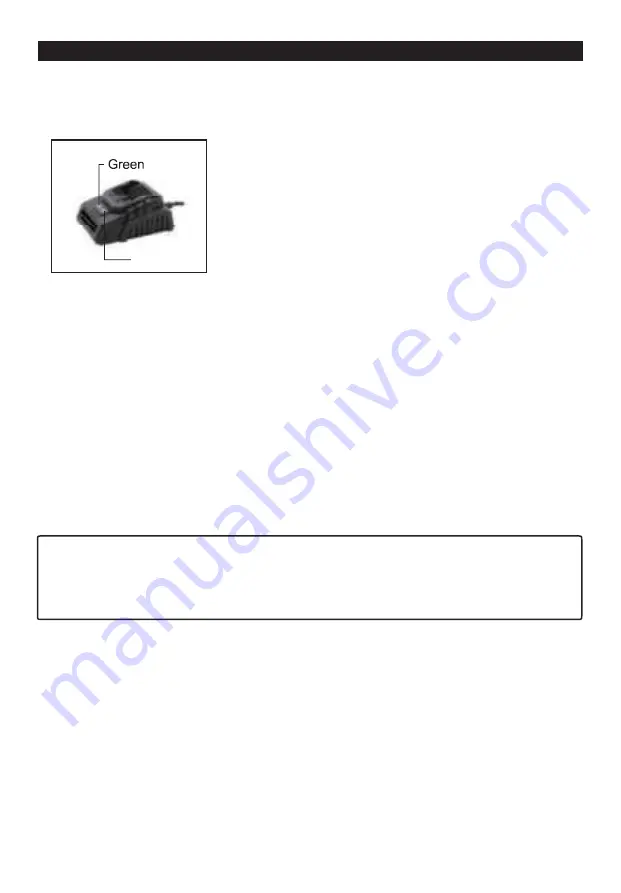
The green light is the power indicator. When the charger is

connected to AC household current, the green light is on.

When the battery is properly inserted into the charger and charging,

the red light is on. When the battery is properly full charged, the red

light will turn off and the green light is on. Normal charging time is 1

to  2  hours.  After  the  charging  is  completed,  remove  the  battery

pack from the charging stand immediately.

When  charging  more  than  one  battery  pack,  allow  15  minutes

between charges.

After many charge/discharge cycles, your battery will lose its ability

to hold a charge. It should then be replaced. Dispose of batteries at

an appropriate waste disposal facility. Do not throw batteries away

in common trash receptacles.

REMEMBER: 

This  tool  is  cordless  and  does  not  need  to  be 

connected to a power supply.


CAUTION: 

Do  not  expose  either  the  tool  or charger  to  the rain or 

water. It is best not to overcharge the battery as this may damage 

the battery.  If  the battery power  is low, stop working and recharge 

the battery pack. To prolong the using life of  the tool, do not  work 

continually for more than 20 minutes at a time.


Light


Red Light


WARNING: 

When the machine is obstructed, please turn off the 

switch  right  away  and  check  if  the  work  piece  is  right.  An 

obstruction may cause the machine motor to bur

n out.

Summary of Contents for CDS326

Page 1: ...24V MAX CORDLESS MOUSE SANDER MODEL CDS326 Instruction Manual ...

Page 2: ...PARTS LIST p 14 SCHEMATIC DRAWING p 15 CALIFORNIA PROP 65 WARNING Some dust created by power sanding sawing grinding drilling and other constuction activities contains chemicals known to the state of California to cause cancer birth defects or other reproductive harm Some examples of these chemicals are Lead from lead based paints Crystalline silica from bricks and cement and other masonry product...

Page 3: ... the plug If it still does not fit contact a qualified electrician to install a polarized outlet Do not change the plug in any way Double Insulation eliminates the need for the three wire grounded power cord and grounded power supply system Avoid body contact with grounded surfaces such as pipes radiators ranges and refrigerators There is an increased risk of electric shock if your body is grounde...

Page 4: ...e turning the tool on A wrench or a key that is left attached to a rotating part of the tool may result in personal injury Do not overreach Always keep proper footing and balance Proper footing and balance enables better control of the tool in unexpected situations Use safety equipment Always wear eye protection Dust mask non skid safety shoes hard hat or hearing protection must be used for approp...

Page 5: ...d by the manufacturer for your model Accessories that may be suitable for one tool may become hazardous when used on another tool BATTERY TOOL USE AND CARE Ensure the switch is in the off position before inserting the battery pack Inserting the battery pack into power tools that have the switch on may cause an accident Recharge only with the charger specified by the manufacturer A charger that is ...

Page 6: ...ailure to follow maintenance instructions may create a risk of electric shock or injury SAFETY INSTRUCTIONS FOR CORDLESS SANDER This power tool is intended to function as a sander Read all safety warnings instructions illustrations and specifications provided with this power tool Failure to follow all instructions listed below may result in electric shock fire and or serious injury Operations such...

Page 7: ...away from the plane of the rotating accessory and run the power tool at maximum no load speed for one minute Damaged accessories will normally break apart during this test time Wear personal protective equipment Depending on application use face shield safety goggles or safety glasses as appropriate wear dust mask hearing protectors gloves and workshop apron capable of stopping small abrasive or w...

Page 8: ... water or other liquid coolants may result in electrocution or shock Maintain labels and nameplates on the tool These carry important safety information Avoid unintentional starting Prepare to begin work before turning on the tool Do not depress the spindle lock when starting or during operation Do not leave the tool unattended when the Battery Pack is connected Turn off the tool and remove the Ba...

Page 9: ...ord Ground Fault Circuit Interrupter GFCI should also be implemented as it prevents sustained electrical shock The warnings precautions and instructions discussed in this instruction manual cannot cover all possible conditions and situations that may occur It must be understood by the operator that common sense and caution are factors which cannot be built into this product but must be supplied by...

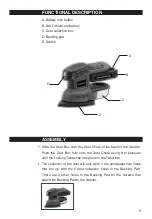
Page 10: ...back of the Sander Push the Dust Box fully onto the Dust Chute using firm pressure until the Locking Tabs snap into place in the Tab Slots The collection of the dust will only work if the sandpaper has holes that line up with the 5 dust collection holes in the Backing Pad There are 4 other holes in the Backing Pad for the Screws that attach the Backing Pad to the Sander B C D ...

Page 11: ...ur battery will lose its ability to hold a charge It should then be replaced Dispose of batteries at an appropriate waste disposal facility Do not throw batteries away in common trash receptacles REMEMBER This tool is cordless and does not need to be connected to a power supply CAUTION Do not expose either the tool or charger to the rain or water It is best not to overcharge the battery as this ma...

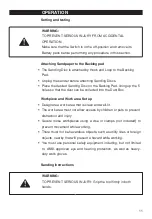
Page 12: ...distraction and injury Secure loose workpieces using a vise or clamps not included to prevent movement while working There must not be hazardous objects such as utility lines or foreign objects nearby that will present a hazard while working You must use personal safety equipment including but not limited to ANSI approved eye and hearing protection as well as heavy duty work gloves Sanding Instruc...

Page 13: ...anding to ensure even sanding CAUTION Empty the Dust Box frequently and after use to prevent fire hazard Periodically press the O on the Switch to stop the tool and check for disc wear and empty Dust Box Replace worn Sanding Discs as needed TO PREVENT ACCIDENTS AFTER USE Turn off the tool WARNING Allow the tool to come to a complete stop before setting it down Procedures not specifically explained...

Page 14: ...affect its safe operation AFTER USE empty the Dust Box and wipe external surfaces of the tool with clean cloth Wear ANSI approved safety goggles and NIOSH approved breathing protection and blow dust out of the motor vents using dry compressed air periodically to lengthen tool life Disconnect battery pack and store battery pack charger and tool in dry indoor area out of reach of children and away f...

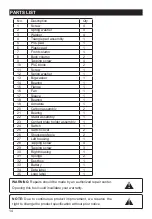
Page 15: ...Carbon assembly 2 21 Bearing 1 22 Stator assembly 1 23 Contact plate holder assembly 1 24 Switch 1 25 Switch cover 2 26 Shockproof pole 2 27 Left housing 1 28 Tapping screw 4 29 Tapping screw 3 30 Right housing 1 31 Sponge 2 32 Dust box 1 33 Battery 1 34 Data label 1 35 Logo label 1 WARNING Repairs should be made by an authorized repair center Opening this tool could invalidate your warranty NOTE ...

Page 16: ...15 SCHEMATIC DRAWING ...

Page 17: ...16 ...

Page 18: ......

Reviews: