background image

1

1.Before unpack the unit,please inspect the carton carefully for any 

damage.any damage,please take a picture or record all admage 
carefully.if necessary,contact your dealer/distributor immediately. to 

le a freight claim.

2.Unpack the carton,then inspect thr carton carefully for any damage 

and check if all the spare parts are there .if there is any damage,please 
take a picture or record all it carefully .if necessary,contact your 
dealer/distributor immediately. 

3.Water test before installation .although all our walk-in tub are water 

tested before they leave our factory,there may be some loose of the 
hose connections due to the transport. 

(1)Place the tub on a 

at surface in an area where it may be drained 

after testing.

(2)Check if there is any loose of the connection system.
(3)Close the door,

ll the tub with water to the over

ow and allow 

standing for a few minutes to inspect the tub for leaks.

(4)Insert the plug,start all the function for few minutes(which 

includes the functions of massage,air bubble,underwater light, ozone 
sterilization,aroma and so on.)inspect the tub completely any defect 
must be reported to your dealer /distributor prior to installation in order 
to have it covered under warrant.

TESTING YOUR WALK-IN TUB BEFORE INSTALLATION 
BY FOLLOWING PROCEDURES

IMPORTANT:Failure to follow the pre-installation instruction 

and water test the bathtub before installation, 
manufacturer will not be liable for the removal 
or installation of the bathtub.

Summary of Contents for EMPV-WIT02

Page 1: ...EMPV WIT02 ...

Page 2: ......

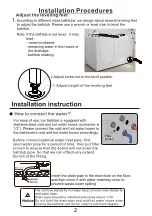
Page 3: ... transport 1 Place the tub on a flat surface in an area where it may be drained after testing 2 Check if there is any loose of the connection system 3 Close the door fill the tub with water to the overflow and allow standing for a few minutes to inspect the tub for leaks 4 Insert the plug start all the function for few minutes which includes the functions of massage air bubble underwater light ozone ...

Page 4: ...1 2 Filter screen ...

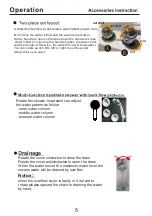
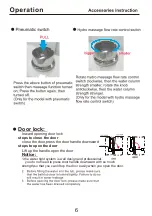
Page 5: ... chart Water and electricity installation drawing 20 The socket 18 shower head water jet drainer hydrodynamic adjust pneumatic switch transfer water inlet shower head turn on hot cold water 53 The drain 2 36 ...

Page 6: ...To test the GFCI push the test button TheGFCI should interrupt the power Push the reset botton and the power should be restored if the GFCI fails to operate in this manner there is a possibility of an electric shock do not operate this unit disconnect the unit and have the problem corrected by a licensed electrician before using CAUTION DO NOT USE HARSH ABRASIVES OR SOLVENTS TO CLEAN THIS PRODUCT ...

Page 7: ...tate the shower head shell can adjust the water pattern as follow inner water column middle water column external water column A B hot cold waterfall sprinkler open close A Waterfall Sprinkler transferable switch Marked with Icon B Controls the water inflow and the water temperature Up the handle to open otherwise down the handle to close water inflow You pull up the handle higher the water force wi...

Page 8: ...d to press door handle downward with so much strength so that you can lift up the door easily when you open the door Door lock Inward opening door lock steps to close the door close the door press the door handle downward steps to open the door Lift up the handle open the door 6 ...

Page 9: ...7 ...

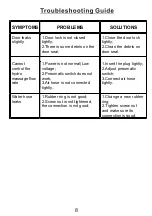
Page 10: ...rol the hydro massage flow rate 1 Power is not normal Low voltage 2 Pneumatic switch does not work 3 Air hose is not connected tightly 1 Insert the plug tightly 2 Adjust pneumatic switch 3 Connect air hose tightly Water hose leaks 1 Rubber ring is not good 2 Screw nut is not tightened the connection is not good 1 Change a new rubber ring 2 Tighten screw nut and make sure its connection is good 8 ...

Reviews: