33
EN
3
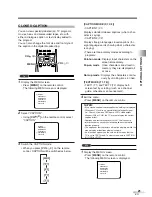
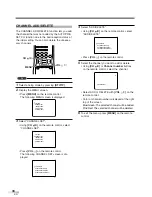
Select "TIME ZONE".
• Using
[CH
K
/
L
]
on the remote control, select
"TIME ZONE".
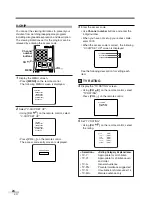
4
Select your "TIME ZONE".
• When you press
[VOL
X
/
Y
]
on the remote
control, the TIME ZONE will be switched as
below.
• Based on the world standard time information
acquired from digital broadcasting, the time dif-
ference will be adjusted as below.
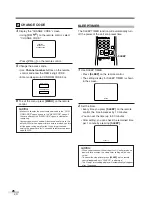
5
To exit the menu, press
[MENU]
on the remote
control.
DTV DISPLAY [LETTERBOX]
DTVCC
D.S.T.[Daylight Saving]
[ON]
TIME ZONE
[ALASKA]
ALASKA
-9 hours
HAWAII
-10 hours
PACIFIC
-8 hours
MOUNTAIN
-7 hours
CENTRAL
-6 hours
EASTERN
-5 hours
ATLANTIC
-4 hours
TIME ZONE
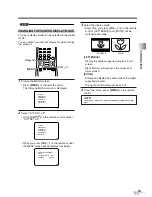
If you move the TV to a different area after the ini-
tial setting you set when you first turned on the
power, you can set the area again.
1
Display the MENU screen.
• Press
[MENU]
on the remote control.
The following MENU screen is displayed.
2
Select "DTV SET UP".
• Using
[CH
K
/
L
]
on the remote control, select
"DTV SET UP ".
• When you press
[VOL
X
]
on the remote con-
trol, the following MENU screen is displayed.
DTV DISPLAY [LETTERBOX]
DTVCC
D.S.T.[Daylight Saving]
[ON]
TIME ZONE
[ALASKA]
PICTURE
CHANNEL SET
[ENG]/ESP/FRA
V-CHIP SET UP
CAPTION [OFF]
DTV SET UP
PICTURE
CHANNEL SET
[ENG]/ESP/FRA
V-CHIP SET UP
CAPTION [OFF]
DTV SET UP
CH
CH
VOL
VOL
CHANNEL
RETURN
–/ENT
INPUT
SELECT
3
2
1
6
5
4
9
8
+100
0
7
MUTE
SLEEP
MENU
MENU
CH
K
/
L
VOL
X
/
Y
O
THER SETTING

