7
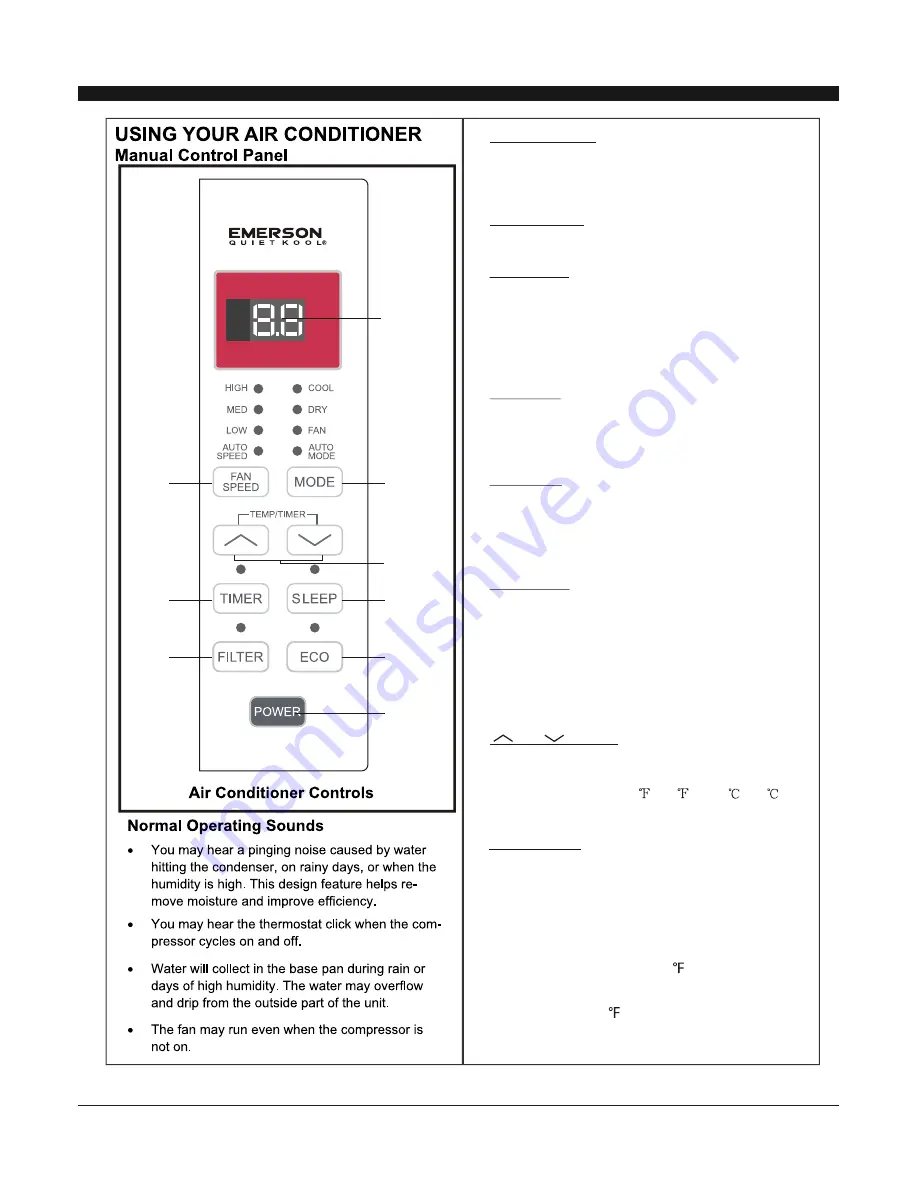
and Button:
3. Use these buttons on the
control panel and remote to increase or decrease
the Set Temperature or Timer.
Temperature range: 61
~88
or 16
~31
.
Cool Mode:
Dry Mode:
Fan Mode:
Auto Mode:
Press the mode button to cycle
through the various modes: Cool, Dry, Fan and
Auto.
The cooling function allows the air
conditioner to cool the room and at the same time
reduces humidity. Press the MODE button to
activate the cooling function. To optimize this
function adjust the temperature by pressing the up
and down arrows and the speed by pressing the
Fan Speed button.
This function reduces the humidity of
the air to make the room more comfortable. Press
MODE button to set the DRY mode. An automatic
function of alternating cooling cycles and air fan
is activated.
In AUTO mode the unit automatically
chooses the fan speed and the mode of operation
(COOL, DRY, or FAN). In this mode the fan speed
and the temperature are set automatically
according to the room temperature (
).
This mode will only circulate the air.
Press MODE button to select FAN MODE.
Pressing the FAN SPEED button allows you to
change the fan speed setting from HI, MED, and
LO. If using the remote control, it will store the fan
speed setting of the previous use.
Room
temperature is determined by the temperature
sensor located in the indoor unit.
1.
Shows the set temperature.
Operation modes are: Cool, Dry, Fan, and Auto.
Time is displayed using the timer setting.
Digital Display:
2.
Mode Button:
Press the SLEEP button, the Sleep
Light will be on after 10s. and the remaining lights
on the display will be off. In SLEEP mode, the air-
conditioner will automatically adjust the
temperature and fan speed to make the room more
comfortable during the night. The set temperature
will automatically raise by 1
every 30-60
minutes and at most change six times until the set
temperature is 28
.
Run time will depend on set temperature.
4.
Sleep Button:
3
6
1
2
4
5
9
8
7
Summary of Contents for EARC5RD1
Page 1: ...MODEL EARC5RD1 5000 BTU ...
Page 2: ......
Page 3: ......
Page 5: ...1 below ...
Page 6: ...2 7 8 ...
Page 7: ...3 ...
Page 10: ...6 Head FIG 9 9 10 FIG 10 FIG 11 FIG 12 FIG 13 FIG 14 4 ...
Page 14: ...10 15 FIG 15 ...
Page 15: ...11 ...
Page 16: ...12 For any questions or Technical Support Please Call Customer Service 1 844 801 8880 ...
Page 17: ......
Page 18: ......


