background image

3

WARNING:

TO REDUCE THE RISK OF FIRE OR ELECTRIC SHOCK, DO NOT EXPOSE THIS

APPLIANCE TO RAIN OR MOISTURE. TO PREVENT ELECTRIC SHOCK, MATCH THE WIDE

BLADE OF PLUG TO WIDE SLOT, FULLY INSERT.

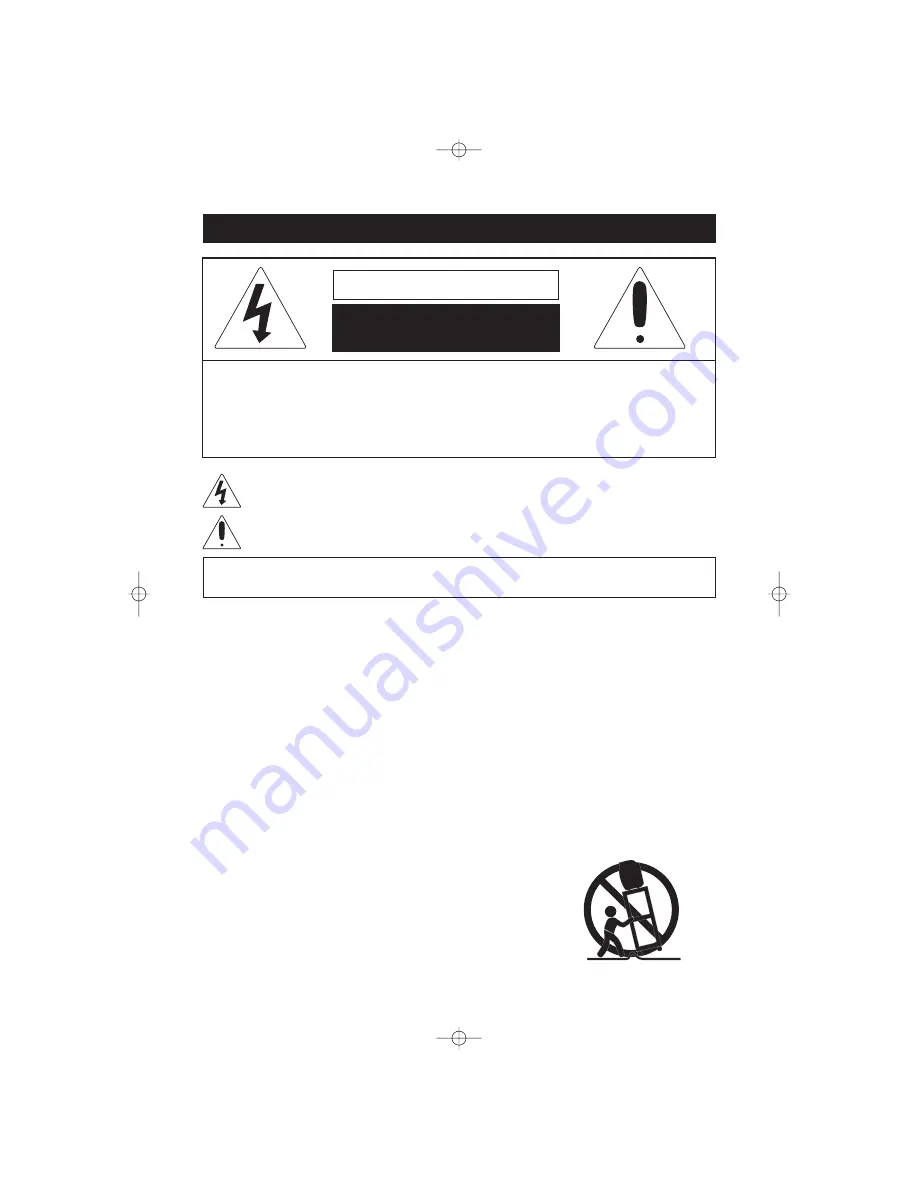
The exclamation point within an equilateral
presence of important operating and
accompanying the appliance.

triangle is intended to alert the user to the

maintenance (servicing) instructions in the literature

The lightning flash with arrowhead symbol within an equilateral triangle is intended to alert
the user to the presence of uninsulated dangerous voltage within the product’s enclosure
that may be of sufficient magnitude to constitute a risk of electric shock to persons.

CAUTION:TO REDUCE THE RISK OF ELECTRIC SHOCK, DO NOT

REMOVE COVER (OR BACK). NO USER-SERVICEABLE
PARTS INSIDE. REFER SERVICING TO QUALIFIED SERVICE
PERSONNEL.

CAUTION

RISK OF ELECTRIC SHOCK

DO NOT OPEN

IMPORTANT SAFETY INSTRUCTIONS (CONTINUED)

Before using the unit, be sure to read all operating instructions carefully. Please note that these

precautions and may not pertain to your unit. For example, this unit may not have

the

an outdoor antenna.

are general

capability to be connected to

1. READ INSTRUCTIONS

2. RETAIN INSTRUCTIONS

3. HEED WARNINGS

4. FOLLOW INSTRUCTIONS

5. CLEANING

6. ATTACHMENTS

7. WATER AND MOISTURE

8. ACCESSORIES

8A

All the safety and operating instructions should be read before the product is operated.

The safety and operating instructions should be retained for future reference.

All warnings on the product and in the operating instructions should be adhered to.

All operating and use instructions should be followed.

Unplug this product from the wall outlet before cleaning. Do not use liquid cleaners or aerosol
cleaners. Use a dry cloth for cleaning.

Do not use attachments not recommended by the product's manufacturer as they may cause
hazards.

Do not use this product near water-for example: near a bathtub, washbowl, kitchen sink or
laundry tub: in a wet basement; or near a swimming pool.

Do not place this product on an unstable cart, stand, tripod, bracket
or table. The product may fall, causing serious injury and serious
damage to the product. Use only with a cart, stand, tripod, bracket
or table recommended by the manufacturer or sold with the product.

Any mounting of the product should follow the manufacturer's

instructions, and should use a mounting accessory recommended
by the manufacturer.

.An appliance and cart combination should be moved with care.

Quick stops, excessive force and uneven surfaces may cause the
appliance and cart combination to overturn.

.

fall,

causin g

or tabl e

th e

r .

S3126A

PORTABLE CART WARNING

(symbol provided by RETAC)

Summary of Contents for Dora the Explorer DTE316

Page 1: ......

Page 2: ...LOCATION OF CONTROLS REMOTE CONTROL CABLE CATV SATELLITE CONNECTIONS EXTERNAL AUDIO VIDEO CONNECTIONS ANTENNA CONNECTIONS VCR CONNECTIONS SETTING THE TV MENUS TROUBLESHOOTING GUIDE RECEPTION DISTURBANCES LIMITED WARRANTY SPECIFICATIONS 3 5 5 6 7 8 9 10 11 12 24 25 26 27 28 1 ...

Page 3: ... to become familiar with its features and obtain the performance that will bring you continued enjoyment for many years In the event you require technical assistance please call the Emerson service Department at 800 898 9020 For future reference record the serial number in the space provided Serial Number_________________________________________________ n ...

Page 4: ...OW INSTRUCTIONS 5 CLEANING 6 ATTACHMENTS 7 WATER AND MOISTURE 8 ACCESSORIES 8A All the safety and operating instructions should be read before the product is operated The safety and operating instructions should be retained for future reference All warnings on the product and in the operating instructions should be adhered to All operating and use instructions should be followed Unplug this produc...

Page 5: ... the vicinity of overhead power lines or other electric light or power circuits or where it can fall into such power lines or circuits When installing an outside antenna system extreme care should be taken to keep from touching such power lines or circuits as contact with them might be fatal Do not overload wall outlets and extension cords as this can result in a risk of fire or electric shock Nev...

Page 6: ...guidelines for proper grounding and in particular specifies that the cable ground shall be connected to the grounding system of the building as close to the point of cable entry as practical 22 DAMAGE REQUIRING SERVICE 23 HEAT 24 NOTE TO CATV SYSTEM INSTALLER FCC WARNING This equipment may generate or use radio frequency energy Changes or modifications to this equipment may cause harmful interfere...

Page 7: ...another 3 VHF UHF IN Jack Connect a VHF UHF antenna CATV VCR satellite etc Cable to this jack AV button must be set to TV CATV 2 VIDEO IN AND OUT Jack Use this jack to receive a video signal from another A V component 1 SPEAKER 3 MENU Button Use this button to turn the TV s menu system on and off 4 TV AV Button 6 Remote Control Sensor This receiver receives a signal from your Do not block it remot...

Page 8: ...ure to follow the correct polarity when installing the batteries as indicated in the battery compartment Reversed batteries may cause damage to the device 3 Do not mix different types of batteries together e g Alkaline and Carbon zinc or old batteries withfreshones 4 If the device is not to be used for a long period of time remove the batteries to prevent damage or injury from possible battery lea...

Page 9: ... of the converter descrambler or satellite box usually 3 or 4 and use the converter descrambler or satellite box to select channels CONVERTER DESCRAMBLER OR SATELLITE BOX INCOMING 75OHM CATV CABLE 75 OHM CABLE TO TV VCR FOR SUBSCRIBERS TO UNSCRAMBLED BASIC CABLE TV SERVICE WITH SCRAMBLED PREMIUM CHANNELS If you subscribe to a satellite service or a cable TV service in which basic channels are unsc...

Page 10: ...nput jack of the TV AV2 To access the unit connected to these jacks press the AV IN button so AV appears on the screen To resume normal TV viewing simply press the AV IN button again EXTERNAL SOURCE AUDIO VIDEO Cord Not Supplied AUDIO VIDEO Cord Not Supplied How do I watch the external unit connected to the Audio Video Input jacks Press the AV IN button so AV appears on the screen then start the e...

Page 11: ...ennas Connect the 75 ohm cable from the VHF Connect antenna and the UHF antenna twin lead wire to a combiner NOT SUPPLIED Attach the combiner to the antenna jack Connect the 75 Ohm cable form combination VHF UHF antenna to the antenna jack OR If your combination antenna has a 300 ohm twin lead wire use a 300 75 ohm matching transformer NOT SUPPLIED Connect the UHF twin lead wire to a combiner NOT ...

Page 12: ...vision using Audio Video cables CABLES NOT INCLUDED 1 Connect the cable satellite or incoming antenna to the VHF UHF IN jack on the rear of the VCR 2 Connect the audio cable from the VCR s Audio OUT jack to the TV s Audio IN jack Connect the video cable from the VCR s Video OUT jack to the TV s Video IN jack 3 Press the AV IN button until AV appears on the TV screen and press PLAY on the VCR to wa...

Page 13: ...Adjust Select Clock On time Off time Attention Preset Channel PRESET Channel 01 Add Delete Add Reception CATV Auto Search Fine AFC On Adjust Select 1 Press the POWER button to turn your TV On or Standby 1 2 You can press the MENU buttons on the remote control or the MENU button on the TV set to adjust the or according to the menu shown on the screen PICTURE PRESET CLOCK FUNCTION 2 2 12 Noted PICTU...

Page 14: ...utton to cyclically select or Standard Nature Mild Vivid Custom 2 1 3 3 1 2 3 1 Press the Volume Up or Volume Down button to adjust the setting 0 100 2 Press the MENU button to enter and return Picture setting 13 2 1 3 3 2 1 1 2 3 3 2 1 1 2 3 3 PICTURE Adjust Select Settings Standard Brightness 50 Contrast 65 Color 50 Sharpness 50 Tint 00 PICTURE Adjust Select Settings Standard Brightness 50 Contr...

Page 15: ...ss the MENU button to enter and return Picture setting 2 1 3 1 Press the Volume Up or Volume Down button to adjust the setting 0 100 2 Press the MENU button to enter and return Picture setting 14 3 2 1 1 2 3 3 2 1 1 2 3 3 2 1 1 2 3 3 PICTURE Adjust Select Settings Standard Brightness 50 Contrast 65 Color 50 Sharpness 50 Tint 00 PICTURE Adjust Select Settings Standard Brightness 50 Contrast 65 Colo...

Page 16: ...TING THE TV MENUS CONTINUED SETTING THE TINT 7 2 1 3 1 Press the Volume Up or Volume Down button to adjust the setting 50 50 2 Press the MENU button to enter and return Picture setting 15 2 1 1 2 3 3 SETTING THE PRESET MENU 1 PRESET Channel 01 Add Delete Add Reception CATV Auto Search Fine AFC On Adjust Select 1 1 Press the Channel Up or Channel Down button to select or the item Channel Add Delete...

Page 17: ...arch Fine AFC On Adjust Select 2 1 1 Press the Volume Up or Volume Down button to cyclically select or CATV Cable TV Air VHF UHF Channels 2 1 1 Press the Volume Up or Volume Down button to cyclically select or Del Add SETTING THE ADD DELETE 3 PRESET Channel 01 Add Delete Add Reception CATV Auto Search Fine AFC On Adjust Select 1 Press the Volume Up or Volume Down button to adjust the setting 2 1 2...

Page 18: ... through all the channels and store active channels into memory 2 1 1 Press the Volume Up or Volume Down button to adjust the setting 50 50 SETTING THE FINE SETTING THE AFC 2 1 1 Press the Volume Up or Volume Down button to cyclically select or On Off 6 PRESET Channel 01 Add Delete Add Reception CATV Auto Search Fine AFC On Adjust Select 7 PRESET Channel 01 Add Delete Add Reception CATV Auto Searc...

Page 19: ...e Up button to set the minutes and the Volume Down button to set the hours 2 1 SETTING THE ON TIME 3 1 Press the Volume Up button to set the minutes and the Volume Down button to set the hours 18 2 1 1 2 2 1 1 2 2 1 CLOCK Adjust Select Clock On time Off time Attention Preset Channel CLOCK Adjust Select Clock On time Off time Attention Preset Channel CLOCK Adjust Select Clock On time Off time Atten...

Page 20: ...ect Clock On time Off time Attention Preset Channel 3 1 Press the MENU button thrice the CLOCK menu will appear 2 Press the Channel Up or Down button until Bespoke is selected 2 3 Press the Volume Up button to set the minutes and the Volume Down button to set the hour of the time you want the channel changed 5 4 1 Press the Volume Up button to set the minutes and the Volume Down button to set the ...

Page 21: ... Press the Channel Up or Channel Down button to select or the item Col Sys Language C Caption Parental Ctrl 2 20 2 1 1 2 2 1 The color system is NTSC CLOCK Adjust Select Clock On time Off time Attention Preset Channel FUNCTION Adjust Select Col Sys NTSC Language English C Caption Off Parental Ctrl Off FUNCTION Adjust Select Col Sys NTSC Language English C Caption Off Parental Ctrl Off ...

Page 22: ... 1 1 2 FUNCTION Adjust Select Col Sys NTSC Language English C Caption Off Parental Ctrl Off 1 Press the Volume Up or Volume Down button to cyclically select or Off C1 C2 C3 C4 T1 T2 T3 T4 2 1 3 2 1 1 Press the Volume Up or Volume Down button to select or 2 Press the remote control Direct Channel Selection button 0 9 enter the four digit password 0000 is the preset password if you have not changed ...

Page 23: ...ed back on by pressing this button again or one of the Volume Up or Volume Down buttons 1 2 2 1 3 DIRECT CHANNEL SELECTION NUMBER 0 9 BUTTONS 1 1 1 Use these buttons to select a channel The channel number will appear at the top right corner of the screen 1 To set the TV to turn off after a preset amount of time press the SLEEP button Sleep will appear on the screen Press the SLEEP button again Sle...

Page 24: ...sy Violence Violence Sexual Situations Adult Language Sexually Suggestive Dialogue FA V S L D US MOVIES Ratings Chart GENERAL AUDIENCE All ages admitted G PG PG 13 R NC 17 X PARENTAL GUIDANCE Some material may not be suitable for children PARENTS CAUTIONED Some material may be inappropriate for children under 13 RESTRICTED Children under 17 must be accompanied by a parent or adult OVER AGE 17 ONLY...

Page 25: ... antenna for better reception or use an outdoor antenna TO VIEW CLOSED CAPTIONS Select the CC option in the menu to switch between normal TV and the Closed Captions Modes Captions and Full Screen Text This Closed Caption Mode will display text on the screen in English or another language Generally Closed Captions in English are transmitted on Captions 1 These Closed Caption Modes will display text...

Page 26: ...TE button again Possible local interference Check for source of reception disturbance Antenna CATV connector is not connected Check CATV connection of VHF UHF antenna Volume is set to minimum Increase volume Tune to a new channel TV station stopped broadcasting Sleep Timer is set Set Sleep Timer to Off Home breaker has blown Check breaker TV signal is weak Check CATV or VHF UHF antenna connection ...

Page 27: ...nces GHOSTS Ghosts are caused by the television signal following two paths One is the direct path and the other is reflected from tall buildings hills or other objects Changing the direction or position of the antenna may improve the reception SNOW If your receiver is located in the fringe area of a television station where the signal is weak your picture may be marred by the appearance of small d...

Page 28: ...ur proof of purchase Send your unit to the address blow This warranty does not cover damage from negligence misuse abuse accident failure to follow operating instructions commercial use rental repairs by an unauthorized facility or products purchased used serviced or damaged outside of the United States THIS WARRANTY GIVES YOU SPECIFIC LEGAL RIGHTS AND YOU MAY ALSO HAVE OTHER RIGHTS WHICH VARY FRO...

Page 29: ...ght App 20 7lbs 9 4kgs Picture Tube 13 Receiving Channels VHF 2 13 Receiving Channels UHF 14 69 Receiving Channels CATV 14 36 A W 37 59 AA WW 60 85 AAA ZZZ 86 94 86 94 95 99 A 5 A 1 Video Output Level in TV Mode 1 Vp p Audio Output Level in TV Mode 0 5 Vrms Specifications are subject to change without notice 100 125 100 125 01 5A Antenna Input VHF UHF in 75 Ohms coaxial Remote control 1 piece Owne...

Page 30: ...PART NO DTE316 06302006 01 Printed in China R ...

Reviews: