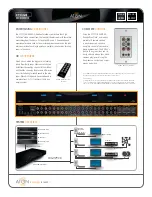
background image

ISIS I&C Manual

In-Store Information Server (ISIS) Installation Instructions • 3

Location for Mounting

• This product is intended for indoor use only. The 

unit should not be exposed to ambient conditions 
outside of the range of 0ºC (32 degrees F) to 35ºC 

(95 degrees F) and relative humidity outside the 

range 5% to 95% non-condensing.

1.7. Mounting

There are two mounting options for the ISIS: Desktop 

and Cabinet. 

Desktop

Four non-skid rubber feet are provided for desktop 

mounting. Do not use the mounting brackets if you intend 
to mount the unit on your desktop. The rubber feet are 
self-adhesive. Simply remove them from the paper back-
ing and place them at each outside corner edge of the bot-
tom of the unit.

Cabinet

Mount the ISIS in a cabinet, install the mounting 

brackets on either side of the unit with the sheet metal 
screws provided in the hardware bag. The mounting 
brackets are interchangeable. 

Observe the following when mounting the ISIS in a 

cabinet:

• Maintain three inches of clearance on the sides, top, 

and bottom of the unit to provide adequate ventila-

tion.

• Mount the unit in such a manner as to provide max-

imum efficiency in cooling. The intake for the fan is 

located at the front of the unit just above the POW-

ER and HDD LEDs. Air exits the unit through grill-
work located to the left and the rear of the unit.

• Mount the unit in such a way as to orient the intake 

towards the bottom of the cabinet and have airflow 

up through the unit and exit to the left and top of the 
cabinet.

• With the ISIS properly oriented in its cabinet, the in-

take for the fan will be situated towards the bottom 

of the cabinet and the connectors will be situated to-

wards the top of the cabinet.

1.8. Power Requirements

The power connector of the ISIS must be connected to 

a dedicated 120VAC, 60Hz circuit capable of providing at 
least 1.5 Amperes, plus sufficient capacity for test equip-
ment.

International units must be wired to a 240VAC, 50Hz 

source of power capable of providing at least 0.75 
Amperes, plus sufficient capacity for test equipment.

Domestic ISIS units are shipped with a cord-set that 

consists of a NEMA-5 15P plug and an IEC 320 connec-
tor. If, for some reason, the ISIS is to be directly connected 
to a power source, use one of the color schemes shown in 
Table 1-2 on page 3.

1.9. Connections

Make connections to the ISIS in the following order. 

For specific details on communications wiring, refer to 

Section 1.11., 

Wiring Details

.

1. Connect the Ethernet cable. The ISIS pro-

vides a single auto-sensing 10BASE-T or 

100BASE-TX (RJ-45) connector on slot 1. 

Make this connection to your LAN (local 
area network).

2. If applicable, make the RS-232 connection. 

Plug the DB-9 RS-232 cable into COM1, or 
COM2 if COM1 is occupied.

3. Connect the LonWorks network connection. 

The ISIS provides a single, two-pin 78-
Kbaud free topology connection on slot-4. 

Make this connection to your Echelon FTT-

10 LonWorks trunk.

4. Connect the power cable. Using the 3-con-

ductor power cord supplied with the ISIS, 

connect the PC plug to the keyed connector 

NOTES:


•A clean environment with ongoing mini-

mum exposure to dust is strongly recom-

mended.

• During the construction phase, make sure to 

keep construction and metallic particles away 

from the ISIS. If necessary, keep the ISIS pow-

ered off and covered. For additional informa-
tion, see Section 1.16.1., Filter Maintenance.

Table 1-2

 Power Wiring Color Schemes

North America

International

BLACK

: Line

BROWN

: Line

WHITE

: Neutral

BLUE

: Neutral

GREEN

:


Ground

GREEN/YELLOW

Ground

Summary of Contents for CPC ISIS

Page 1: ...026 1306 Rev 0 12 04 02 In Store Information Server ISIS Installa tion and Configuration Guide ...

Page 2: ......

Page 3: ...s Inc be liable for any direct indirect special incidental or consequential damages resulting from any defect or omission in this manual even if advised of the possibility of such damages In the interest of continued product development Computer Process Controls Inc reserves the right to make improvements to this manual and the products described herein at any time without notice or obligation REA...

Page 4: ......

Page 5: ...UP AND INITIAL CHECKOUT 4 1 11 WIRING DETAILS 4 1 11 1 Ethernet 4 1 11 2 Serial 4 1 11 3 Modem Optional 4 1 12 FIGURES 5 1 12 1 ISIS Connector Layout 5 1 12 2 Mounting Detail 6 1 13 RS 485 OPTION 6 1 14 WIRING DETAILS 7 1 15 CABLE DIAGRAMS 7 1 15 1 RS 485 Full Duplex 7 1 15 2 RS 485 Half Duplex 7 1 16 MAINTENANCE 8 1 16 1 Filter Maintenance 8 1 16 2 Real Time Clock Battery 8 1 17 REPLACEMENT PARTS...

Page 6: ......

Page 7: ...oes not directly support user changes to many Windows settings except IP address 1 3 Precautions 1 3 1 Safety Precautions The following items are warnings of a general nature relating to the installation and start up of the ISIS control ler Be sure to heed these warnings to prevent personal injury and or equipment damage A 120VAC or 240VAC for international units cir cuit powers the ISIS controlle...

Page 8: ... plug types which require customer supplied cables with DB 9S socket ends to connect to the ISIS 1 5 Compatibility ISIS Compatibility with the CPC REFLECS and Ein stein product lines 1 6 Installation and Start Up Read through the entire document before beginning the installation procedure 1 6 1 Unpack the ISIS Unpack the ISIS and inspect the contents of the pack age for damaged or missing componen...

Page 9: ... situated to wards the top of the cabinet 1 8 Power Requirements The power connector of the ISIS must be connected to a dedicated 120VAC 60Hz circuit capable of providing at least 1 5 Amperes plus sufficient capacity for test equip ment International units must be wired to a 240VAC 50Hz source of power capable of providing at least 0 75 Amperes plus sufficient capacity for test equipment Domestic ...

Page 10: ...s connection is capable of running at either 10 Mbps or 100 Mbps it automatically adjusts to either speed This means the ISIS can exist on the same network with a mixture of 10BaseT and 100BaseTX hardware con nected to a smart 10 100 hub capable of adjusting to the devices it supports 1 11 2 Serial There are two RS 232 serial ports on the ISIS labeled COM1 and COM2 These are DTE type ports using i...

Page 11: ... LED HDD LED PRINTER PHONE LINE COM3 O I 1 2 3 4 Power Connector Power Switch KEYBOARD MOUSE Ethernet 10BaseT LON Trunk FTT 10 VIDEO PRINTER COM1 PHONE LINE COM3 COM2 COM1 COM2 RS 232 COM1 RS 232 COM2 Ethernet RJ 45 Printer LPT1 LON FTT 10 RS 485 port COM3 RS 485 port COM4 RS 485 option model NP 485 has two DB 9P male connectors and is typically located in slot 2 See Section 1 13 RS 485 Option for...

Page 12: ...ory installed RS 485 adapter located in slot 2 Figure 1 2 This is a dual port adapter with two standard male DB 9 plug male connectors Figure 1 3 ISIS top view RS 485 Option Table 1 3 COM Port Assignments for RS 485 Ports on an ISIS RS 485 Option RS 485 Adapter COM Port Assignments Top DB 9 Connector COM3 Bottom DB 9 Con nector COM4 ...

Page 13: ...e to connect the ISIS using RS 485 full duplex 1 15 2 RS 485 Half Duplex An RS 485 bus wired for half duplex is commonly known as a two wire bus Cabling between devices uses three 3 conductors a single twisted pair plus a shield ground wire Use the following cable pinouts to make a cable to connect the ISIS using RS 485 half duplex Table 1 4 Pinouts for RS 485 ports on an ISIS RS 485 option model ...

Page 14: ... of the battery requires removal of the Central Processor Card and re entry of the setup information 1 17 Replacement Parts Servicing the ISIS may call for replacement parts There are three categories of parts Non replaceable Standard Replacement Field Replacement 1 18 Non Replaceable Parts Other than the parts listed in the replacement parts section there are no serviceable components on an ISIS ...

Page 15: ...ense This product generates and uses energy of about the same frequency as radio and TV broadcasts Installed cor rectly it may interfere with reception of radio and TV broadcasts If you suspect this product is causing interference turn your computer on and off while the radio or TV is showing interference If the interference disappears when you turn the computer off and reappears when you turn the...

Page 16: ...e maximum end to end distance from the con troller to the hub is 328 feet 100m 7 Plug one end of another Ethernet cable into the RJ 45 Ethernet port on the Einstein that has the PC 104 network card installed 8 Plug the other end of the Ethernet cable into an empty port on a LAN hub or switch 9 All additional Einstein units should be con nected to the networked Einstein via the Ech elon network For...

Page 17: ...er to the ISIS follow these steps 1 Take the supplied CPC approved network ca ble and plug the 9 pin connector into RS 232 COM 1 2 Plug the 4 pin connector into the COM C port on the REFLECS For more information see the CPC Refrigeration Monitor and Case Control Installation and Operation Manual Figure 1 7 ISIS to REFLECS NOTE The Ethernet connection must be made prior to applying power to the con...

Page 18: ......

Reviews: