background image

1 About This Documentation

Read this documentation completely, especially chapter 

g

 2. Safety before work-

ing with the product.

These instructions contain important information on the safe and appropriate as-
sembly, operation, and maintenance of the product and how to remedy simple
malfunctions yourself.

1.1 Additional documentation

In addition to this documentation, you will obtain further documents on the
product or the machine/system where it is installed.

u

Observe all documents supplied with the system or machine.

Additionally always observe the following regulations:

• General, statutory and other binding rules of the European and national laws.

• Applicable regulations for accident prevention and environmental protection.

1.2 Presentation of information

1.2.1 Warnings

Warnings of personal injury and damage to property are highlighted in this docu-
mentation. The measures described to avoid these hazards must be followed.

Display as highlighted box

Warnings are displayed in the form of highlighted boxes with the following struc-
ture:

 SIGNAL WORD

Hazard type and source

Consequences of non-observance

u

Precautions

Presentation with highlighted signal word

Instructions and lists often contain warnings that are integrated into the text.
They are introduced with a bold signal word:

CAUTION! 

Do not exceed permissible bending radii.

Meaning of the signal words

Signal word

Meaning

DANGER

Immediate danger to the life and health of persons.

Failure to observe these notices will result in serious health conse-
quences, including death.

Warning

Possible danger to the life and health of persons.

Failure to observe these notices can result in serious health conse-
quences, including death.

Caution

Possible dangerous situation.

Failure to observe these notices may result in minor injuries or dam-
age to property.

Notice

Possibility of damage to property or malfunction.

Failure to observe these notices may result in damage to property or
malfunctions, but not in personal injury.

1.2.2 Symbols

Recommendation for the optimum use of our products.

Observe this information to ensure the smoothest possible operation.

2 Safety

2.1 About this chapter

The product has been manufactured according to the accepted rules of current
technology. Even so, there is danger of injury and damage to equipment if the
following chapter and safety instructions of this documentation are not followed.

• Read this chapter and this documentation completely before working with

the product.

• Keep this documentation in a location where it is accessible to all users at all

times.

• Always include the documentation when you pass the product on to third par-

ties.

2.2 General safety instructions

• Observe the valid regulations for accident prevention and environmental pro-

tection for the country where the device is used and at the workplace.

• Only use AVENTICS products that are in perfect working order.

• Examine the product for obvious defects, such as cracks in the housing or

missing screws, caps, or seals.

• Do not modify or convert the product. The warranty will not apply if the prod-

uct is incorrectly assembled.

• Persons who assemble, operate, disassemble, or maintain AVENTICS products

must not consume any alcohol, drugs, or pharmaceuticals that may affect
their ability to respond.

• Do not place any improper mechanical loads on the product under any cir-

cumstances.

• Product warnings and information must be legible, i.e. not covered by paint,

etc.

2.3 Intended use

• The product may only be commissioned after it has been installed in the ma-

chine/system for which it is intended.

• Observe the technical data and the listed specified operating conditions and

performance limits.

• Only use Compressed air as the medium.

The product is intended for professional use only.

• Intended use includes having read and understood these instructions com-

pletely, especially the section “Notes on Safety”.

2.4 Personnel qualifications

The work described in this documentation requires basic knowledge in the fol-
lowing areas, as well as knowledge of the appropriate technical terms:

• Mechanics

• Pneumatics

• Electrics

In order to ensure safe use, these activities described in this documentation may
therefore only be carried out by qualified technical personnel or an instructed
person under the direction and supervision of qualified personnel.

Qualified personnel are those who can recognize possible dangers and institute
the appropriate safety measures, due to their professional training, knowledge,
and experience, as well as their understanding of the relevant regulations per-
taining to the work to be done. Qualified personnel must observe the rules rele-
vant to the subject area.

2.5 Safety instructions related to the product and technology

• Lay cables and lines so that they cannot be damaged and no one can trip over

them.

• Do not operate the product in aggressive ambient air (e.g., solvent vapors).

The substances listed as examples in the following table, which contain solvents
in various concentrations, can lead to an aggressive ambient air/compressed air
in the application area of compressed air preparation devices and in the suction
area of air compressors.

Solvents

Acetone, paint thinners, alcohols, ester.

Detergents

Trichloroethylene, perchloroethylene, ben-
zene, gasoline.

Other substances

Synthetic oils, drilling oil, high-alloyed oils,
certain compressor oils, brake fluid, ammo-
nia, bonding and sealing agents, plasticizers,
anti-freeze, coolants/lubricants.

CAUTION! 

A pressurized polycarbonate reservoir may corrode in an aggressive

ambient air/compressed air and explode as a result.
If the presence of the substances stated in the table cannot be avoided, such as in
gluing machines or vulcanization plants, the use of metal reservoirs is required

• If a lubricator is used, only use a suitable pneumatic oil.

AVENTICS™

 AS1 / AS2 / AS3 / AS5 | R412013436-BAL-001-AF | English

10

Summary of Contents for AVENTICS AS1

Page 1: ...r l uso Instrucciones de servicio Bruksanvisning R412013436 BAL 001 AF 2021 07 Replaces 2017 02 DE EN FR IT ES SV AVENTICS AS1 AS2 AS3 AS5 Filter FLS FLP FLC FLA Filter FLS FLP FLC FLA Filtre FLS FLP FLC FLA Filtro FLS FLP FLC FLA Filtro FLS FLP FLC FLA Filter FLS FLP FLC FLA ...

Page 2: ...eitshinweise 3 3 Lieferumfang 4 4 Produktbeschreibung 4 5 Montage Inbetriebnahme und Betrieb 4 5 1 Befestigungselemente W01 W05 montieren 4 5 2 Halb und vollautomatischer Kondensatablass 4 5 2 1 Halbautomatischer Kondensatablass 4 5 2 2 Vollautomatischer Kondensatablass 4 6 Demontage Austausch 4 6 1 Filter austauschen 5 7 Erweiterung und Umbau 5 7 1 Durchflussrichtung ändern AS2 AS3 AS5 5 7 1 1 Be...

Page 3: ...lichen Do kumentationen weiter 2 2 Allgemeine Sicherheitshinweise Gültige Vorschriften zur Unfallverhütung und zum Umweltschutz im Verwen derland und am Arbeitsplatz beachten AVENTICS Produkte nur in technisch einwandfreiem Zustand verwenden Das Produkt auf offensichtliche Mängel wie beispielsweise Risse im Gehäuse oder fehlende Schrauben Abdeckkappen Dichtungen prüfen Das Produkt grundsätzlich ni...

Page 4: ...01 W05 montieren Siehe g Abb 8 bis g Abb 12 5 2 Halb und vollautomatischer Kondensatablass VORSICHT Mögliche Beeinträchtigung der Druckluftanlage durch Kondensat Beim halbautomatischen Kondensatablass wird Kondensat nur abgelassen wenn der Behälter drucklos ist Bei längerem Betrieb kann das Kondensat den maximalen Füllstand übersteigen und in die Druckluftanlage gelangen Dies kann zur Beschädigung...

Page 5: ...nsatz wechseln e 5 Einzelteile wieder zusammensetzen f 6 Neuen Filtereinsatz eindrehen und von Hand leicht anziehen g 7 Behälter im Uhrzeigersinn bis auf Anschlag einschrauben h i 8 Erneut Druck auf die Anlage geben Vorgehen Serie AS1 FLP FLC FLA Siehe g Abb 4 1 Relevanten Anlagenteil drucklos schalten und Anlage entlüften 2 Behälter entgegen dem Uhrzeigersinn herausdrehen a b 3 Filterstück heraus...

Page 6: ...seinheit oder War tungsgeräten verwenden 9 Entsorgung Entsorgen Sie das Produkt nach den nationalen Bestimmungen Ihres Landes 10 Fehlersuche und Fehlerbehebung Störung Mögliche Ursache Abhilfe Druck Durchflussniveau wird nicht erreicht oder baut sich langsam ab Filter verschmutzt Filter zu klein gewählt Filter reinigen bzw ersetzen Größeren Filter wählen Verschmutzungsanzeige zeigt bereits bei der...

Page 7: ...f g h i Abb 5 Filter austauschen Serie AS2 AS3 AS5 FLS Abb 6 Filter austauschen Serie AS2 AS3 AS5 FLP FLC FLA a a d e f c b Abb 7 Verschmutzungsanzeige AS FLP FLC montieren Abb 8 W01 Befestigung mit Befestigungsplatte AVENTICS AS1 AS2 AS3 AS5 R412013436 BAL 001 AF Deutsch 7 ...

Page 8: ...igungswinkel Abb 10 W03 Verblockung und Befestigung mit Befestigungsbügel Abb 11 W04 Verblockung mit Verblockungssatz Abb 12 W05 Verblockung und Befestigung mit Verblockungssatz AVENTICS AS1 AS2 AS3 AS5 R412013436 BAL 001 AF Deutsch 8 ...

Page 9: ...livery 11 4 Product description 11 5 Assembly commissioning and operation 11 5 1 Mounting fastening elements W01 W05 11 5 2 Semi and fully automatic condensate drain 11 5 2 1 Semi automatic condensate drain 11 5 2 2 Fully automatic condensate drain 11 6 Disassembly exchange 11 6 1 Exchanging the filter 12 7 Conversion and extension 12 7 1 Changing the flow direction AS2 AS3 AS5 12 7 1 1 Rotating t...

Page 10: ...orkplace Only use AVENTICS products that are in perfect working order Examine the product for obvious defects such as cracks in the housing or missing screws caps or seals Do not modify or convert the product The warranty will not apply if the prod uct is incorrectly assembled Persons who assemble operate disassemble or maintain AVENTICS products must not consume any alcohol drugs or pharmaceutica...

Page 11: ... in operation for an ex tended period the condensate may exceed the maximum filling level and find its way into the compressed air system This may result in damage to the com pressed air system 1 Regularly check the filling level in the reservoir 2 Drain condensate manually once it reaches the maximum filling level 3 Do not allow the condensate to enter the environment in an uncontrolled manner 5 ...

Page 12: ... insert e 5 Reassemble the individual parts f 6 Screw in a new filter insert and tighten gently by hand g 7 Screw in the reservoir as far as it will go in a clockwise direction h i 8 Apply pressure to the system again Procedure for series AS1 FLP FLC FLA See g Fig 4 1 Make sure the relevant system part is not under pressure and exhaust the sys tem 2 Turn reservoir counterclockwise and remove a b 3...

Page 13: ...g Do not use compressed air for cleaning blowing off the maintenance unit or equipment 9 Disposal Dispose of the product in accordance with the national regulations in your coun try 10 Troubleshooting Malfunction Possible cause Remedy Pressure flow level is not reached or drops off slowly Filter contaminated Selected filter size too small Clean or replace filter Select larger filter Contamination ...

Page 14: ... f g h i Fig 5 Exchanging the filter Series AS2 AS3 AS5 FLS Fig 6 Exchanging the filter Series AS2 AS3 AS5 FLP FLC FLA a a d e f c b Fig 7 Mounting contamination display AS FLP FLC Fig 8 W01 Mounting with mounting plate AVENTICS AS1 AS2 AS3 AS5 R412013436 BAL 001 AF English 14 ...

Page 15: ...racket Fig 10 W03 Block assembly and mounting with mounting clip Fig 11 W04 Block assembly with block assembly kit Fig 12 W05 Block assembly and mounting with block assembly kit AVENTICS AS1 AS2 AS3 AS5 R412013436 BAL 001 AF English 15 ...

Page 16: ... 4 Description du produit 18 5 Montage mise en service et fonctionnement 18 5 1 Montage des éléments de fixation W01 à W05 18 5 2 Purge semi automatique et entièrement automatique 18 5 2 1 Purge semi automatique 18 5 2 2 Purge entièrement automatique 18 6 Démontage remplacement 19 6 1 Remplacement des filtres 19 7 Transformation et extension 20 7 1 Modification du sens de débit AS2 AS3 AS5 20 7 1 ...

Page 17: ...ntivement et com plètement avant d utiliser le produit Conserver cette documentation de sorte que tous les utilisateurs puissent y accéder à tout moment Toujours transmettre le produit à de tierces personnes accompagné des do cumentations nécessaires 2 2 Consignes générales de sécurité Respecter les consignes de prévention d accidents et de protection de l envi ronnement applicables dans le pays d...

Page 18: ...er des mouvements dangereux et saccadés du vérin u Lors de la mise en service d une installation sans unité de mise en pression SSU veiller à ce que les vérins se trouvent en position finale ou à ce que les vérins qui ne sont pas en position finale ne présentent aucun danger ATTENTION Lors du fonctionnement l installation est sous pression Une installation réalisée de manière non conforme risque d...

Page 19: ...u Variante Variante de purge AS2 R961400026 Long Purge Semi automatique AS3 R961400141 AS5 R961403331 c Éléments de filtre à charbon actif matériau charbon actif AS1 1829207064 AS2 1829207044 AS3 R961400143 AS5 R961403333 Procédure série AS1 FLS Voir g Fig 3 1 Mettre la partie pertinente de l installation hors pression et purger l installa tion 2 Dévisser la cuve dans le sens inverse des aiguilles...

Page 20: ...rer les joints 4 x 1 5 selon DIN 3771 d 3 Poser l indicateur d encrassement e sur le boîtier de filtres et serrer les vis f Couple de serrage max 1 5 Nm M5 x 20 selon DIN 965 8 Nettoyage et entretien Obturer toutes les ouvertures à l aide de dispositifs de protection appropriés afin qu aucun produit nettoyant ne puisse s infiltrer dans le système Ne jamais utiliser de solvants ou de détergents agr...

Page 21: ...LS a b c d e f g h Fig 4 Remplacement des filtres Série AS1 FLP FLC FLA a b c d e f g h i Fig 5 Remplacement des filtres Série AS2 AS3 AS5 FLS Fig 6 Remplacement des filtres Série AS2 AS3 AS5 FLP FLC FLA AVENTICS AS1 AS2 AS3 AS5 R412013436 BAL 001 AF Français 21 ...

Page 22: ...Fixation avec plaque de fixation Fig 9 W02 Fixation avec équerre de fixation Fig 10 W03 Blocage montage en batterie et fixation avec étrier de fixation Fig 11 W04 Blocage montage en batterie avec kit de montage en batterie AVENTICS AS1 AS2 AS3 AS5 R412013436 BAL 001 AF Français 22 ...

Page 23: ...Fig 12 W05 Blocage montage en batterie et fixation avec kit de montage en batterie AVENTICS AS1 AS2 AS3 AS5 R412013436 BAL 001 AF Français 23 ...

Page 24: ...4 Descrizione del prodotto 26 5 Montaggio messa in funzione e uso 26 5 1 Montaggio degli elementi di fissaggio W01 W05 26 5 2 Scarico di condensa semiautomatico e automatico 26 5 2 1 Scarico di condensa semiautomatico 26 5 2 2 Scarico di condensa automatico 26 6 Smontaggio sostituzione 27 6 1 Sostituzione del filtro 27 7 Ampliamento e trasformazione 28 7 1 Modifica della direzione di flusso AS2 AS...

Page 25: ...do che sia sempre accessibile a tutti gli utenti Cedere il prodotto a terzi sempre unitamente alle documentazioni necessarie 2 2 Avvertenze di sicurezza generali Osservare le prescrizioni antinfortunistiche e di protezione ambientale vigenti nello stato in cui l apparecchio viene usato e sul posto di lavoro AVENTICS Utilizzare i prodotti esclusivamente in condizioni tecniche perfette Verificare ev...

Page 26: ...vocare danni al prodotto e portare a lesioni gravi u Prima della messa in funzione controllare la corretta installazione di tutti i collegamenti raccordi e apparecchi di manutenzione 5 1 Montaggio degli elementi di fissaggio W01 W05 Ved da g Fig 8 a g Fig 12 5 2 Scarico di condensa semiautomatico e automatico ATTENZIONE Possibile danneggiamento dell impianto dell aria compressa provocato da conden...

Page 27: ...AS2 R961400026 lungo Scarico di condensa semiautomatico Serie AS Cod materiale variante Variante con scarico di condensa AS3 R961400141 AS5 R961403331 c Elementi filtranti a carbone attivo materiale carbone attivo AS1 1829207064 AS2 1829207044 AS3 R961400143 AS5 R961403333 Procedimento serie AS1 FLS Ved g Fig 3 1 Togliere l alimentazione pneumatica della parte rilevante dell impianto e sca ricare ...

Page 28: ... x 1 5 secondo la norma DIN 3771 d 3 Applicare l indicatore di sporco e sul corpo del filtro e serrare le viti f Coppia di serraggio max 1 5 Nm M5 x 20 secondo DIN 965 8 Pulizia e cura Chiudere tutte le aperture con dispositivi di protezione adeguati in modo da evitare la penetrazione di detergenti nel sistema Non usare mai solventi o detergenti aggressivi Non utilizzare idropulitrici ad alta pres...

Page 29: ...FLS a b c d e f g h Fig 4 Sostituzione del filtro Serie AS1 FLP FLC FLA a b c d e f g h i Fig 5 Sostituzione del filtro Serie AS2 AS3 AS5 FLS Fig 6 Sostituzione del filtro Serie AS2 AS3 AS5 FLP FLC FLA AVENTICS AS1 AS2 AS3 AS5 R412013436 BAL 001 AF Italiano 29 ...

Page 30: ...8 W01 Fissaggio con piastra di fissaggio Fig 9 W02 Fissaggio con squadretta Fig 10 W03 Montaggio in batteria e fissaggio con staffa di fissaggio Fig 11 W04 Montaggio in batteria con set per il montaggio in batteria AVENTICS AS1 AS2 AS3 AS5 R412013436 BAL 001 AF Italiano 30 ...

Page 31: ...Fig 12 W05 Montaggio in batteria e fissaggio con set per il montaggio in bat teria AVENTICS AS1 AS2 AS3 AS5 R412013436 BAL 001 AF Italiano 31 ...

Page 32: ... 4 Descripción del producto 34 5 Montaje puesta en servicio y funcionamiento 34 5 1 Montaje de los elementos de fijación W01 W05 34 5 2 Purga de condensado completamente automática y semiautomática 34 5 2 1 Purga de condensado semiautomática 34 5 2 2 Purga de condensado automática 34 6 Desmontaje sustitución 35 6 1 Sustitución del filtro 35 7 Modificación y ampliación 36 7 1 Modificación de la dir...

Page 33: ...uridad contenidas en la documentación Lea este capítulo y toda la documentación con detenimiento y por completo antes de trabajar con el producto Guarde esta documentación en un lugar al que siempre puedan acceder fácil mente todos los usuarios Entregue el producto a terceros siempre junto con la documentación necesa ria 2 2 Indicaciones de seguridad generales Observar las prescripciones vigentes ...

Page 34: ...ocar movi mientos de cilindro bruscos y peligrosos u Asegurarse de que durante la puesta en servicio de una instalación sin uni dad de llenado SSU los cilindros estén en la posición final o bien que los ci lindros que no estén en la posición final no puedan causar ningún daño ATENCIÓN La instalación en funcionamiento está bajo presión En el caso de una instalación inadecuada se pueden producir dañ...

Page 35: ...mpletamente automática AS1 1829207063 largo Purga de condensado semiautomática AS2 R961400027 corto Purga de condensado completamente automática AS2 R961400026 largo Purga de condensado semiautomática AS3 R961400141 AS5 R961403331 c Elementos filtrantes de carbón activo material carbón activo AS1 1829207064 AS2 1829207044 AS3 R961400143 AS5 R961403333 Procedimiento de la serie AS1 FLS Véase g Fig ...

Page 36: ...nsertar las juntas 4 x 1 5 según DIN 3771 d 3 Colocar el indicador de suciedad e sobre el cuerpo del filtro y apretar los tor nillos f Par de apriete máx 1 5 Nm M5 x 20 según DIN 965 8 Limpieza y cuidado Cerrar todas las aberturas con dispositivos de protección adecuados para que no penetre ningún producto de limpieza en el sistema No utilice nunca disolvente ni productos de limpieza agresivos No ...

Page 37: ... FLS a b c d e f g h Fig 4 Sustitución del filtro Serie AS1 FLP FLC FLA a b c d e f g h i Fig 5 Sustitución del filtro Serie AS2 AS3 AS5 FLS Fig 6 Sustitución del filtro Serie AS2 AS3 AS5 FLP FLC FLA AVENTICS AS1 AS2 AS3 AS5 R412013436 BAL 001 AF Español 37 ...

Page 38: ...ciedad AS FLP FLC Fig 8 W01 Fijación con placa de fijación Fig 9 W02 Fijación con escuadra de fijación Fig 10 W03 Unión y fijación con estribo de fijación Fig 11 W04 Unión con juego de unión AVENTICS AS1 AS2 AS3 AS5 R412013436 BAL 001 AF Español 38 ...

Page 39: ...Fig 12 W05 Unión y fijación con juego de unión AVENTICS AS1 AS2 AS3 AS5 R412013436 BAL 001 AF Español 39 ...

Page 40: ...sföreskrifter 41 3 Leveransomfattning 42 4 Produktbeskrivning 42 5 Montering driftstart och drift 42 5 1 Montera fästelement W01 W05 42 5 2 Halv och helautomatisk kondensdränering 42 5 2 1 Halvautomatisk kondensdränering 42 5 2 2 Helautomatisk kondensdränering 42 6 Demontering byte 42 6 1 Byta filter 43 7 Utbyggnad och ombyggnad 43 7 1 Ändra flödesriktning AS2 AS3 AS5 43 7 1 1 Vrida behållaren AS2...

Page 41: ...ika olyckor och för att skydda miljön Använd endast AVENTICS produkter om de är i ett tekniskt felfritt tillstånd Kontrollera om produkten har några synliga skador t ex sprickor i huset eller saknar skruvar täcklock eller tätningar Produkten får aldrig förändras eller byggas om Garantin upphör vid felaktig montering Personer som monterar använder demonterar eller underhåller AVENTICS produkter får...

Page 42: ...ondens Vid halvautomatisk kondensdränering dräneras kondens endast när behållaren är trycklös Vid längre drift kan kondensen överstiga maximal nivå och komma in i tryckluftsanläggningen Detta kan orsaka skador på tryckluftsanläggningen 1 Kontrollera regelbundet vätskenivån i uppsamlingsbehållaren 2 Dränera kondensen manuellt om den har nått maxnivån 3 Låt inte kondensen rinna ut okontrollerat i om...

Page 43: ...6 Skruva i den nya filterinsatsen och dra åt lätt för hand g 7 Skruva i behållaren medurs ända till anslaget h i 8 Koppla till trycket till anläggningen igen Tillvägagångssätt serie AS1 FLP FLC FLA Se g Bild 4 1 Koppla från den aktuella anläggningsdelen så att den blir trycklös och avlufta anläggningen 2 Skruva ut behållaren moturs a b 3 Skruva ut filterstycket c d 4 Byt filterinsats e 5 Skruva i ...

Page 44: ... inte tryckluft för rengöring urblåsning av luftbehandlingsenheter 9 Avfallshantering Avfallshantera produkten enligt gällande nationella föreskrifter 10 Felsökning och åtgärder Fel Möjlig orsak Åtgärd Tryck flödesnivån uppnås inte eller minskar långsamt Filtret är smutsigt Filtret är för litet Rengör eller byt ut filtret Välj ett större filter Föroreningsindikator visar rött reda vid första drift...

Page 45: ...a b c d e f g h i Bild 5 Byta filter Serie AS2 AS3 AS5 FLS Bild 6 Byta filter Serie AS2 AS3 AS5 FLP FLC FLA a a d e f c b Bild 7 Montera föroreningsindikator AS FLP FLC Bild 8 W01 Fäste med fästplatta AVENTICS AS1 AS2 AS3 AS5 R412013436 BAL 001 AF Svenska 45 ...

Page 46: ...vinkel Bild 10 W03 Blockmontering och fäste med fästbygel Bild 11 W04 Blockmontering med blockmonteringssats Bild 12 W05 Blockmontering och fäste med blockmonteringssats AVENTICS AS1 AS2 AS3 AS5 R412013436 BAL 001 AF Svenska 46 ...

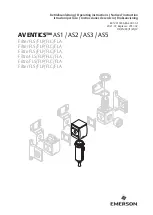
Page 47: ...products are subject to a natural process of wear and aging An example configuration is depicted on the title page The delivered product may thus vary from that in the illustration Translation of the original operating instructions The original operating instructions were created in the German language Subject to modifications All rights reserved by AVENTICS GmbH even and especially in ca ses of p...

Reviews: