background image

2 9

SNOOZE Alarm

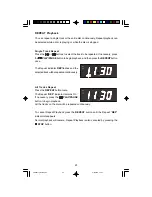
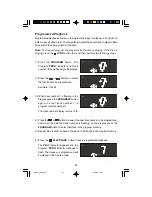
When the alarms turn on in the morning you can activate the 

SNOOZE

 control to

catch a few minutes extra sleep by pressing the 

SNOOZE

 button on the top panel.

The Snooze function stops the alarm for 9 minutes and then turns the alarm ‘On’

again.

When the Snooze function has been

activated the appropriate 

AL 1

 or 

AL 2

indicator flashes in the display.

CKD5811_080306.p65

3/8/2006, 11:01

29

Summary of Contents for SmartSet CKD5811

Page 1: ...ANUAL CKD5811 Visit our web site at www emersonradio com SmartSet CD Clock Radio with Automatic Time Setting System and Digital Tuning Stereo Receiver U S Patent No 6 567 344 CKD5811_080306 p65 3 8 2006 11 01 40 ...

Page 2: ...ly cord or plug is damaged liquid has been spilled or objects have fallen into the apparatus the apparatus has been exposed to rain or moisture does not operate normally or has been dropped 11 This appliance shall not be exposed to dripping or splashing water and no object filled with liquids such as vases shall be placed on the apparatus 12 Use only with the cart stand tripod bracket or table spe...

Page 3: ... programmable memory and repeat playback It will also play CD R and CD RW discs in addition to normal CDs The digital tuning stereo receiver locks in your favorite stations perfectly and stores up to 20 stations 10 AM and 10 FM in memory for immediate recall This model also includes a dual battery back up system There s a built in CR2430 lithium battery that will maintain the time and alarm settin...

Page 4: ...o the dealer Please call the Emerson Consumer Products Customer Service Hotline toll free at 1 800 898 9020 One of our customer service representatives will try to diagnose and correct the problem for you If we cannot solve the problem by phone you will be instructed how to receive a replacement unit Once again all of us at Emerson Radio thank you for your purchase CKD5811_080306 p65 3 8 2006 11 0...

Page 5: ...protection against harmful interference in a residential installation This equipment generates uses and can radiate radio frequency energy and if not installed and used in accordance with the instructions may cause harmful interference to radio communications However there is no guarantee that interference will not occur in a particular installation If this equipment does cause harmful interferenc...

Page 6: ...ce such as a table desk shelf stand etc out of direct sunlight and away from sources of excess heat dust vibration moisture or humidity and convenient to a 120V 60Hz AC outlet Unwind the AC power cord and extend it to its full length This is important The FM antenna is built into the AC power cord Battery Back up Systems This model has two separate battery back up systems There is a built in 3 Vol...

Page 7: ...n and remove the battery door 2 Gently pull the battery terminal outside of the compartment just far enough so you can connect the battery 3 Connect a fresh well known brand of 9 Volt Alkaline battery to the battery terminal It can only be connected one way 4 Push the battery back into the battery compartment and replace the battery door CKD5811_080306 p65 3 8 2006 11 01 6 ...

Page 8: ...If the Low Battery indicator remains On this indicates that either you have not installed the 9 Volt battery or that the 9 Volt battery is exhausted and needs to be replaced If the Low Battery indicator flashes this indicates that the 3 Volt lithium battery is getting weak and should be replaced as soon as possible Instructions for changing the lithium battery will be found on page 32 of this manu...

Page 9: ...nto your outlet This defeats the safety feature and could expose you to electric shock Protect Your Furniture This model is equipped with non skid rubber feet to prevent the product from moving when you operate the controls These feet are made from non migrating rubber material specially formulated to avoid leaving any marks or stains on your furniture However certain types of oil based furniture ...

Page 10: ...9 LOCATION OF CONTROLS AND INDICATORS FRONT PANEL 1 2 3 1 10 11 9 8 12 7 13 6 5 14 15 4 16 17 18 31 30 29 28 27 26 25 24 23 22 21 20 19 TOP PANEL 32 CKD5811_080306 p65 3 8 2006 11 01 9 ...

Page 11: ...ompartment Back Cabinet 11 AC Power Cord 12 CD Door 13 PRESET Button 14 REV SKIP TUNING Button 15 FWD SKIP TUNING Button 16 VOLUME Control 17 PLAY PAUSE Button 18 STOP Button 19 WAKE UP TRACK Button 20 MEMORY Button 21 PRESET Button 22 AM FM Button 23 REPEAT Button 24 NAP Button 25 PROGRAM Button 26 SNOOZE SLEEP NAP OFF Button 27 TIME Button 28 MONTH DATE Button 29 TIME ZONE Button 30 ALM Alarm 2 ...

Page 12: ... numbered time zone When pressed together with the TIME button the and buttons adjust the time display backward or forward When pressed together with the ALM 1 or ALM 2 buttons the and buttons adjust the wake up time display backward or forward When pressed together with the MONTH DATE button the and buttons adjust the Month and Date display backward or forward When pressed together with the TIME ...

Page 13: ...ion There are 7 time zones programmed into your SmartSet clock radio as follows ZONE 1 Atlantic Time ZONE 2 Eastern Time Default Setting ZONE 3 Central Time ZONE 4 Mountain Time ZONE 5 Pacific Time ZONE 6 Yukon Time ZONE 7 Hawaiian Time To change the default time zone display depress the TIME ZONE button The number 02 will appear on the display indicating that the default zone is ZONE 2 Eastern Ti...

Page 14: ... release the MONTH DATE and TIME buttons the display returns to the correct time Daylight Saving and Leap Year Adjustments All Daylight Saving and Leap Year adjustments are made automatically by the SmartSet internal computer as follows Start of Daylight Saving Time At 2 00 AM on the 2nd Sunday in March the clock will automatically advance to 3 00 AM End of Daylight Saving Time At 3 00 AM on the 1...

Page 15: ... the power is restored Adjusting The Wake Up Times Your SmartSet clock radio has two separate alarms that can be set and used independently You may use the alarms to wake two people at different times or you may use one alarm for weekdays and the other for weekend wake up times The procedure for adjusting the wake up time is the same for both Alarm 1 and Alarm 2 1 Depress and hold either the ALM 1...

Page 16: ...nly the Saturday and Sunday indicators are On the Weekends only mode is selected To change the Alarm Mode setting for Alarm 1 hold the ALM 1 setting button and press the ALARM MODE button until the day indicators show the desired mode setting Weekdays only Weekends only or Everyday operation Release the ALARM MODE and ALM 1 setting buttons and the display will return to the correct time Follow the...

Page 17: ...and until it finds a strong signal and then stops on that station Repeat this process until the tuner stops on the desired station 4 If you tuned to an FM Stereo station the FM ST indicator appears in the display 5 Five seconds after you release the or button the display automatically changes from radio frequency back to the correct time To see the station frequency again press the TIME button The...

Page 18: ...ing F 1 disappears and the station frequency returns to the display This indicates that FM 92 5 is now stored in FM Preset Memory 1 4 Tune to the next station that you wish to store Press the MEMORY button once then press the PRESET button to select Preset Memory number 2 F 2 begins flashing in the display 5 Press the MEMORY button once more to enter your desired station in Preset Memory number 2 ...

Page 19: ...t Stations Press the AM FM button to select the desired band Press the PRESET or buttons to scroll through the preset stations one by one Changing Preset Stations 1 Tune to the new station that you want to store 2 Press the MEMORY button and then press the PRESET or buttons to select the memory number that you wish to change 3 When the desired Preset Memory number is flashing press the MEMORY butt...

Page 20: ... theAC power cord until you find the position that provides the best reception AM The AM bar antenna is inside the cabinet of the main unit You may need to change the position of the main unit until you find the position that provides the best reception for your favorite AM stations CKD5811_080306 p65 3 8 2006 11 01 19 ...

Page 21: ...0 compatibility cannot be guaranteed This is not an indication of any problems with your player 1 Press the POWER ON OFF button to switch the unit On If you were previously listening to the radio the unit will return to the last station that was tuned before the power was switched off 2 Press on the CD door in the area marked OPEN CLOSE to open the CD door When the door opens if you have not alrea...

Page 22: ...and PLAY indicators remain in the display to indicate that a CD is playing Note If your disc is dirty heavily scratched or otherwise unreadable the display will continue to show two dashes but playback will not begin 6 Adjust the VOLUME control to the desired level 7 Playback will continue until the last track has played then the player stops the display briefly shows the total number of tracks th...

Page 23: ...r that is paused and then returns to the correct time The sound stops but the disc continues to spin and the PLAY indicator flashes To cancel Pause mode and resume playback press the PLAY PAUSE button again The sound returns and the PLAY indicator stops flashing SKIP Search Controls To skip to higher or lower numbered tracks during playback press the or buttons repeatedly until the desired track n...

Page 24: ...EPEAT T button once The Repeat indicator REP flashes and the selected track will be repeated continuously All Tracks Repeat Press the REPEAT button twice The Repeat REP indicator remains On If necessary press the PLAY PAUSE button to begin playback All the tracks on the disc will be repeated continuously To cancel Repeat Playback press the REPEAT button until the Repeat REP indicator disappears No...

Page 25: ... track to be programmed Example Track 7 3 When track number 7 is flashing in the display press the PROGRAM button again to enter track number 7 in program memory number 1 The track number display returns to 0 4 Press the or buttons to select the next track number to be programmed and when the desired track number is flashing on the display press the PROGRAM button to enter that track in the progra...

Page 26: ...sequence from the memory press the STOP button while the player is at programming mode The programmed sequence is also canceled if the CD door is opened the Tuner mode is selected or the power is switched Off Programmed Repeat Playback You can use the Repeat and Programmed Playback features together to continuously repeat a programmed sequence of tracks if desired First program the desired tracks ...

Page 27: ... to the station that you want to wake you up adjust the VOLUME control to the desired level and then shut the system Off 2 Slide the ALARM 1 and or ALARM 2 selector switches located on the left side panel to the RADIO position The AL 1 and or AL 2 indicators will appear in the main display to confirm that the alarms are On 3 At the selected wake up time the radio will turn on to the selected stati...

Page 28: ...n The AL 1 and or AL 2 indicators will appear in the main display to confirm that the alarms are On 2 At the selected wake up time the electronic buzzer tone alarm will come on It will start softly and gradually increase in volume to wake you gently The buzzer sound will continue for one hour and then shut off automatically and reset itself for the following day To shut the buzzer off sooner you c...

Page 29: ...rack number appears on the display release all the buttons Note The wake up track number you selected remains in the memory until you change it by selecting a different track 4 At the selected wake up time the CD player will turn on to your selected track It will play for one hour or until the end of the disc whichever comes first and then shut off automatically and reset itself for the following ...

Page 30: ... a few minutes extra sleep by pressing the SNOOZE button on the top panel The Snooze function stops the alarm for 9 minutes and then turns the alarm On again When the Snooze function has been activated the appropriate AL 1 or AL 2 indicator flashes in the display CKD5811_080306 p65 3 8 2006 11 01 29 ...

Page 31: ...en shut off automatically 3 To change the amount of Sleep time depress and hold the SLEEP button and press the or buttons to decrease or increase the amount of sleep time from 2 minutes to 99 minutes Note When you change the Sleep timer from the original 30 minute default setting your new setting becomes the new default setting For example if you change the Sleep timer setting from 30 minutes to 4...

Page 32: ...timer setting until you change it again To cancel Nap Timer press the SNOOZE button DIMMER Control The display dimmer control was set to the HI High position at our factory If you find the display to be too bright for sleeping slide the DIMMER switch to the LO Low position PHONES Stereo Headphone Jack This system includes a stereo headphone jack for private listening without disturbing others The ...

Page 33: ...it was manufactured and you experience only the normal nuisance type short duration power interruptions your battery may last for up to 5 years or even longer When the battery power drops below a certain level the indicator will flash When you see this indicator you should change the battery as soon as it is convenient for you to do so To change the battery proceed as follows 1 Purchase a replacem...

Page 34: ... new battery back into the slot in the cabinet 5 Replace the screws that secure the battery holder in the cabinet 6 Turn the radio right side up and confirm that the indicator is no longer flashing or Off if you also have installed a 9V battery 7 Save these instructions You ll have to do this again five to eight years from now CKD5811_080306 p65 3 8 2006 11 01 33 ...

Page 35: ...05 If you notice that the time on your SmartSet clock radio is completely incorrect and the day indicator is also wrong press the MONTH DATE button to see the date If the date display is showing 1 01 January 1st you probably experienced a total memory loss To reset the clock after a total memory loss proceed as follows 1 Follow the instructions on pages 32 33 and install a new CR2430 lithium batte...

Page 36: ... Month Date displays are still correct Make final adjustments if necessary The SmartSet clock memory is now reset and the new lithium battery will maintain it for the next 5 to 8 years depending on the number and duration of the power outages you experience Important Note After resetting the clock don t forget to reset your wake up times and alarm mode settings and sleep timer settings as well CKD...

Page 37: ...t and microscopic debris so gently wiping with a soft cloth should remove most particles Wipe in a straight line from the inside to the outside of the disc Small dust particles and light stains will have absolutely no effect on reproduction quality Clean the disc periodically with a soft lint free dry cloth Never use detergents or abrasive cleaners to clean the disc If necessary use a CD cleaning ...

Page 38: ...s dusty wipe it with a soft dry dust cloth Do not use any wax polish sprays or abrasive cleaners on the cabinet Caution Never allow any water or other liquids to get inside the unit while cleaning Lithium Battery Precautions Dispose of the old battery properly Do not leave it lying around where a young child or pet could play with or swallow it If the battery is swallowed contact a physician immed...

Page 39: ...ling costs and enclose a copy of your proof of purchase Send your unit to Emerson Radio Corp 5101 Statesman Drive Irving TX 75063 This warranty does not cover damage from negligence misuse abuse accident failure to follow operating instructions commercial use rental repairs by an unauthorized facility or products purchased used serviced or damaged outside of the United States THIS WARRANTYGIVES YO...

Page 40: ...EMERSON Part No 16 3010 608 02 Printed in China CKD5811_080306 p65 3 8 2006 11 01 39 ...

Reviews: