


31
© 2021, Elon Group AB. All rights reserved.
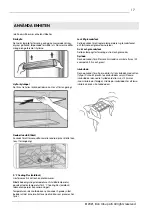
16. Move the upper door to an appropriate position, and then
fix part 2 using screws 1. Before fixing part 2, pass connector
3 through hinge 2, referring back to step 3. (Support the upper
door with your hand while installing it.)
17. Connect electrical connector 1 as shown in the picture, then
fix with screw 3, referring back to step 2.
18. Open the upper door, refit the door racks, then close the
door.
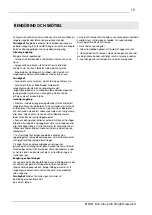
Note:
lf your appliance has a door handle, you should reverse this by
following the instructions below.
Remove the upper door and place it on a smooth surface with
its outside panel upwards. Prise off part 1 and part 4, then
remove screws 2, as shown in the picture. Transfer handle 3 to
the right side, fix it with screws 2, and fit part 4.
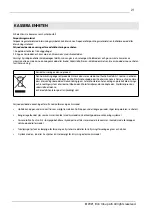
For the convenience of transportation, the door handles are
provided separately in a plastic bag; you can install the door
handles as follows.
1. Prise out the screw covers on the left side of the door and put
them in the plastic bag.
2. Hold the door handle in place on the left side of the door
and line up the screw holes in the handle and the door as
illustrated.
3. Fix the handle in place using the special screws provided in
the plastic bag. Then install the screw covers.
1. Electrical connector
2. Upper hinge cover
3. Self-tapping screw
1. Special flange screws
2. Upper hinge
3. Electrical connector
1. Handle covers
2. Special screws
3. Handle
4 Screw hole cover