45
12.3 Conf. Bat. (configuring batteries)
If you select “No Name” at the “Battery” stage, you now have to
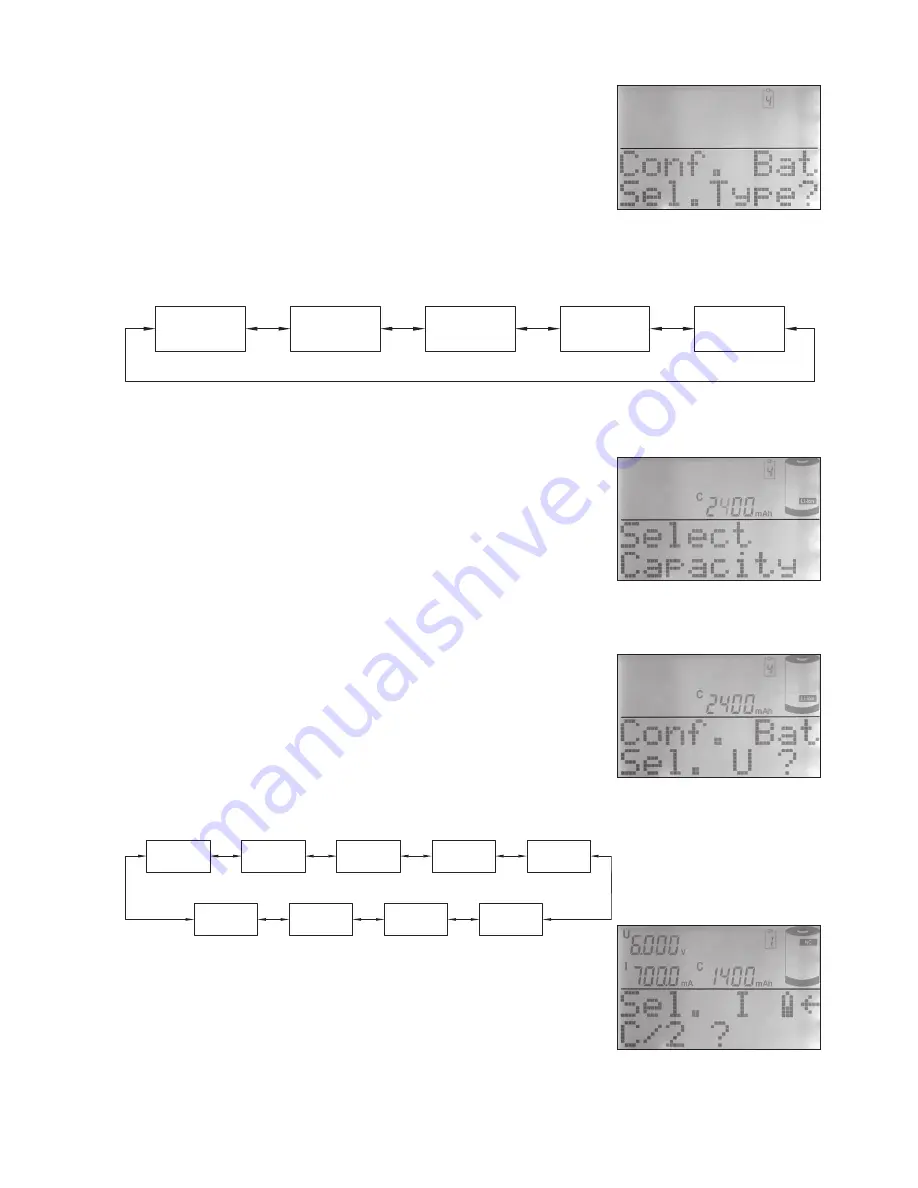
configure the battery to be charged. When you call up the menu, the
window shown in Fig. 11 appears.
First you must confirm your selection with the “OK / Menu” button,
then select the battery technology (type). Confirm your choice again,
then enter the nominal capacity of the pack using the jog dial. To speed
up data input you can edit the point to be changed (flashing) using
the arrow buttons (Fig. 13). Confirm the selected capacity, then enter
the nominal battery voltage in the same manner (Fig. 14). The actual
increments available are determined by the battery technology (type) you selected earlier.
Fig. 12: Supported battery technologies
When you have entered the nominal voltage, select the charge current and the discharge current in
turn; note that the program presents fixed pre-set charge / discharge
rates to speed up the data entry process.
Fig. 15 shows the basic options for charge current and discharge
current, while Fig. 16 shows the associated display window.
When you are selecting the charge current please note that the char-
ge rates 2C and 4C are only available at channel 1 if the (optional)
temperature sensor for super-fast charging is connected to the socket
on the back panel.
For those functions which consist of several automatic charge /
discharge cycles it is possible to enter a defined interval between the
termination of the charge process and the start of the subsequent
discharge process (Fig. 17). A brief press of the “OK / Menu” button
calls up the appropriate data entry window, where the time setting is
entered in the usual way using the jog dial or the arrow buttons. This
completes the battery data input process.
Now press “Return” to confirm your selection - assuming that you do
not wish to make corrections to any of the individual inputs - and the
program returns to “Chan-Menu”, where you can now select the
processing program (“Function”) you wish the charger to carry out
(Fig. 18). The battery data input process described above is not ne-
cessary if you intend to charge a battery whose data is already stored
in the database. In this case you simply select the desired battery from
the database, after which the program moves directly to the selection
menu for the processing program (“Function”).
Fig. 11: Selecting the batte-
ry technology
Fig. 13: Entering the nomi-
nal battery capacity
Fig. 14: Entering the nomi-
nal battery voltage
Fig. 16: Selecting the charge
current
Fig. 15: The fixed pre-set
charge rates of the ALC
8500-2 Expert
C/5
C/10
C/3
C/2
4C
2C
1C
C/20
direct
NC
NiMH
Li Ion
Li Pol
Pb


