background image


More Security, More Convenience


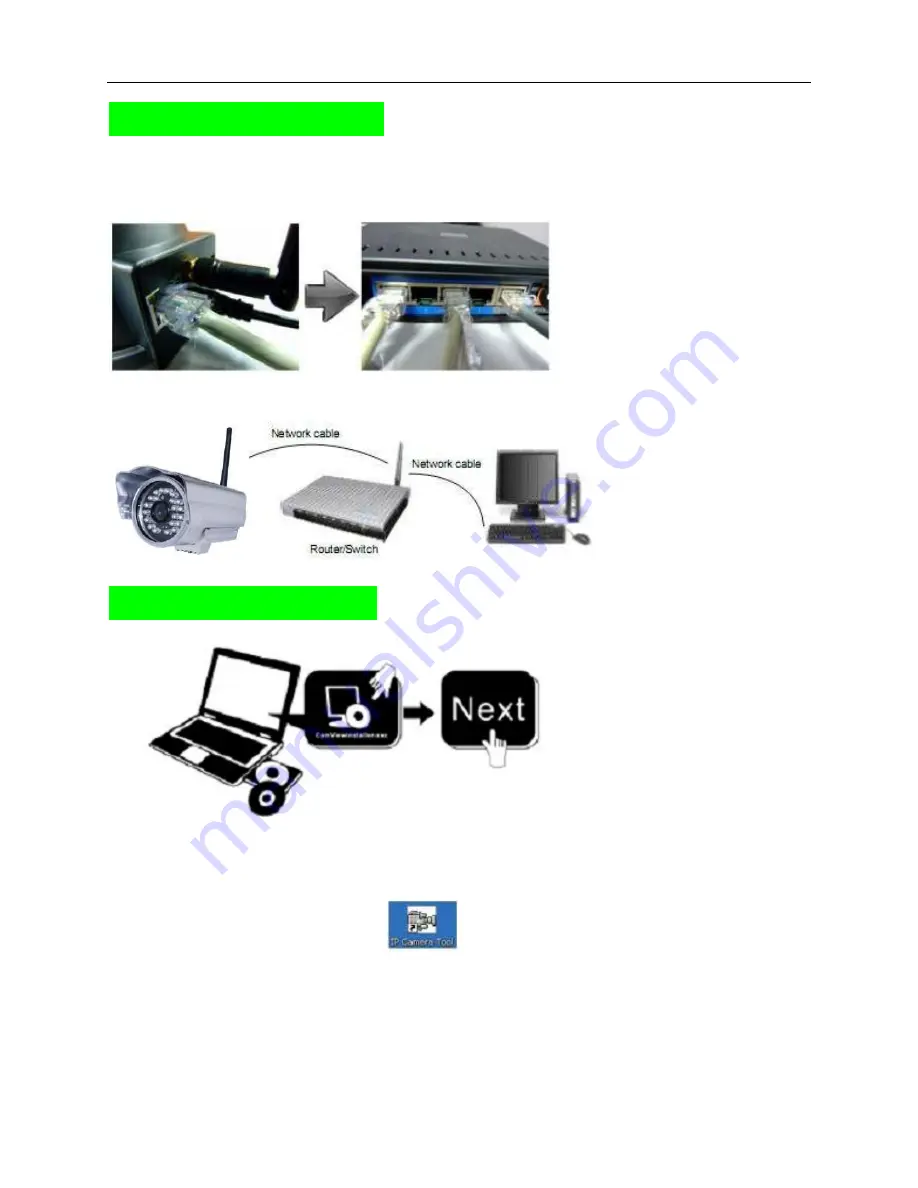
Step 1: Hardware Installation

1.  Install the Wi-Fi antenna. 

2.  Plug the power adaptor into camera. 

3.  Plug the network cable into camera, the other side to the router/switch. 


Step 2: Software Installation


Install the follow software: 

1. 

IP Camera Tool

: Open the CD, click “

IPCamSetup.exe

”—“

Next

”—“

Next

”—“

Close

”. 

2. 

ActiveX

: Click “

Appinstall.exe

”—“

Next

”—“

Install

”—“

Finish

”. 

After this done, the icon “IP Camera Tool” 

will be displayed on desktop.   


Summary of Contents for C903IP

Page 1: ...More Security More Convenience Wired Wireless IP Camera Quick Installation Guide IE Browser Model 1 Model 2 Model 3...

Page 2: ...era 3 Plug the network cable into camera the other side to the router switch Step 2 Software Installation Install the follow software 1 IP Camera Tool Open the CD click IPCamSetup exe Next Next Close...

Page 3: ...e click to go to IE login interface Default username admin Password no password 2 Choose the language English Chinese Spanish Korean German French Italian Portuguese optional 3 Choose the work mode IE...

Page 4: ...fresh the IE interface and login the camera again then will see live video If there is still no live video after run ActiveX please try to enable the ActiveX options of IE security settings please do...

Page 5: ...then try step 1 2 again Q2 How to do Wireless Settings 1 Make sure the router is a wireless router 2 Make sure the Wi Fi antenna installed 3 Make sure whether there is encryption of the WLAN of route...

Page 6: ...DDNS 1 Login the camera Click Network DDNS Service Settings 2 Choose the DDNS there are 2 options Manufacturer s DDNS This domain is provided by manufacturer Third Party DDNS This domain is provided b...

Page 7: ...ird party DDNS please choose the server you use such as 3322 org or dyndns org as below Y ou have to register an account firstly keep the user password host then fill in it Note Only one DDNS can be c...

Page 8: ...Server is the same as your router 4 Set Port Forwarding in the router This is the most important step Set port forwarding in router refer to the IP of your camera correctly then the DDNS will work Be...

Page 9: ...er 2 Choose Firewall select Virtual Servers 3 Input the port except 80 and IP address then click save Note The port and IP address should be the same as Camera DLINK 1 Login the router 2 Choose Advanc...

Page 10: ...ecurity More Convenience After all these 4 steps done then you can use the DDNS freely check the DDNS status from the camera as below and get the link of DDNS for internet view Step Login System Devic...

Page 11: ...e please go to http www whatismyip com Y ou will find the current WAN IP of your device 2 From router Y ou can also get the WAN IP address from your router Q5 How to register a third party DDNS accoun...

Page 12: ...More Security More Convenience 2 Choose Sign Up under FREE 3 Do the follow steps Then choose Add to Cart...

Page 13: ...this account 5 Please login your email box and open the active link you get by email then it will go to the activate page to get this account active Y ou will get all the details of your DDNS such as...

Reviews: