background image


Installation Instructions 

General Introduction 

The Magnetic Detector is used in security or home automation applications to detect 
opening or closing of doors/windows. It consists of two parts; a Detector and a 
Magnet. Opening the protected door/window will remove the magnetic field, sending 
an alarm signal to the gateway. 


Product Overview 


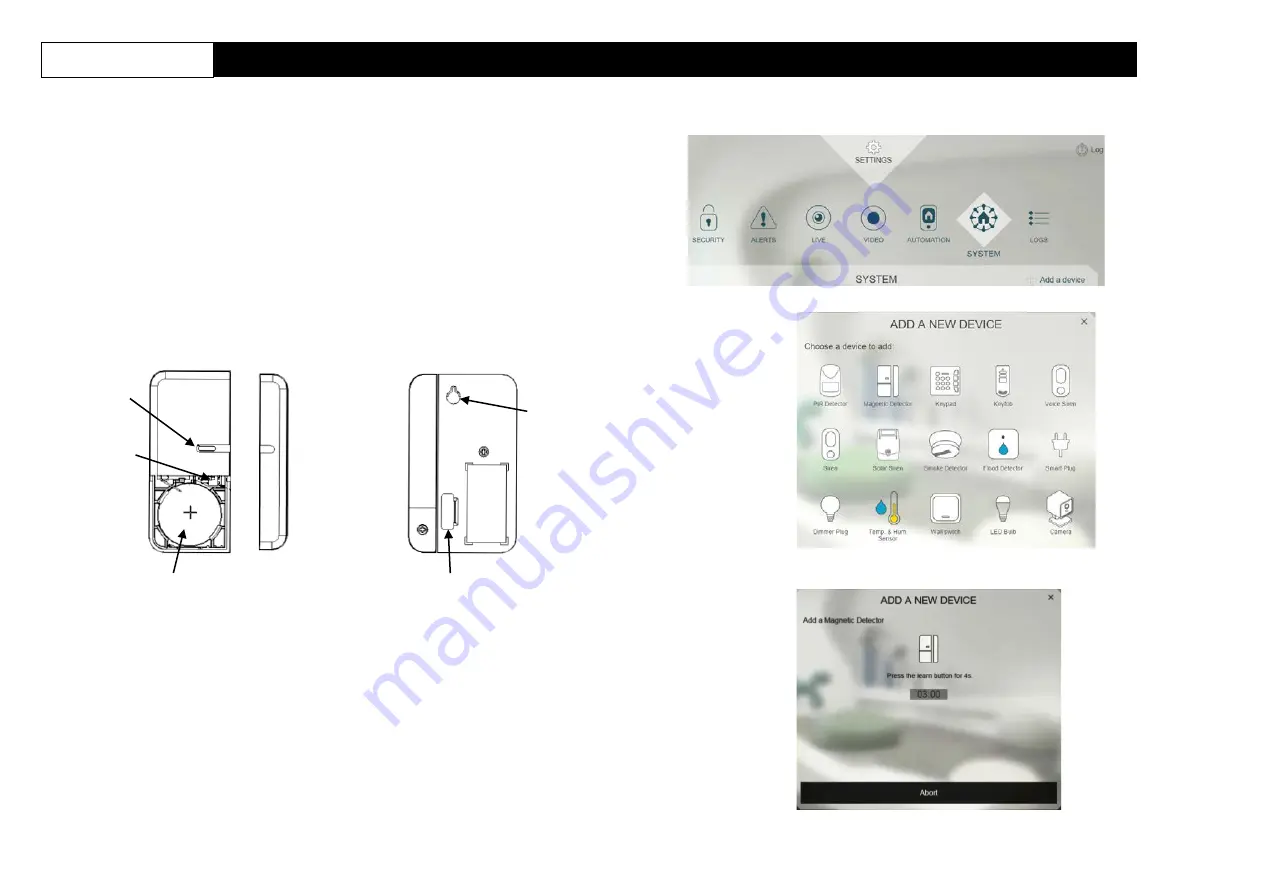
4.  Select “Magnetic Detector”. 


LED 


Tamper 

switch 


Detector 

Magnet 


Battery 


Screw 

mounting 

hole 


Battery Mylar 

(for models with 

battery included) 


5.  The following screen will appear. This means the gateway is entering binding 

mode. 


Binding with Homesys 

1. 

Models with battery included

: The battery is isolated by a mylar film to deactivate 

the detector during shipment. Do not remove the mylar film yet. 

Models without battery included

: Do not insert the battery yet. 

2.  Log into th eELRO Smart Home Alarm


account from a web browser. 

3.  Select “System”, then “Add a Device”. 


6. 

Models with battery included

: Pull out the mylar film, the LED should turn ON. 

AS80MA11 

Magnetic Detector 


Summary of Contents for AS80MA11

Page 1: ...agnet Battery Screw mounting hole Battery Mylar for models with battery included 5 The following screen will appear This means the gateway is entering binding mode Binding with Homesys 1 Models with battery included The battery is isolated by a mylar film to deactivate the detector during shipment Do not remove the mylar film yet Models without battery included Do not insert the battery yet 2 Log ...

Page 2: ... the detector 2 Repeat steps 4 to 5 of the Binding with ELRO Smart Home Alarm section 3 Locate the Tamper switch as shown below Tamper switch 4 Press and hold the Tamper switch for about 4 seconds and release The LED will start to blink repeatedly This implies detector has now entered the binding mode and is waiting to receive binding signals from the gateway 5 Within 5 seconds the LED indicator w...

Page 3: ...e device Please use plastic or wooden spacers to separate the detector and metal surface when required Installation 1 Fit the magnet on the moving part of the door window opposite the detector or vice versa if necessary Use the provided self adhesive tape to secure them in place 2 Make sure the parallel gap between the magnet and detector is less than 20mm and that they are aligned An alarm will b...

Page 4: ...until the LED flashes moderately Release the button The unit enters code binding mode and a 30 second countdown starts 2 Within the 30 second countdown press and hold the link button for more than 6 seconds until the LED turns off 3 Remove the batteries and re insert them again If the LED blinks slowly for 30 seconds this implies the device is reset back to factory mode Specifications Battery CR24...

Reviews: