


Elmo ImageMate Software
Quick Guide
Plano ISD Instructional Technology
Installing Elmo ImageMate Software
1. Go to the
App Depot
on your computer desktop.
2. Double-click the
Elmo—Driver Shortcut
to begin the installation
(it may take a minute to launch).
3. Click through the wizard to install the Elmo software.
Accessing the Elmo Software
1. Turn on your projector and select the
Computer
button on the projector remote control.
2. Turn on the Elmo.
3. Double-click the
ImageMate208
shortcut in the
Administrative Tools
folder in
PISD Apps
.
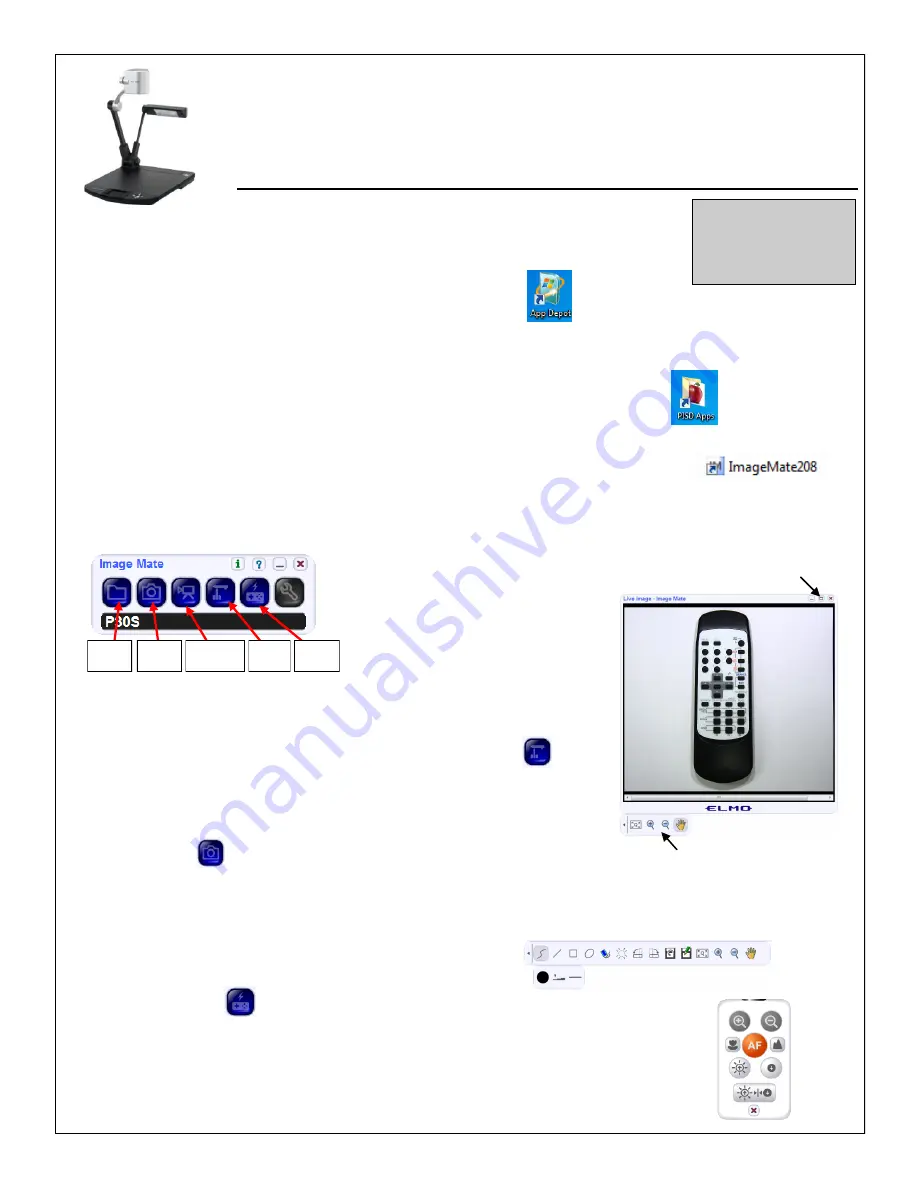
Using the Elmo Image Mate Software
Image Mate Toolbar
Viewing the Elmo on your computer
Your elmo image will automatically appear on your computer screen.
If you close the live image window. Click the Live Image button
on the toolbar.
Full Screen Mode
Maximize the Live Image window to display the image in full screen.
Still Capture
Press the
camera
button on the toolbar to take a picture of your document.
A second window will open with the captured image. This image can be saved as a picture (.jpg) file and can be
inserted into a Word Document (etc.).
A drawing toolbar will appear below the captured image.
These tools allow can be used to draw on the captured image.
Remote Control
The remote control toolbar can be used while viewing your document in full screen mode
to adjust brightness, focus and zoom instead of using the regular Elmo remote control.
Press the
Remote Control
button on the toolbar to view the remote control toolbar.
Support
Don Dempsey 28059
Dana Adams
28092
Maximize
(Full Screen)
Capture
Image
Open
Image
Recording
Tools
Live
Image
Remote
Control
Enlarge/Shrink image (not Zoom)


