background image


  Operate your new scooter in familiar and safe areas. Drive slowly at first, 

and do not travel too far from your home or familiar surroundings until 
you have become accustomed to your scooter’s controls. 

  Fully recharge the battery again. 

  After four or five charging cycles, the batteries are able to receive 100% of 

their peak performance level and are able to last for an extended period of 
time. 


How can I ensure maximum battery life? 

Fully charged deep-cycle batteries provide reliable performance and extended 
battery  life.  Keep  your  scooter’s  batteries  fully  charged  whenever  possible. 
Batteries  that  are  regularly  and  deeply  discharged,  infrequently  charged,  or 
stored without a full charge may be permanently damaged, causing unreliable 
performance and limited service life. 
 

REPLACING YOUR SCOOTER’S BATTERIES 
 
Battery replacement 

1. Removes battery pack from the scooter by releasing the battery pack lock, 

grasping the handle, and lifting up. 

2.Remove all screws that hold the battery pack. 
3. Remove the connectors and replace the used battery with the new one. 


V.    OPERATION 


BEFORE GETTING ONTO YOUR SCOOTER


  Have you fully charged the batteries? See IV. “Batteries and charging” 

  Ensure that the manual freewheel lever in the 

open

 (power driven) position? 

Never leave the manual  freewheel  lever in  the 

close

 position unless  you 

are manually pushing your scooter. 


Ensure that the tiller lock knob is in the locked position? See “Disassembly 

and assembly.” 


OPERATING YOUR SCOOTER 

    After planning your route: 

Summary of Contents for Dis-Chem Voyager II

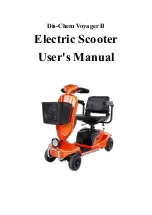
Page 1: ...Dis Chem Voyager II Electric Scooter User s Manual...

Page 2: ...1 TABLE OF CONTENTS INTRODUCTION SPECIFICATIONS III YOUR SCOOTER BATTERY CHARGING OPERATING YOUR SCOOTER ASSEMBLY AND DISASSEMBLY SAFETY INSTRUCTIONS VIII MAINTENANCE IX WARRANTY...

Page 3: ...arket We designed this scooter to restore the dignity equality and personal freedom to provide convenience and comfort This manual contains important information concerning the proper maintenance and...

Page 4: ...13 degree Ground Clearance 50 mm Weight Capacity 100 kg Motor Rated Power 24V 270 W Controller 24V 45A Battery Charger 2A Batteries 2 pcs of 20AH Battery Weight 13 8 kg Braking System Electric Regener...

Page 5: ...When the throttle is completely released it automatically returns to the center stop position the brake is engaged and your scooter will stop Speed adjustment dial This dial allows you to preset your...

Page 6: ...m your scooter Motor transaxle assembly The motor transaxle assembly is an electro mechanical device that converts electrical energy from your scooter batteries into the controlled mechanical energy t...

Page 7: ...Speed regulator 3 Horn button 4 Power switch 5 Forward and backward control 6 LED light switch Fig2 1 Control panel 2 Basket 3 LED light 4 Front wheel 5 Main frame 6 Brake handle 7 Seat height adjuste...

Page 8: ...ve the key from the key switch Plug the 3 pin charger cord into the battery receptacle Plug the charger input into the wall outlet to charge It is recommended that you charge your batteries for 8 to 1...

Page 9: ...h morning to give you a full day of service If you use your scooter once a week or less charge its batteries at least once a week for 12 to 14 hours at a time Keep your scooter batteries fully charged...

Page 10: ...uently charged or stored without a full charge may be permanently damaged causing unreliable performance and limited service life REPLACING YOUR SCOOTER S BATTERIES Battery replacement 1 Removes batte...

Page 11: ...ual then try again 1 PIECES The scooter consists of the following main modules which you can put together or dismantle without using any tools 1 Chassis 3 Seat 4 Battery box 2 PROCEDURE 1 Loosen tille...

Page 12: ...latch forward See figure E Lift the toggle latch buckle up 7 Frame separation push back on the seat post to pivot the scooter rear section rearwards until the rear sections Is standing vertically on i...

Page 13: ...immunity level which would provide useful protection from the more common sources of radiated EMI The immunity level of this powered scooter as shipped with no further modification is not known There...

Page 14: ...ence EMI from sources such as radio and TV stations amateur radio HAM transmitters two way radios and cellular phones can affect powered scooter and motorized scooters Following the warnings listed be...

Page 15: ...band CB radios and cellular phones while your scooter is turned ON 2 Be aware of nearby transmitters such as radio or TV stations and hand held or mobile two way radios and try to avoid coming close t...

Page 16: ...radio or TV stations and hand held or mobile two way radios and try to avoid coming close to them BE AWARE that adding accessories or components or modifying your scooter may make it more susceptible...

Page 17: ...se If within such warrant period any such products shall be proven to be defective such product shall be repaired or replaced at the manufacturer s option To guarantee your benefits and the excellent...

Page 18: ...the unit or its part without authorization 5 The warranty has expired 6 Incidents caused by uncontrollable factors such as typhoon Floods fire earthquake or war III DISCLAMER It is not intended to be...

Page 19: ...__________ State ______Zip Code _____________ Telephone ________________ Date of Purchase ______________ Selling Dealer __________________________________________ Dealer s Telephone Phone ____________...

Reviews: