background image

7

ELITE GNS 430W

The small left knob is used to tune the kilohertz (kHz) value of 
the standby frequency for the COM transceiver or the VLOC 
receiver, whichever is currently selected by the tuning cursor. 
Press this knob momentarily to toggle the tuning cursor 
between the COM and VLOC frequency fi elds.

The COM Flip-fl op button is used to swap the active and 
standby COM frequencies. Press and hold to select the 
emergency frequency of 121.500.

The VLOC Flip-fl op button is used to swap the active and 
standby VLOC frequencies.

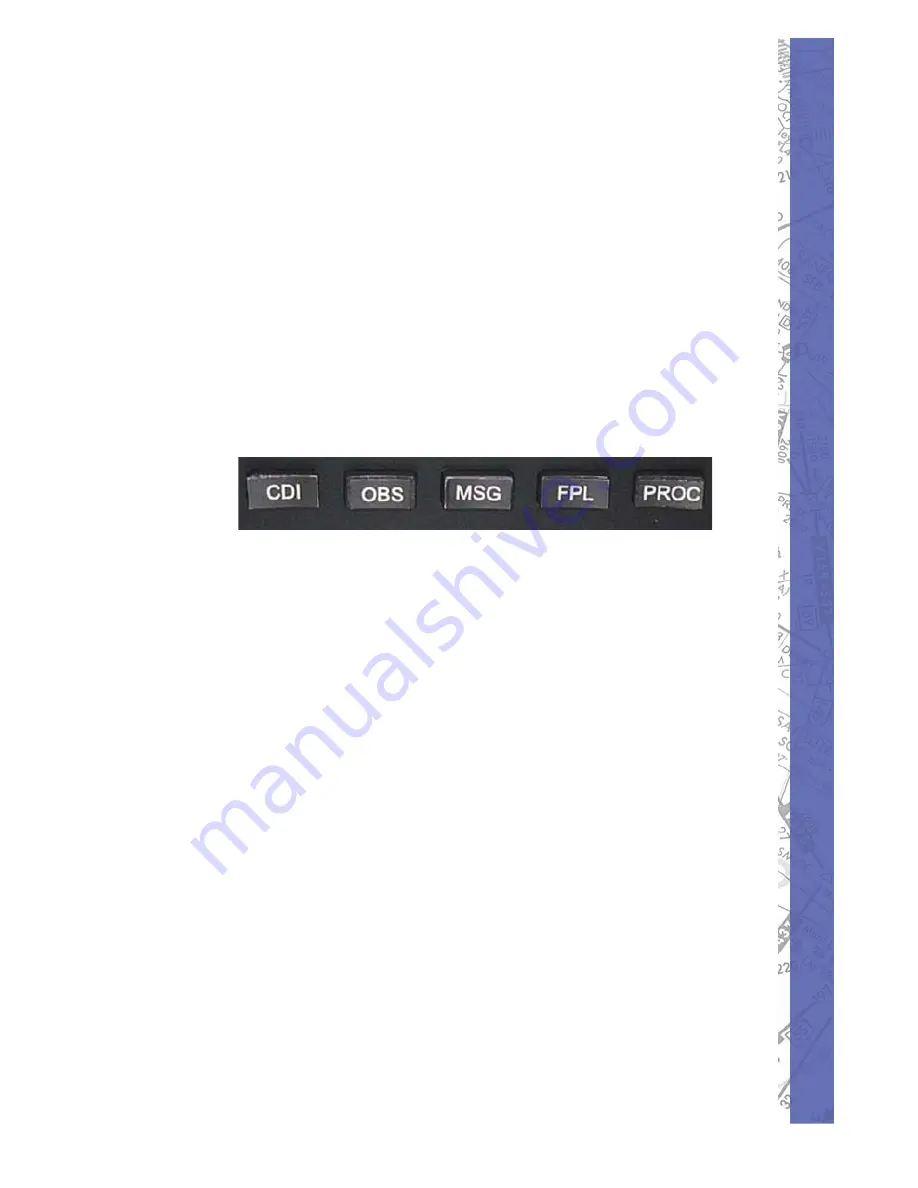
BOTTOM ROW KEYS

The CDI button is used to toggle which navigation source 
(GPS or VLOC) drives the external HSI or CDI. 

The OBS button is used to select either manual or automatic 
sequencing of waypoints. Pressing the OBS button selects 
OBS mode which retains the current ‘active to” waypoint as 
the navigation reference even after passing the waypoint. 
In other words, it prevents sequencing to the next waypoint. 
Pressing the OBS button again returns the unit to normal 
operation with automatic waypoint sequencing. When OBS 
mode is selected, the pilot may set the desired course to or 
from a waypoint by using the “Select OBS Course” pop-up 
window or an external OBS selector on the HSI or CDI.

The MSG button is used to view system messages and 
pilot alerts such as warnings, and requirements.

The FPL button allows the pilot to create, edit, activate, 
invert fl ight plans as well as access approaches, departures 
and arrivals. The closest point to a fl ight plan feature is 
also available by pushing the FPL button.

Summary of Contents for GNS 430W

Page 1: ...1 ELITE GNS 430W GNS 430W INSTALLATION AND QUICK REFERENCE GUIDE ELITE Part No 88293 001 Rev 10 08 ...

Page 2: ...system ELITE assumes the end user is familiar with the basic principles of flying pilotage GPS navigation and overall aeronautical knowledge This guide is not designed to be a step by step operational instructional guide on the operation of ELITE software or hardware nor is it intended to be a complete user guide of the Garmin GNS 430W GPS system ELITE highly recommends users of the ELITE software...

Page 3: ...Guide ELITE GNS 430W control module One USB cable One WiBu key ELITE V8 5 software DVD ELITE software box not shown ELITE software Quick Start Installation Guide not shown Control module mounting kit Velcro or rubber feet not shown If you are missing any of the above components contact ELITE Customer Service at 407 277 7700 or 800 557 7590 ...

Page 4: ...e plugging the flat end into your computer s USB port or USB hub ensure the selector switch is in the DOWN or POS 1 The selector switch is reserved for future enhancements however it must remain in POS 1 for complete functionality With your computer powered ON once the flat end of the USB cable is inserted into the USB plug on your computer or USB hub follow the on screen instructions carefully so...

Page 5: ...ap range 7 MENU 8 ENT enter 9 Small left knob tunes kHz push to activate cursor 10 Large left knob tunes mHz 11 CDI Selector 12 OBS Selector 13 MSG message 14 FPL flight plan 15 PROC procedures 16 Large right knob selects page groups 17 Small right knob selects pages within groups push 18 to activate cursor and to select alpha numeric ...

Page 6: ... The ELITE version of the GNS 430W does NOT provide optional displays and programming such as GDL49WeatherDatalink GDL69 69AXMSatelliteDatalink or XM Satellite radio TAWS or GPWS terrain alerts LEFT HAND KEYS AND KNOBS The COM Power Volume knob controls unit power and communications radio volume Press momentarily to disable the automatic squelch mode The VLOC Volume knob controls audio volume for ...

Page 7: ...ct either manual or automatic sequencing of waypoints Pressing the OBS button selects OBS mode which retains the current active to waypoint as the navigation reference even after passing the waypoint In other words it prevents sequencing to the next waypoint Pressing the OBS button again returns the unit to normal operation with automatic waypoint sequencing When OBS mode is selected the pilot may...

Page 8: ...oint and establishes a direct course to the selected destination This course is indicated by a magenta line from the aircraft to the destination waypoint The MENU button displays a specific list of operational options This options list allows the pilot to access additional features or make settings changes as they relate to the currently displayed page The CLR button is used to erase information r...

Page 9: ...oups of NAV WPT AUX or NRST Push the knob momentarily to display the on screen cursor The cursor allows the pilot to enter data and or make a selection from a list of options The knob is also used to move the target pointer up clockwise or down counter clockwise when the map panning function is active ...

Page 10: ...lcome page will appear briefly while the unit performs a self test followed by the display of several brief pages relating to obstacle terrain airport data etc are self tested to ensure proper operation Once the unit s self test is completed the Database Confirmation Page is displayed showing the effective and expiration dates of the navigation database Note The database dates shown will NOT refle...

Page 11: ...ight instruments such as the CDI HSI RMI if equipped and or external annunciators After verifying the proper operation of the flight instruments push the ENT key to display the Satellite Status Page When the Satellite Status Page is displayed keep in mind the number and position of depicted satellites is simulated and does not reflect current satellite position The Satellite Status Page is for tra...

Page 12: ...lay screen is divided into three distinct windows or areas The left 1 4 of the display screen provides a COM window with active and standby frequencies as well as the VLOC with both standby and active frequencies The active frequency is displayed in white characters while the standby frequencies are shaded blue The right 3 4 of the display consists of a GPS window which shows the various navigatio...

Page 13: ...o move the tuning cursor to the VLOC window Then use the small and large left knobs to select the desired frequency The COM Flip flop and the VLOC Flip flop keys are used to activate the desired frequency If the turning cursor is not currently in the desired window such as COM or VLOC press the small left knob marked PUSH C V momentarily Turn the large left knob to dial in the desired mHz value Fo...

Page 14: ... for the highlighted cursor location The GNS 430W s main pages are divided into four separate page groups NAV WPT AUX and NRST Each group is composed of multiple pages The page groups are selected using the large right knob The individual pages are selected using the small right knob The bottom right corner of the screen indicated which page group is currently being displayed the number of screens...

Page 15: ...up is WPT selected by the large right knob and have page one of 10 selected Selected by the small right knob To select the desired page group press and hold the CLR button to select the default NAV page Turn the large right knob to select the desired page group ...

Page 16: ...SUPPLEMENTS 16 NAV PAGE GROUP The NAV Page Group includes six pages Default NAV Map NAV COM ...

Page 17: ...17 ELITE GNS 430W Position Satellite Status VNAV ...

Page 18: ...SUPPLEMENTS 18 WPT PAGE The WPT Page Group includes ten pages Airport Location Airport Runway Environment Airport Frequencies ...

Page 19: ...19 ELITE GNS 430W Airport Approach Airport Arrival Procedure Airport Departure Procedure ...

Page 20: ...SUPPLEMENTS 20 Intersection NDB VOR ...

Page 21: ...21 ELITE GNS 430W User Defined Waypoints ...

Page 22: ...SUPPLEMENTS 22 AUX PAGE GROUP The WPT Page Group includes ten pages Flight Planning Utility Setup 1 ...

Page 23: ...23 ELITE GNS 430W Setup 2 Note The flight plan pages are selected by pressing the FPL button and using the small right knob to select the desired page ...

Page 24: ...wed by the ENT button When the word Done is flashing push the ENT button again to activate You may also select an airport s tower frequency by turning the big right knob and highlighting the appropriate frequency Push ENT to load the frequency Push ENT again when the word Done is highlighted Use the COM Flip flop to switch from the standby to active mode ...

Page 25: ...25 ELITE GNS 430W ...

Page 26: ...SUPPLEMENTS 26 Nearest Intersections Can utilize the Direct To feature Nearest NDBs Can utilize the Direct To feature Nearest VORs Can utilize the auto tune feature ...

Page 27: ...27 ELITE GNS 430W Nearest USER waypoints Can utilize the Direct To feature Nearest ARTCC Can utilize the auto tune feature Nearest FSS Can utilize the auto tune feature ...

Page 28: ...N Press the FPL button 1 Turn the small right knob to display the Flight 2 Plan Catalog Turn the large right knob to highlight Create 3 New Flight Plan and select ENT A blank Flight Plan page appears Using the 4 big and small right knobs enter the identifier of the departure waypoint and push the ENT key ...

Page 29: ...29 ELITE GNS 430W Repeat all the steps in step 4 above to enter 5 additional waypoint data After all waypoint data has been entered 6 press the small right knob to return to the Flight Plan Catalog page ...

Page 30: ...hlighted Use the small and large right knobs to enter the identifier of the desired destination waypoint The destination waypoint can be an airport fix navaid VORTAC NDB or a user defined waypoint Push the ENT button to confirm your selection The word Activate will be highlighted in flashing white Push the ENT button again to activate the Direct To function ...

Page 31: ...ROM THE MAP PAGE Select the MAP page from the NAV Page Group Press the small right knob to display the Group panning cursor Arrow Turn the right left knobs to position the cursor at the desired location Press the Direct To button over the desired location ...

Page 32: ...ctivate will be highlighted in flashing white Push the ENT button again to activate the waypoint route and to navigate to the selected waypoint The route of flight will be drawn with a solid magenta line from the current position to the selected waypoint ...

Page 33: ...IEWING AIRPORT INFORMATION Turn the large right knob to select the WPT Page Group WPT appears in the lower right corner of the screen Turn the small right knob to select the desired page in this example runway information ...

Page 34: ...SUPPLEMENTS 34 Push the small right knob to highlight the various runways ...

Page 35: ... right knob to the selected runway Push the ENT button The primary tower frequency will be flashing with green highlighting Press ENT to autotune the frequency in the COM standby mode Use the COM Flip flop to make the frequency active ...

Page 36: ...MENTS 36 AUTO TUNE A FREQUENCY FROM A LIST Select an airport using the right large and small knobs Turn the small right knob to the third page of the WPT page Push the right small knob to activate the cursor ...

Page 37: ...through to the desired frequency Press the ENT button which will move the selected frequency into the COM standby box Press the COM Flip flip button to make the frequency active Note the RX in the COM box which indicates the COM receiver is receiving audio ...

Page 38: ...SUPPLEMENTS 38 DEFAULT NAV PAGE The following symbols are used on the Default NAV page below the CDI to depict the active leg of a flight plan or a Direct to ...

Page 39: ...39 ELITE GNS 430W MAP PAGE The following symbols are used on the MAP Page which depict airports navaids intersections and heliports ...

Page 40: ...SUPPLEMENTS 40 BOTTOM ROW ANNUNICATORS AND MESSAGES ...

Page 41: ... a published approach Push the PROC button to display the 1 procedures page Turn the large right knob and highlight 2 Select Approach followed by pushing the ENT button A window will be displayed on top of the 3 primary display showing all the available procedures Turn the large right knob to move the highlight bar to the desired procedure and push the ENT button ...

Page 42: ...t and push the ENT button Turn the large right knob to highlight Load 5 or Activate and push the ENT key Selecting Load will add the procedure into the active flight plan and allow uninterrupted navigation and reserve the approach for quick activation when needed Selecting Activate overrides the enroute portion of the active flight plan proceeding directly to the approach portion ...

Page 43: ...LOC receiver portion of the GNS 430 and the external CDI or HSI for primary navigation and course guidance To confirm this reminder window you must highlight Yes and push the ENT button Push the CDI button to select VLOC which 7 will assign VLOC guidance to the CDI HSI On the Flight Mode Annunciator and verify VLOC is illuminated white You do NOT want to see the green GPS illuminated ...

Page 44: ...will be displayed including waypoints fixes holds etc For additional details push the small right 9 knob to move the highlight bar on the particular aspect of the approach The word Done will be highlighted in white Push the ENT which will return to the Active Flight Plan page ...

Page 45: ...ve published RNAV GPS approaches with many replacing the old NDB approach procedures by GPS overlays As an approach is selected there may be ILS 09L or RNAV 09L with GPS noted to the right If an approach with GPS is available and selected the approach procedure can be flown using the GPS receiver ...

Page 46: ...final approach course and guides you to intercept the final approach fix before reaching the Final Approach Fix With the desired approach loaded in the 1 active flight plan push the PROC button to display the procedures page Turn the large right knob to highlight Activate 2 Vector To Final Push the ENT key 3 The Default NAV page will be displayed 4 providingcourseguidance distance bearing ground s...

Page 47: ...oint in the active flight plan or by using the Direct to button By doing so the desired waypoint will automatically appear when choosing the SelectApproach mode from the procedures page Otherwise you must first choose an airport followed by the approach procedure WhenagroundbasedILSapproachisloaded the desired frequency is automatically placed in the standby position in the VLOC window Push the VL...

Page 48: ...he lower right corner of the display During the approach alerts will advise course changes with standard rate turns such as TURN TO 195º will appear in the lower right corner of the display For GPS approaches RAIM will monitor satellite conditions and alert using the word INTEG at the bottom left corner of the display if protection limits can not be maintained Should the INTEG alert occur the GPS ...

Page 49: ... however guidance through the turn is not provided except through the roll mode of steering equipped autopilots Alerts for proper holding pattern entry such as HOLD DIRECT are displayed in the lower right corner of the display Waypoint sequencing is automatically suspended indicated by SUSP in the lower left center of the display at the holding waypoint Push the OBS button again to return to autom...

Page 50: ... parallel or direct As the holding pattern is flown an automatic time appears on the default NAV page The timer will automatically reset on the outbound side of the hold when abeam the hold waypoint The timer will once again reset as the inbound turn is begun within approximately 30º of the inbound course The GPS will provide course guidance ONLY on the inbound side of the holding pattern Guidance...

Page 51: ... the approach as LNAV VNAV it can be flown to LNAV VNAV minimums MAPR Indicates the system is providing missed approach integrity and CDI full scale deflection 0 3nm ENR Indicates the system is in en route mode CDI full scale deflection is 2 0nm or current CDI scale selection whichever is smaller TERM Indicates the system is in terminal mode CDI full scale deflection is 1 0nm or current CDI scale ...

Page 52: ... not be regarded as affecting the validity of any trademark or service mark Apple Logo and Macintosh are registered trademarks of Apple Computer IBM and PC are trademarks of International Business Machines Corporation Windows 95 98 2000 Me NT and XP are trademarks of Microsoft Corporation Jeppesen is a trademark of Jeppesen Sanderson Inc LICENSE AGREEMENT This is a license agreement and not an agr...

Page 53: ...his Agreement Such a transfer terminates your license You may not rent or lease the Software or otherwise transfer or assign the right to use the Software except as stated in this paragraph You may not reverse engineer decompile modify disassemble or create derivative works based upon the Software in whole or part Term and Termination This license terminates if you fail to comply with any provisio...

Page 54: ...imitation of liability for consequential or incidental damages the above limitation may not apply to you This Agreement constitutes the entire agreement between you and Licensor regarding the Software and supersedes any other information advice or representation given to You by Licensor or its dealers distributors agents or employees This Agreement is governed by the laws of the State of Florida U...

Page 55: ...e you currently hold What is the highest pilot license you currently hold Private Instrument Neither I m not a pilot Which ELITE software do you currently own ELITE Core ELITE Premium None this is my first ELITE purchase What is your main reason for purchasing the ELITE software package with the GNS 430W control module I m a simulator enthusiast I want to learn the 430W for my own knowledge My air...

Page 56: ...ame ________________________________________ Address ________________________________________ ________________________________________ ________________________________________ Phone ________________________________________ Complete and return to ELITE Simulation Solutions 5700 Dot Com Court Suite 1010 Oviedo Florida 32765 ...

Reviews: