background image

input the correct combination, then the handle can be pressed down to

unlock

3.5 The lock will stay unlocked

until the handle is lifted.

3.6 Initial Combination

3.7

For all the new lock, the pre-set initial combination is “123678”

3.8 Change the combination(User’s code)-----

If the user want to change the combination.

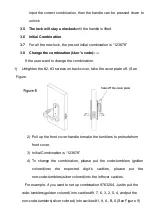
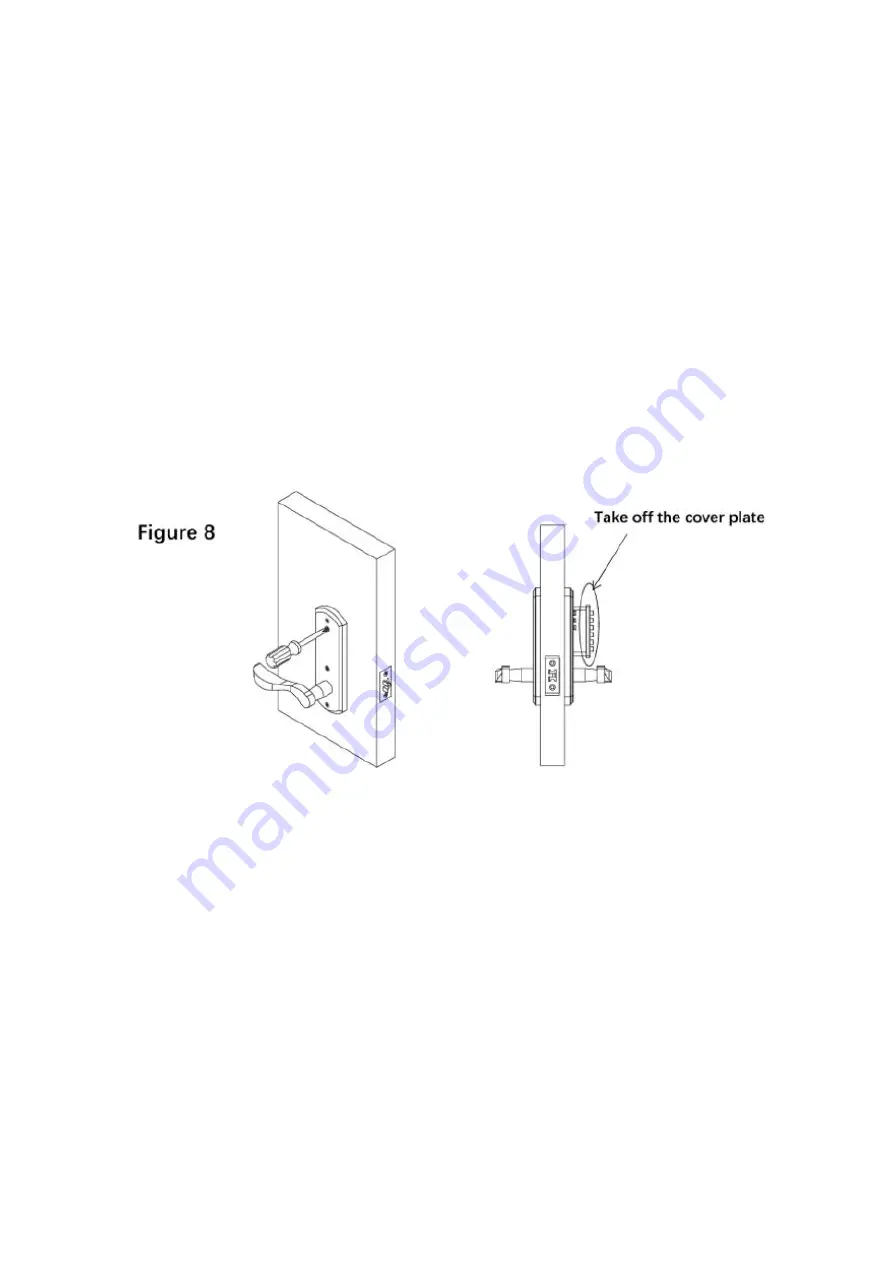
1) Untighten the #2, #3 screws on back cover, take the cover plate off. (See

Figure

2) Pull up the front cover handle to make the tumblers to protrudefrom

front cover.

3) Initial Combination is “123678”

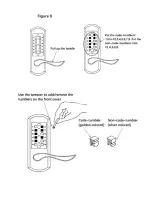
4) To change the combination, please put the code-tumblers (golden

colored)into the expected digit’s cavities, please put the

non-code-tumblers(silver colored)into the leftover cavities.

For example, if you want to set up combination 9763254. Just to put the

code-tumblers(golden colored) into cavities#9, 7, 6, 3, 2, 5, 4, and put the

non-code-tumblers(silver colored) into cavities #1, 8, A, B, 0.(See Figure 9)

Summary of Contents for MKS Series

Page 1: ...Stainless Steel Mechanical Keyless Entry Lock Series MKS www elemakelocks com...

Page 2: ...ur life more safe and stylish Series MKS is aproducts family of the high grade stainless steel mechanical keyless door lock It s ideal for residential homes apartment buildings offices schools hospita...

Page 3: ...or for installation with the drilling template 2 3 Step 3 Install the latch front cover back cover cover plate 3 How to operate the lock 3 1 Open the door from exterior when locked 3 2 Open the door f...

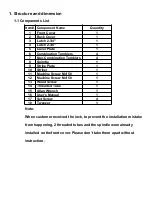
Page 4: ...4 8 Spindle 1 9 Strike Plate 1 10 Striker 1 11 Machine Screw M4 50 1 12 Machine Screw M4 50 1 13 Wood Screw 1 14 Threaded Tube 1 15 Allan Wrench 1 16 User s Manual 1 17 Set Screw 4 18 Tweezer 1 Note...

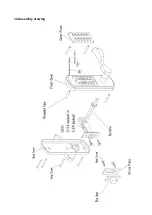
Page 5: ...1 2Assembly drawing...

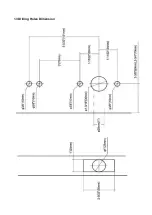
Page 6: ...1 3Drilling Holes Dimension...

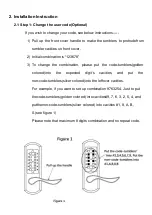
Page 7: ...678 3 To change the combination please put the code tumblers golden colored into the expected digit s cavities and put the non code tumblers silver colored into the leftover cavities For example if yo...

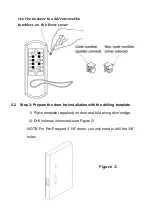
Page 8: ...lling template 1 Place template supplied on door and fold along door s edge 2 Drill holes as instructed see Figure 2 NOTE For Pre Prepped 2 1 8 doors you only need to drill the 3 8 holes Figure 2 Use...

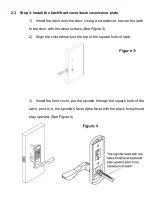
Page 9: ...ver secure the latch to the door with the wood screws See Figure 3 2 Align the colored mark on the top of the square hole of latch 3 Install the front cover put the spindle through the square hole of...

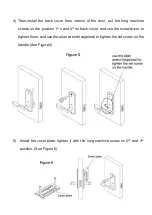
Page 10: ...crews on the position 1st n and 4th on back cover and use the screw driver to tighten them and use the allan wrench supplied to tighten the set screw on the handle See Figure 5 5 Install the cover pla...

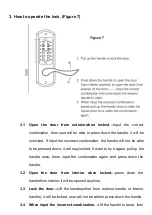
Page 11: ...move to next step B Press the handle from interior the latch can be moved back it s good move to next step C Pull up the handle from interior once then input the correct combination press the exterior...

Page 12: ...down it will stay locked If want to try it again pull up the handle once them input the combination again and press down the handle 3 2 Open the door from interior when locked press down the handlefro...

Page 13: ...ver take the cover plate off See Figure 2 Pull up the front cover handle to make the tumblers to protrudefrom front cover 3 Initial Combination is 123678 4 To change the combination please put the cod...

Page 14: ......

Page 15: ...ost to avoid loss to any customers 4 2 What if out of return replacement window or out of warranty time In most case we will continuously to provide the return replacement service or other support to...

Page 16: ...e Lock Products Online customer service Facebook csservice168 163 com Skype customerservice products Email address customerservice elemakelocks com Customer service center address Eastern 25752 W 143r...

Reviews: