7. INSTALLING THE CONTROLLER
Once the appropriate temperature measurement method
has been chosen and the proper controller installation
location has been determined, the installation process
can begin. Follow the steps described below:
loosen the fixing screw and remove
the controller cover,
put all cables through the opening
in the bottom of the cover,
using two screws, positioned vertically,
tighten the controller to the installation box,
referring to the diagram, connect all cables
to the connection strip,
install the front cover and tighten the fixing screw.
15
Summary of Contents for ELR-10
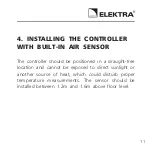
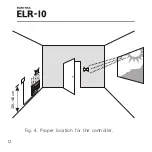
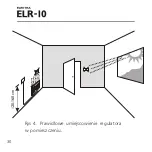
Page 12: ...120 160 cm Fig 4 Proper location for the controller 12...
Page 17: ...Fig 5 Electronic temperature controller ELEKTRA ELR 10 1 2 3 20 0 5 10 1 5 30 2 5 0 1 17...
Page 30: ...120 160 cm Rys 4 Prawid owe umiejscowienie regulatora w pomieszczeniu 30...
Page 35: ...Rys 5 Elektroniczny regulator temperatury ELEKTRA ELR 10 35 1 2 3 20 0 5 10 1 5 30 2 5 0 1...
Page 39: ...www elektra otoplenie ru RU Instrukcja monta u PL Installation manual UK...
Page 40: ...ELEKTRA ELR 10 b y ELEKTRA ELR 10 40...
Page 41: ...41 1 2 3 4 5 40 6 7 8...
Page 42: ...1 ELEKTRA ELR 10 ELEKTRA ELR 10 42...
Page 43: ...1 C D 1 43...
Page 44: ...C D A D 2 C D A D 3 44 40...
Page 45: ...A B C D 1 A B C D 2 A B C D 3 1 45...
Page 46: ...2 II N L N L1 3600 N N L1L 2 46 3600 230 50...
Page 47: ...47 3 c a 50...
Page 48: ...3 ELEKTRA 48...
Page 49: ...49 4 o a 120 160 c...
Page 50: ...120 160 c 4 50...
Page 51: ...51 5 O 40 1 4 3...
Page 52: ...52 6 230 50 cos 1 3600 5 35 0 5 1 IP 20 80 82 36 LED...
Page 53: ...7 53...
Page 54: ...54 8 0 1 1 c 2 LED o 3...
Page 55: ...5 ELEKTRA ELR 10 55 1 2 3 20 0 5 10 1 5 30 2 5 0 1...


