User guide
ELI
O
S
ECH001XN111-A4 – 07/2022
131
Measurement on ECHOSOFT
6.6 Audiometry
5.
This button allows you to import new lists on the software (If you have no list installed, click on this button to
import lists previously downloaded from
http://echodia.fr/firmware/vocal/
6.
This option will pause the list after each word.
7.
Set the stimulation power, can by modify with
«up»
and
«down»
keys.
Select the stimulation ear side, can be switched with
«L/R»
keys.
8.
The whole green area is dedicated to the masking noise. In the upper part, the power and frequency band of the
noise are indicated. Just below, the box "
Continuous masking
" allows to have a permanent masking (if it is not
checked, the masking starts at the same time as the stimulation). The lower part consists of the tabs for selecting
the masking mode, and the corresponding setting:
•
Differential mode: The value set via the cursor is the gap between the stimulation power and the mask-
ing power (ex: for a differential of -30dB, for a stimulation at 80dB, the masking power will be 50dB).),
•
Manual mode: The value set with the cursor is the masking power.
•
9.
The "
Headphones
" button allows you to see which stimulator is active and to switch between the two audio outputs.
Thus, it is possible to connect the headphones and the bone vibrator (each to one of the audio outputs) and switch
between the air conduction and bone conduction test.
•
A click on the keyboard icon shows a reminder of all keyboard shortcut (See subsection
10.
Indicator light show that a stimulation is in progress,
–
Green: no stimulation,
–
Red: stimulation is running.
11.
Save or create a new measurement,
12.
Real-time display of the percentage of correctly answered words according to the intensity. A right click on a point
gives the possibility to delete it and to check which words have been pronounced correctly
6.6.3
Use of the microphone
ECH
O
SOFT
allows you to use the computer microphone to communicate with the patient, in the case where the
patient is in an audiometry cabin and the operator is outside.
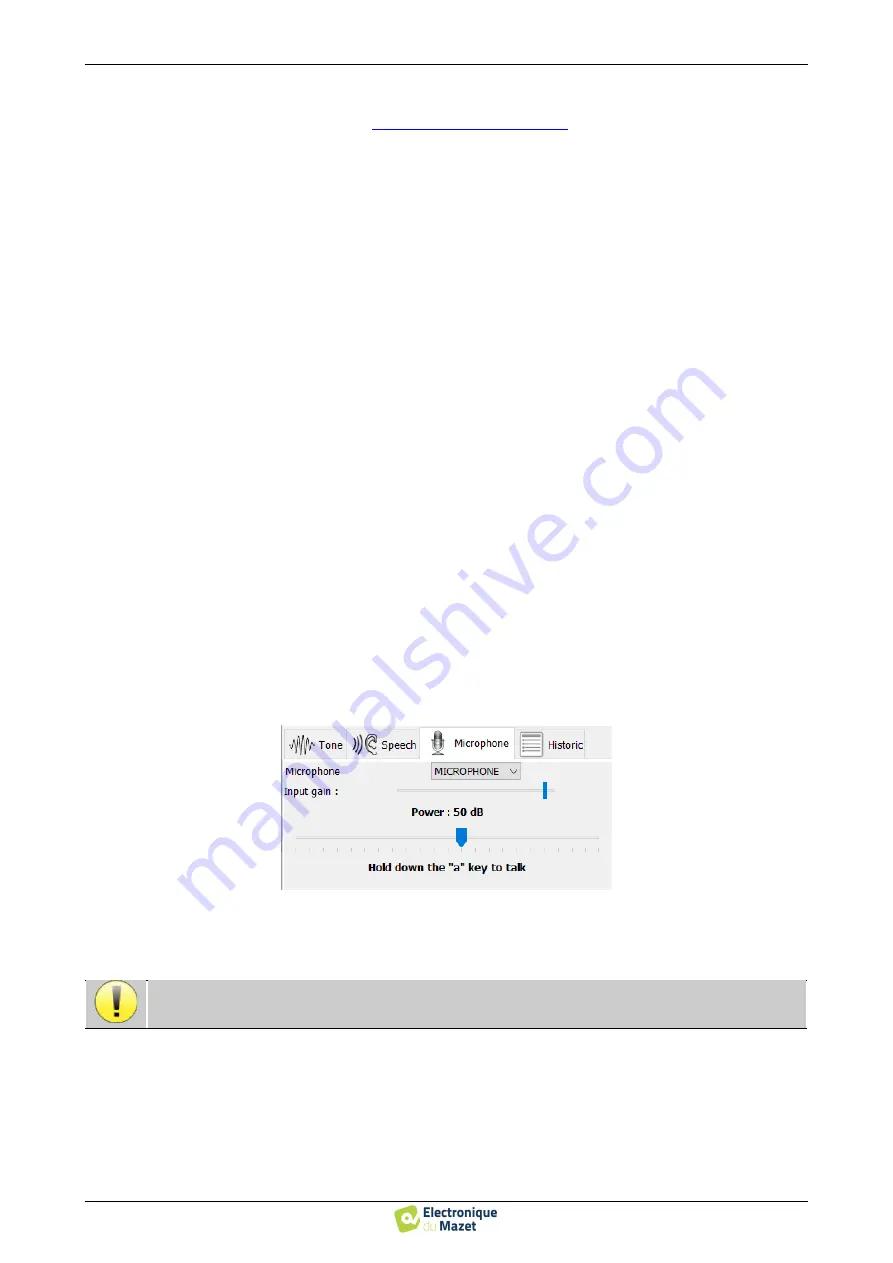
The microphone setup is done thanks to the third tab at the top left of the audiometry window.
It is possible to select the input device (the device list will depend on the computer and the sound card).
It is possible to adjust the input gain (this will depend on the computer and the sound card).Finally, you need to adjust
the power at which the sound will be sent in the patient headphone.
To use the microphone, keep the “A” key pressed and speak (the light indicator at the bottom left then turns red).
The volume is indicative, it may vary depending on the microphone, computer and speech of the operator.


