background image

User manual

7

2 Warranty terms and exclusions

If the purchase of this product includes warranty coverage, warranty is provided in line with local regulations and sub-
ject to the product being installed and used for the purposes as designed, and as described within the appropriate
equipment documentation.
Warranty will be applicable where the customer has used only genuine spare parts and has performed maintenance
in accordance with Electrolux Professional user and maintenance documentation made available in paper or elec-
tronic format.
Electrolux Professional strongly recommends using Electrolux Professional approved cleaning, rinse and descaling
agents to obtain optimal results and maintain product efficiency over time.
The Electrolux Professional warranty does not cover:

• service trips cost to deliver and pick up the product;
• installation;
• training on how to use/operate;
• replacement (and/or supply) of wear and tear parts unless resulting from defects in materials or workmanship re-

ported within one (1) week from the failure;

• correction of external wiring;
• correction of unauthorized repairs as well as any damages, failures and inefficiencies caused by and/or resulting

from;
– insufficient and/or abnormal capacity of the electrical systems (current/voltage/frequency, including spikes and/
or outages);
– inadequate or interrupted water supply, steam, air, gas (including impurities and/or other that does not comply
with the technical requirements for each appliance);
– plumbing parts, components or consumable cleaning products that are not approved by the manufacturer;
– customer’s negligence, misuse, abuse and/or non-compliance with the use and care instructions detailed within
the appropriate equipment documentation;
– improper or poor: installation, repair, maintenance (including tampering, modifications and repairs carried out
by third parties not authorized third parties) and modification of safety systems;
– Use of non-original components (e.g.: consumables, wear and tear, or spare parts);
– environment conditions provoking thermal (e.g. overheating/freezing) or chemical (e.g. corrosion/oxidation)
stress;
– foreign objects placed in- or connected to- the product;
– accidents or force majeure;
– transportation and handling, including scratches, dents, chips, and/or other damage to the finish of the product,
unless such damage results from defects in materials or workmanship and is reported within one (1) week of deliv-
ery unless otherwise agreed;

• product with original serial numbers that have been removed, altered or cannot be readily determined;
• replacement of light bulbs, filters or any consumable parts;
• any accessories and software not approved or specified by Electrolux Professional.
Warranty does not include scheduled maintenance activities (including the parts required for it) or the supply of
cleaning agents unless specifically covered within any local agreement, subject to local terms and conditions.
Check on Electrolux Professional website the list of authorized customer care.

Summary of Contents for WH6-6

Page 1: ...User manual Washer extractor WH6 6 Type W 55H Original instructions 438917890 EN 2022 08 09 ...

Page 2: ......

Page 3: ... 3 3 Hygiene 15 4 3 4 Restaurant 16 4 3 5 Camping 17 4 3 6 Coin operated machines 18 4 4 Additional functions 19 4 5 When program has ended 20 5 Timer 21 6 Error codes 22 7 Maintenance 23 7 1 General 23 7 2 Time for maintenance 23 7 3 Every day 23 7 4 Detergent container 24 7 4 1 Deliming 24 7 5 Drain 25 7 6 Water inlet 26 7 7 Maintenance to be carried out by qualified service personnel 26 8 Dispo...

Page 4: ......

Page 5: ...requency are stated in the installation manual Stationary appliances not fitted with means for disconnection from the supply mains having a contact separation in all poles that provide full disconnection under overvolt age category III the instructions state that means for disconnection must be incorpo rated in the fixed wiring in accordance with the wiring rules The openings in the base shall not...

Page 6: ...ones which may influence your physical and cognitive interaction with it have been assessed and certified A product which exhibits ergonomic features in fact shall fulfil specific ergonomic requirements belonging to three different areas Polytechnic Biomedical and Psychosocial usability and satisfaction For each of these areas specific tests with real users have been performed The product was ther...

Page 7: ...nd or other that does not comply with the technical requirements for each appliance plumbing parts components or consumable cleaning products that are not approved by the manufacturer customer s negligence misuse abuse and or non compliance with the use and care instructions detailed within the appropriate equipment documentation improper or poor installation repair maintenance including tampering...

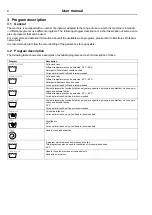
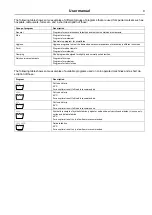
Page 8: ...oad is recommended NORMAL WHITE 1 Cotton and terry Different temperatures can be selected 40 C 95 C Detergent with bleach should be used For an optimal result full load is recommended MILD 1 Synthetic example of synthetic fabrics polyester polyamide polyacrylic and elastan viscose poly cotton and delicate fabrics Different temperatures can be selected 40 C 60 C For an optimal result half load is r...

Page 9: ...lightly and normally soiled textiles Quick service restaurants Programs for mops Programs for workwear Programs for fatty clothes The following table shows some examples of available programs used on coin operated machines and a short de scription of those Program Description COLD 1 Cotton and terry 40 C For an optimal result full load is recommended WARM 1 Cotton and terry 60 C For an optimal res...

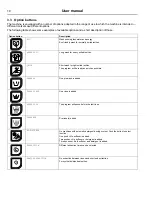
Page 10: ... textiles QUICK Short wash for light soiled textiles The program will be ready as quick as possible PREWASH One pre wash is added EXTRA RINSE One rinse is added STOP RINSE STOP The program will pause before the last rinse PRERINSE Pre rinse s added NO SOFTENER On machines with automatic detergent dosing system Push the button to select function One push No softener is added Two pushes No softener ...

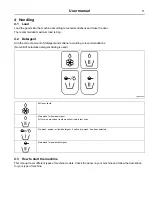
Page 11: ...dations Not valid if automatic detergent dosing is used fig X00963 Softener liquid Main wash for liquid detergent Alt for mop machines liquid mop chemicals in last rinse Pre wash powder or liquid detergent if option pre wash has been selected Main wash for powder detergent 4 3 How to start the machine This manual cover different types of machine models Check the panel on your machine and follow th...

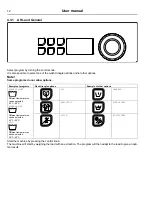
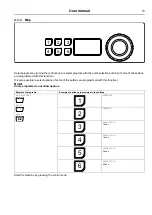
Page 12: ...ons Example of other options NORMAL COLOUR 1 Different temperatures can be selected 30 C 60 C NORMAL WHITE 1 Different temperatures can be selected 40 C 95 C MILD 1 Different temperatures can be selected 40 C 60 C ECO PREWASH HEAVY SOIL EXTRA RINSE QUICK NO SOFTENER Start the machine by pressing the control knob The machine will start by weighing the load with an extraction The program will then a...

Page 13: ...ction It is also possible to select options if some of the buttons are programmed with this function Note Some programs do not allow options Example of programs Example of options programmed in the buttons MICROFIBRE 90 1 MOP 85 1 RINSE 1 PRERINSE 2 PREWASH 3 EXTRACTION 10 sec 4 EXTRACTION 15 sec 5 EXTRACTION 30 sec 6 EXTRACTION 45 sec Start the machine by pressing the control knob ...

Page 14: ... buttons 3 6 on the panel are always used as option buttons and can not be changed At delivery the buttons are programmed to work as options buttons The function of the buttons can be changed at any time Information on how to program the buttons can be found in the Programming and configuration manual and should only be done by a skilled authorized person ...

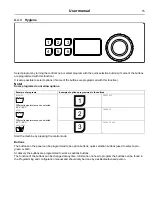
Page 15: ... Different temperatures can be selected 40 C 95 C MILD 1 Different temperatures can be selected 40 C 60 C HANDWASH 1 PRERINSE 2 PREWASH 3 EXTRA RINSE Start the machine by pressing the control knob Buttons The buttons on the panel can be programmed to be option buttons quick selection buttons used to select a pro gram or both At delivery the buttons are programmed to work as options buttons The fun...

Page 16: ...es can be selected 60 C 95 C 3 DELICATE 30 1 Start the machine by pressing the control knob Buttons The buttons 1 6 on the panel are programmed to be quick selection buttons used to select a program The function of the buttons can be changed at any time Information on how to program the buttons can be found in the Programming and configuration manual and should only be done by a skilled authorized...

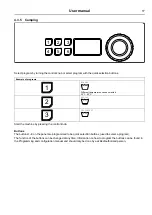
Page 17: ...ed 30 C 95 C 2 MILD 40 1 3 DELICATE 30 1 Start the machine by pressing the control knob Buttons The buttons 1 6 on the panel are programmed to be quick selection buttons used to select a program The function of the buttons can be changed at any time Information on how to program the buttons can be found in the Programming and configuration manual and should only be done by a skilled authorized per...

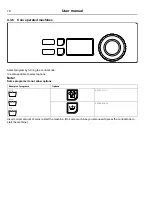
Page 18: ...knob It is also possible to select options Note Some programs do not allow options Example of programs Options COLD 1 WARM 1 HOT 1 HEAVY SOIL EXTRA RINSE Insert correct amount of coins to start the machine On some machines you also need to press the control knob to start the machine ...

Page 19: ...ton the program menu will be displayed Select a new program and start by pressing the control knob start button Rapid advance Select RAPID ADVANCE and activate When pressing the control knob start button a list with all program steps will be displayed Select desired program step from the list by turning the control knob pressing the temperature button s and press the control knob start button to a...

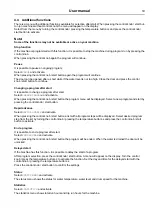
Page 20: ...will perform of the selected program Press the control knob start button to confirm the settings 4 5 When program has ended Leave the door open when ready and do not close the detergent container all the way in it shall be a bit open This is to prevent that moisture stays in the machine and develop bacteria and mould ...

Page 21: ...bmenus BACK TIME ENABLED ALL DAYS MONDAY TUESDAY WEDNESDAY THURSDAY FRIDAY SATURDAY SUNDAY REMOVE OCCASION Activate the TIME menu to program the time Set the time by turning the control knob and save when ready Select from the list and activate the day days one by one by pressing the control knob A filled square indicates that the day is activated Press BACK to exit and save the changes by selecti...

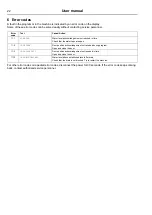
Page 22: ...he water taps are open 11 2 DOOR OPEN Door position acknowledgement not received during program Open and close the door 11 3 DOOR LOCK FAIL Door position acknowledgement not received in time Open and close the door 11 10 DRUM NOT DRAINED Water level above established level after drain Check that the drain is not blocked Try to restart the machine For other error codes or repeated error codes disco...

Page 23: ...tenance if available a telephone number and or a tag will also be displayed The machine can be used meanwhile However the message will keep coming back until the service is performed The message will disappear after about 30 seconds or if the control knob or any button is pressed 7 3 Every day Check that the door is locked during a program Make sure the door cannot be opened until after the progra...

Page 24: ...rgent container was placed in the machine A fig 7212A Use a screwdriver or a similar tool to press against the inner walls on the spraying plate to clean from limescale Press carefully and not too hard since pressing too hard might damage the spraying plate fig X02330 7 4 1 Deliming When deliming is needed Use the special machine cleaning program If it is not available contact authorized service p...

Page 25: ...nd pull out the hose Remove the plug A to empty the drain into for example a baking plate or similar A fig 7388 Pull the clamp upwards and pull out the filter parts Clean the filter parts and the pump housing with for example a small brush fig 7389 When remounting place the cut on the filter part downwards when inserting it Make sure the connections are tight ...

Page 26: ...lter at the water inlet Clean if necessary Demount the hose to the water inlet and pull out the filter A When remounting make sure the filter is in position and that the connections are tight A fig 7387 7 7 Maintenance to be carried out by qualified service personnel Contact qualified service personnel to perform the following maintenance Once a year Inspect the interior of the machine during an a...

Page 27: ...ed and that the refrigerator and heat pump components are special waste assimilable with urban waste The symbol on the product indicates that this product should not be treated as domestic waste but must be correctly disposed of in order to prevent any negative consequences for the environment and human health For further information on the recy cling of this product contact the local dealer or ag...

Page 28: ...Electrolux Professional AB 341 80 Ljungby Sweden www electroluxprofessional com ...

Reviews: