background image

82

4. On the upper part of the cabinet.
Put the hinge pin on the other side.

5. On the lower part of the cabinet.
a. Unscrew the hinge.
b. Remove the door-closing fittings
from the hinge and put the hinge pin
on the other side. Then attach the
supplied door-closing fitting.

4

5 a

5 b

6. a. Remove the door-closing fitting
from the bottom of the door.
b. Then secure the supplied
door-closing fitting on the other side.
c. Secure the lower hinge.

a

b

c

6

Remove any play in the door by
adjusting the height of the lower hinge
with the supplied spanner. Secure with
the lock-nut.

Raise the cabinet and replace the
ventilation grille.

7. To transfer the handle.
Unscrew the screws. Fit the handle

onto the opposite side by turning it
one half circle. Press the supplied
plastic plugs into the holes to which
the handle was previously fitted.

7

Put the cabinet in position. Check that
the appliance is level. See the section
"Positioning the cabinet".

Electrical connection
Connect the cabinet to a grounded
electrical outlet.
Voltage: 230 V.
Fuse: 10 A.
Refer to the rating plate on the left
inside the cabinet.

Summary of Contents for SG245N10

Page 1: ...Benutzerininformation Notice d yutilisation Istruzioni per l uso User manual Gefrier Congélateur Congelatore Freezer SG245N10 SG293N10 ...

Page 2: ...We were thinking of you when we made this product ...

Page 3: ...e The Electrolux ambition is to offer a wide variety of quality products that make your life more comfortable You find some examples on the cover in this manual Please take a few minutes to study this manual so that you can take advantage of the benefits of your new machine We promise that it will provide a superior User Experience delivering Ease of Mind Good luck ...

Page 4: ...sehold waste Instead it shall be handed over to the applicable collection point for the recycling of electrical and electronic equipment By ensuring this product is disposed of correctly you will help prevent potential negative consequences for the environment and human health which could otherwise be caused by inappropriate waste handling of this product For more detailed information about recycl...

Page 5: ...wing 76 Cabinet interior 76 HINT and TIPS 76 Saving energy 76 Food Storage 77 Protect the environment 77 MAINTENANCE and CLEANING 77 Removing the ventilation grille 78 Cleaning 78 To change the lamp 78 Defrosting the freezer 78 When the appliance is not in use 78 SOMETHING NOT WORKING 79 Technical specification 81 INSTALLATION 81 Mains Cable 81 Unpacking 81 Remove the transport supports 82 Cleanin...

Page 6: ...t For the User The cabinet is intended for keeping foodstuff in a normal household as explained in this instruction booklet Do not keep explosive gases or liquids in the refrigerator or freezer compartment They may explode and cause injury and material damage Do not place food products directly against the air hole on the rear wall Do not keep carbonised drinks or bottles in the freezer compartmen...

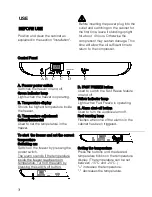
Page 7: ...mostat Used to set the temperature in the freezer D FAST FREEZE button Used to switch the Fast Freeze feature on and off Yellow indicator lamp Lights when Fast Freeze is operating E Alarm shut off button Used to turn the audible alarm off Red warning lamp Flashes when one of the alarms in the cabinet has been triggered To start the freezer and set the correct temperature Switching on Switch on the...

Page 8: ...onfirmation the sound will buzz with a short signal The thermometer is now set for display of warmer food products To return to normal display repeat the same process As confirmation the buzzer will give off a loud signal 18 ACTION FREEZE Information It is very important to press the buttons at exactly the same time Please observe that the display will not change immediately Instead the temperatur...

Page 9: ...erates as follows When the temperature inside the freezer again falls below 11 C the audible alarm stops The temperature display and the red warning lamp will flash to indicate than an alarm was triggered When the alarm shut off button is pressed the display then displays the warmest temperature inside the cabinet during the alarm phase and the display stops flashing By referring to the temperatur...

Page 10: ...et is operating and keeps the set temperature one day after switching it on for the first time Only after then should the freezer be used to freeze fresh foodstuff Suitable storage periods Food purchased in frozen condition Follow the advice on the maximum storage period indicated on the packaging Fresh food frozen at home Fatty and salty food should not be kept frozen for more than three months C...

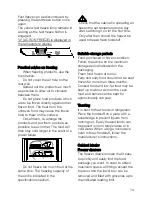
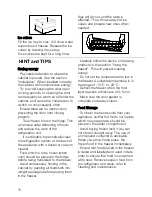
Page 11: ...cleaner Food which is to be frozen when cool should be placed in the fridge before being transfered to the freezer Avoid unnecessary frosting in the cabinet by packing all foodstuffs into airtight packages before placing them in the freezer Carefully follow the advice on freezing products in the section Using the freezer This will prevent wasting energy Do not set the temperature too low in the fr...

Page 12: ...ving the ventilation grille Unsnap the upper edge of the grille by pulling outward downward Then pull the grille straight out to completely remove it Cleaning Clean the cabinet at regular intervals Disconnect the appliance from electricity supply Clean the inside and accessories with warm water and bicarbonate of soda 5ml to 0 5 litre water Rinse and dry thoroughly Regularly check the door seals a...

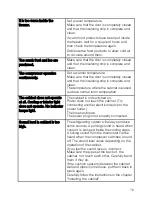
Page 13: ...G NOT WORKING Before contacting your local Service Force Centre check the following point Problem Possible cause Remedy is displayed in the temperature display Please contact your local Electrolux Service Force Centre Audible alarm flashing red warning lamp It is too warm inside the freezer Switch off the audible alarm by pressing the alarm off button The audible alarm could have been triggered by...

Page 14: ... The cabinet does not operate at all Cooling or interior light does not operate No indicator lamps light The cabinet is not switched on Power does not reach the cabinet Try connecting another electrical device to the power outlet The fuse has blown The power plug is not properly connected Sound level in cabinet is too high The refrigerating system will always produce some sounds A pulsing sound is...

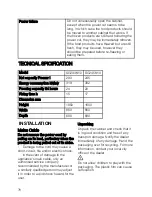
Page 15: ...850 1650 Width 660 660 Depth 680 680 INSTALLATION Mains Cable Do not remove the power cord by pulling on its lead particulary when the product is being pulled out of its niche Damage to the cord may cause a short circuit fire and or electric shock In the event of damage to the appliance s main cable only an authorised service company recommended by the manufacturer or a similarly qualified person ...

Page 16: ...he appliances As shown in the illustration Make sure that the power plug is not squashed or damaged by the back of the product A damaged power plug may overheat and cause a fire Do not place heavy articles or the product itself on the power cord there is a risk of a short circuit and fire If the power plug socket is loose do not insert the power plug there is a risk of electric shock or fire To ob...

Page 17: ...e is correct for each climate classification Climate classifi cation for an ambient temperature of 10 C to 32 C 16 C to 32 C 18 C to 38 C 18 C to 43 C SN N ST T If the cabinet is placed in a corner and the side with the hinges facing the wall the distance between the wall and the cabinet must be at least 10 mm to allow the door to open enough so that the baskets can be removed The power plug must ...

Page 18: ...6 Remove any play in the door by adjusting the height of the lower hinge with the supplied spanner Secure with the lock nut Raise the cabinet and replace the ventilation grille 7 To transfer the handle Unscrew the screws Fit the handle onto the opposite side by turning it one half circle Press the supplied plastic plugs into the holes to which the handle was previously fitted 7 Put the cabinet in ...

Page 19: ...nweisung und Betriebsvorschriften unsachgerechter Installation sowie bei Beschädigung durch äussere Einflüsse höhere Gewalt Eingriffe Dritter und Verwendung von Nicht Original Teilen Nous octroyons sur chaque produit 2 ans de garantie à partir de la date de livraison ou de la mise en service au consommateur documenté au moyen d une facture d un bon de garantie ou d un justificatif d achat Notre ga...

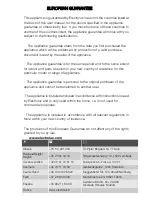
Page 20: ...s personal to the original purchaser of the appliance and cannot be transferred to another user The appliance is installed and used in accordance with instructions issued by Electrolux and is only used within the home i e is not used for commercial purposes The appliance is installed in accordance with all relevant regulations in force within your new country of residence The provisions of this Eu...

Page 21: ... Risløkkvn 2 0508 Oslo Österreich 43 18 66 400 Herziggasse 9 1230 Wien Polska 48 22 43 47 300 ul Kolejowa 5 7 Warsaw Portugal 35 12 14 40 39 39 Quinta da Fonte Edificio Gonçalves Zarco Q 35 2774 518 Paço de Arcos Romania 40 21 451 20 30 Str Garii Progresului 2 S4 040671 RO Schweiz Suisse Svizzera 41 62 88 99 111 Industriestrasse 10 CH 5506 Mägenwil Slovenija 38 61 24 25 731 Electrolux Ljubljana d ...

Page 22: ...86 ...

Page 23: ...87 ...

Page 24: ...8184090 00 27 012007 www electrolux com ...

Reviews: