background image

CONTENTS

1. SAFETY INFORMATION....................................................................................2

2. SAFETY INSTRUCTIONS..................................................................................4

3. INSTALLATION.................................................................................................. 6

4. PRODUCT DESCRIPTION................................................................................ 8

5. DAILY USE....................................................................................................... 10

6. HINTS AND TIPS............................................................................................. 13

7. CARE AND CLEANING....................................................................................16

8. TROUBLESHOOTING......................................................................................16

9. TECHNICAL DATA...........................................................................................18

10. ENERGY EFFICIENCY.................................................................................. 19

WE’RE THINKING OF YOU

Thank you for purchasing an Electrolux appliance. You’ve chosen a product that

brings with it decades of professional experience and innovation. Ingenious and

stylish, it has been designed with you in mind. So whenever you use it, you can

be safe in the knowledge that you’ll get great results every time.

Welcome to Electrolux.

Visit our website for:

Get usage advice, brochures, trouble shooter, service information:

www.electrolux.com/webselfservice

Register your product for better service:

www.registerelectrolux.com

Buy Accessories, Consumables and Original spare parts for your appliance:

www.electrolux.com/shop

CUSTOMER CARE AND SERVICE

Always use original spare parts.

When contacting our Authorised Service Centre, ensure that you have the

following data available: Model, PNC, Serial Number.

The information can be found on the rating plate.

 Warning / Caution-Safety information

 General information and tips
 Environmental information

Subject to change without notice.

1.   SAFETY INFORMATION

Before the installation and use of the appliance, carefully

read the supplied instructions. The manufacturer is not

responsible for any injuries or damages that are the

result of incorrect installation or usage. Always keep the

www.electrolux.com

2

Summary of Contents for LIT60336

Page 1: ...LIT60336 EN Hob User Manual ...

Page 2: ...rvice information www electrolux com webselfservice Register your product for better service www registerelectrolux com Buy Accessories Consumables and Original spare parts for your appliance www electrolux com shop CUSTOMER CARE AND SERVICE Always use original spare parts When contacting our Authorised Service Centre ensure that you have the following data available Model PNC Serial Number The in...

Page 3: ...Do not let children play with the appliance Keep all packaging away from children and dispose of it appropriately Keep children and pets away from the appliance when it operates or when it cools down Accessible parts are hot If the appliance has a child safety device it should be activated Children shall not carry out cleaning and user maintenance of the appliance without supervision 1 2 General S...

Page 4: ...imilarly qualified persons in order to avoid a hazard WARNING Use only hob guards designed by the manufacturer of the cooking appliance or indicated by the manufacturer of the appliance in the instructions for use as suitable or hob guards incorporated in the appliance The use of inappropriate guards can cause accidents 2 SAFETY INSTRUCTIONS 2 1 Installation WARNING Only a qualified person must in...

Page 5: ...ers and extension cables Make sure not to cause damage to the mains plug if applicable or to the mains cable Contact our Authorised Service Centre or an electrician to change a damaged mains cable The shock protection of live and insulated parts must be fastened in such a way that it cannot be removed without tools Connect the mains plug to the mains socket only at the end of the installation Make...

Page 6: ... or without cookware Do not put aluminium foil on the appliance Cookware made of cast iron aluminium or with a damaged bottom can cause scratches on the glass glass ceramic Always lift these objects up when you have to move them on the cooking surface This appliance is for cooking purposes only It must not be used for other purposes for example room heating 2 4 Care and cleaning Clean the applianc...

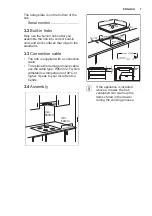
Page 7: ...3 Connection cable The hob is supplied with a connection cable To replace the damaged mains cable use the cable type H05V2V2 F which withstands a temperature of 90 C or higher Speak to your local Service Centre 3 4 Assembly min 50mm min 500mm min 12 min 60 min 28 If the appliance is installed above a drawer the hob ventilation can warm up the items stored in the drawer during the cooking process E...

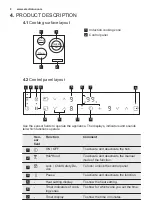
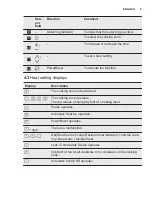
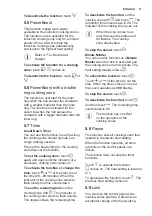
Page 8: ...ich functions operate Sen sor field Function Comment 1 ON OFF To activate and deactivate the hob 2 Hob Hood To activate and deactivate the manual mode of the function 3 Lock Child Safety De vice To lock unlock the control panel 4 Pause To activate and deactivate the function 5 Heat setting display To show the heat setting 6 Timer indicators of cook ing zones To show for which zone you set the time...

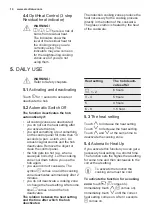
Page 9: ...Display Description The cooking zone is deactivated The cooking zone operates The dot means a change by half of a heating level Pause operates Automatic Heat Up operates PowerBoost operates digit There is a malfunction OptiHeat Control 3 step Residual heat indicator continue cook ing keep warm residual heat Lock Child Safety Device operates Incorrect or too small cookware or no cookware on the coo...

Page 10: ...ct or clean the control panel the hob gets too hot e g when a saucepan boils dry Let the cooking zone cool down before you use the hob again you use incorrect cookware The symbol comes on and the cooking zone deactivates automatically after 2 minutes you do not deactivate a cooking zone or change the heat setting After some time comes on and the hob deactivates The relation between the heat settin...

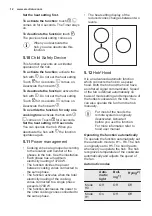
Page 11: ...h slowly the time counts down To see the remaining time set the cooking zone with The indicator of the cooking zone starts to flash quickly The display shows the remaining time To deactivate the function set the cooking zone with and touch The remaining time counts back to 00 The indicator of the cooking zone goes out When the time comes to an end the sound operates and 00 flashes The cooking zone...

Page 12: ...power between cooking zones connected to the same phase The function activates when the total electricity loading of the cooking zones connected to a single phase exceeds 3700 W The function decreases the power to the other cooking zones connected to the same phase The heat setting display of the reduced zones changes between two levels 5 12 Hob Hood It is an advanced automatic function which conn...

Page 13: ... a certain period of time After that time the system deactivates the fan automatically and prevents you from accidental activation of the fan for the next 30 seconds Operating the fan speed manually You can also operate the function manually To do that touch when the hob is active This deactivates automatic operation of the function and allows you to change the fan speed manually When you press yo...

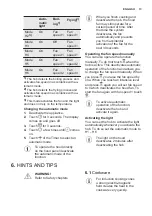
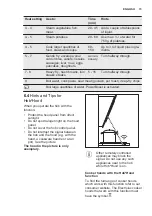
Page 14: ... made of different materials a sandwich construction whistle sound you use a cooking zone with a high power level and the cookware is made of different materials a sandwich construction humming you use a high power level clicking electric switching occurs hissing buzzing the fan operates The noises are normal and do not indicate any malfunction 6 3 Examples of cooking applications The correlation ...

Page 15: ...quantities of water PowerBoost is activated 6 4 Hints and Tips for Hob Hood When you operate the hob with the function Protect the hood panel from direct sunlight Do not spot halogen light on the hood panel Do not cover the hob control panel Do not interrupt the signal between the hob and the hood e g with the hand a cookware handle or a tall pot See the picture The hood in the picture is only exe...

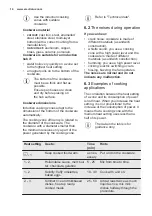
Page 16: ...After cleaning wipe the hob dry with a soft cloth Remove shiny metallic discoloration use a solution of water with vinegar and clean the glass surface with a cloth 8 TROUBLESHOOTING WARNING Refer to Safety chapters 8 1 What to do if Problem Possible cause Remedy You cannot activate or op erate the hob The hob is not connected to an electrical supply or it is connected incorrectly Check if the hob ...

Page 17: ...or oper ate the hood manually Automatic Heat Up does not operate The zone is hot Let the zone become suffi ciently cool The highest heat setting is set The highest heat setting has the same power as the function The heat setting changes between two levels Power management oper ates Refer to Daily use The sensor fields become hot The cookware is too large or you put it too near to the controls Put ...

Page 18: ...plate Give also three digit letter code for the glass ceramic it is in the corner of the glass surface and an error message that comes on Make sure you operated the hob correctly If not the servicing by a service technician or dealer will not be free of charge also during the warranty period The instructions about the Service Centre and conditions of guarantee are in the guarantee booklet 9 TECHNI...

Page 19: ...appliances Part 2 Hobs Methods for measuring performance 10 2 Energy saving You can save energy during everyday cooking if you follow below hints When you heat up water use only the amount you need If it is possible always put the lids on the cookware Before you activate the cooking zone put the cookware on it Put the smaller cookware on the smaller cooking zones Put the cookware directly in the c...

Page 20: ...www electrolux com shop 867350308 A 462019 ...

Reviews: