background image

Service

• Any electrical work required to do the serv-

icing of the appliance should be carried out
by a qualified electrician or competent per-
son.

• This product must be serviced by an au-

thorized Service Centre, and only genuine
spare parts must be used.

Environment Protection

This appliance does not contain gasses
which could damage the ozone layer, in

either its refrigerant circuit or insulation
materials. The appliance shall not be dis-
carded together with the urban refuse
and rubbish. The insulation foam con-
tains flammable gases: the appliance
shall be disposed according to the ap-
plicable regulations to obtain from your
local authorities. Avoid damaging the
cooling unit, especially at the rear near
the heat exchanger. The materials used
on this appliance marked by the symbol

 are recyclable.

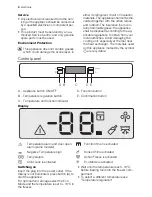
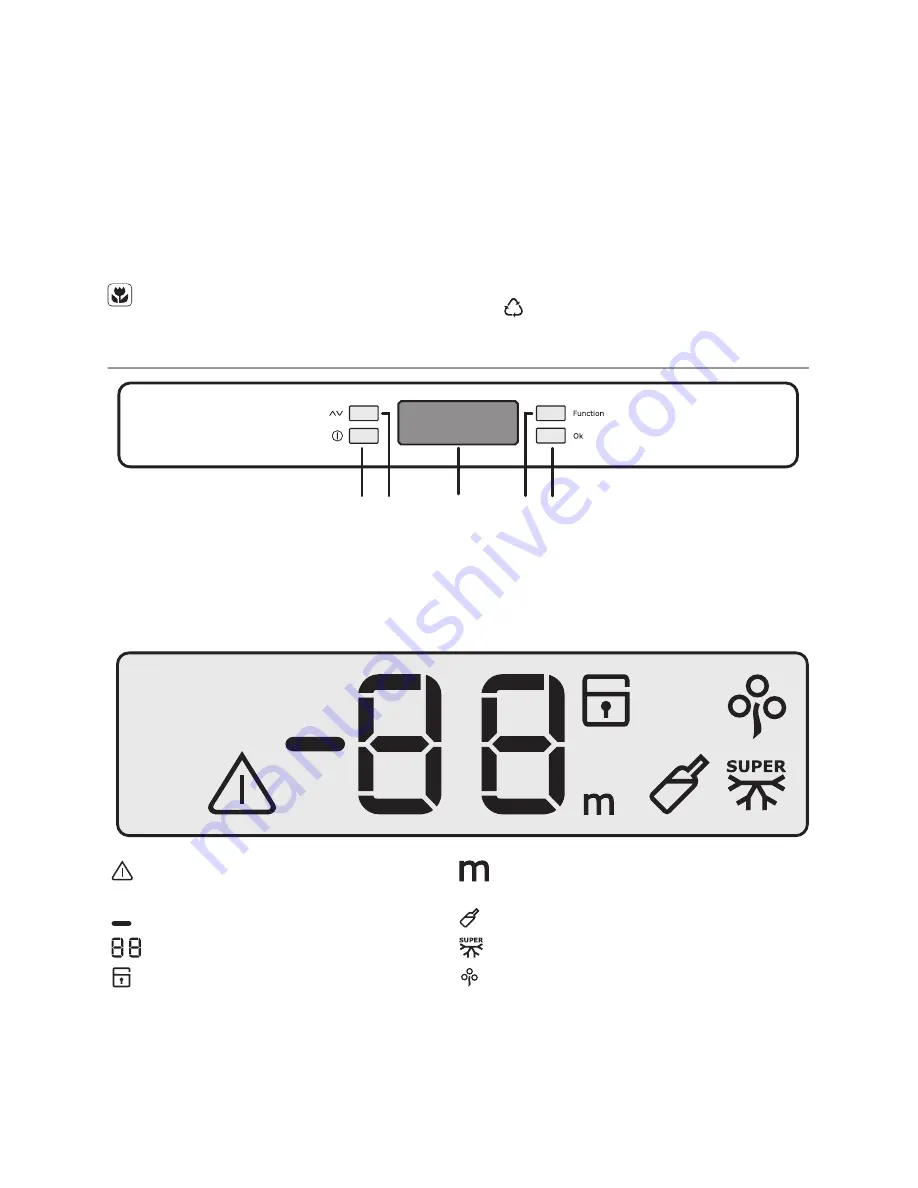
Control panel

B

D E

A

C

A - Appliance button ON/OFF

D - Function button

B - Temperature regulation button

E - Confirmation button

C - Temperature and function indicator


Display

Temperature alarm and door open
alarm (some models)

Function timer is activated

Negative Temperature sign

Drinks Chill is activated

Temperature

Action Freeze is activated

Child Lock is activated

Eco Mode is activated

Switching on

Insert the plug into the power outlet. If the
display is not illuminated, press button (A), to
start the appliance.
For optimal food storage select the Eco
Mode and the temperature is set to -18°C in
the freezer.

• Wait until the temperature reach -18°C,

before loading food into the freezer com-
partment.

• To select a different temperature see

"Temperature regulation".

 electrolux

Summary of Contents for EUC31305W

Page 1: ...user manual Freezer EUC31305W EUC31305X ...

Page 2: ... do not play with the appliance Keep all packaging well away from chil dren There is risk of suffocation If you are discarding the appliance pull the plug out of the socket cut the connection cable as close to the appliance as you can and remove the door to prevent play ing children to suffer electric shock or to close themselves into it If this appliance featuring magnetic door seals is to replac...

Page 3: ... place carbonated or fizzy drinks in the freezer compartment as it creates pressure on the container which may cause it to explode resulting in damage to the appliance Ice lollies can cause frost burns if con sumed straight from the appliance Care and cleaning Before maintenance switch off the appli ance and disconnect the mains plug from the mains socket Do not clean the appliance with metal ob j...

Page 4: ...pecially at the rear near the heat exchanger The materials used on this appliance marked by the symbol are recyclable Control panel B D E A C A Appliance button ON OFF D Function button B Temperature regulation button E Confirmation button C Temperature and function indicator Display Temperature alarm and door open alarm some models Function timer is activated Negative Temperature sign Drinks Chil...

Page 5: ...ssing key D until the corre sponding icon will flash and then key E Eco Mode Function The Eco Mode function is activated by press ing key D several times if necessary until the corresponding icon appears or setting the temperature at 18 C You must confirm the choice by pressing key E within few seconds You will hear the buz zer and the icon remains lighted In this condition the chosen temperatures...

Page 6: ...l smell of a brand new product then dry thoroughly Important Do not use detergents or abra sive powders as these will damage the fin ish Daily use Use of the freezer compartment The symbol means that the freezer is suitable for freezing fresh food and for long term storage The temperature may be regulated between 15 C and 24 C We suggest setting the temperature to 18 C which is optimal for energy ...

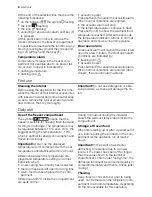
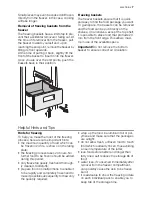
Page 7: ...move the bottom basket to ensure correct air circulation Helpful Hints and Tips Hints for freezing To help you make the most of the freezing process here are some important hints the maximum quantity of food which can be frozen in 24 hrs is shown on the rating plate the freezing process takes 24 hours No further food to be frozen should be added during this period only freeze top quality fresh and...

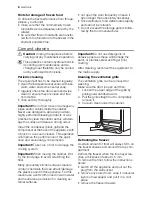
Page 8: ...ser black grill and the compressor at the back of the appliance with a brush or a vacuum cleaner This operation will improve the performance of the appli ance and save energy consumption Important Take care of not to damage the cooling system Important When moving the cabinet lift it by the front edge to avoid scratching the floor Many proprietary kitchen surface cleaners contain chemicals that ca...

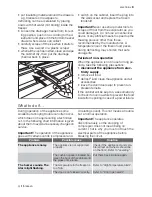
Page 9: ...the appliance and all accessories leave the door doors ajar to prevent un pleasant smells If the cabinet will be kept on ask somebody to check it once in a while to prevent the food inside from spoiling in case of a power failure What to do if During operation of the appliance some smaller but annoying trouble can often occur which does not require calling a technician out In the following chart i...

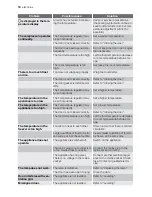
Page 10: ... may be set incorrectly Set a higher temperature The temperature in the appliance is too high The Temperature regulator may be set incorrectly Set a lower temperature The door is not closed correctly Refer to Closing the door The food temperature is too high Let the food temperature decrease to room temperature before stor age The temperature in the freezer is too high Food is too near to each oth...

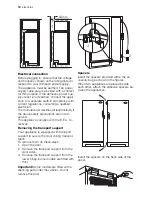
Page 11: ...ation are situated in the rating plate on the internal left side of the ap pliance and in the energy label Installation Read the Safety Information carefully for your safety and correct operation of the appliance before installing the appliance Location To ensure best performance if the appliance is positioned below an overhanging wall unit the minimum distance between the top of the cabinet and t...

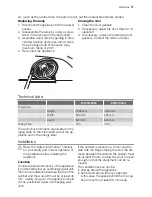
Page 12: ...served This appliance complies with the E E C Di rectives Removing the transport support Your appliance is equipped with transport support to secure the door during transpor tation To remove them do these steps 1 Open the door 2 Remove the transport support from the door sides 3 Remove the transport support from the lower hinge some models are fitted with this Important Some models are fitted with...

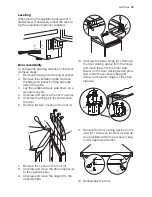
Page 13: ...rew the hinge pin b and remove the door 6 Remove the two covers on the roof c 7 Remove the cover on the front d 8 Unscrew and move the door stopper e to the opposite side 9 Unscrew and move the hinge f to the opposite side a c b 10 Unscrew the lower hinge g1 Remove the door closing device from the hinge and move the pin to the other side Screw on the door closing device provi ded within the access...

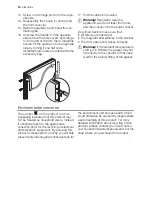
Page 14: ...he door opens and closes correctly Warning If the ambient temperature is cold i e in Winter the gasket may not fit perfectly to the cabinet In that case wait for the natural fitting of the gasket Environmental concerns The symbol on the product or on its packaging indicates that this product may not be treated as household waste Instead it should be taken to the appropriate collection point for th...

Page 15: ...electrolux 15 ...

Page 16: ...855804500 00 092009 www electrolux com www electrolux ch ...

Reviews: