background image

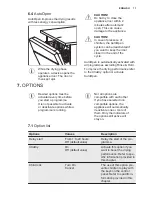
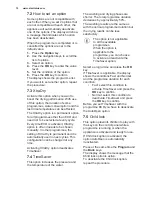
7.2 How to set an option

Some options are not compatible with

each other. When you set 2 options that

are not compatible with each other, the

appliance will automatically deactivate

one of the options. The display will show

a message that indicates which option

has been deactivated.
When the programme is completed or is

cancelled the options are set to the

default value.
1. Press the Option key.

2. Use the navigation keys to scroll the

list of options.

3. Select an option.

4. Press the OK key to enter the value

level.

5. Set the condition of the option.

6. Press the OK key to confirm.

The display shows the programme list.

If you want to set another option, repeat

the procedure.

7.3 XtraDry

Activate this option when you want to

boost the drying performance. With use

of this option, the duration of some

programmes, water consumption and the

last rinse temperature can be affected.
The XtraDry option is a permanent option

for all programmes other than ECO and

need not to be selected at every cycle.
Every time ECO is activated, XtraDry

option is off and needs to be chosen

manually. In other programmes, the

setting of XtraDry is permanent and it is

automatically used in next cycles. This

configuration can be changed at any

time.
Activating XtraDry option deactivates

TimeSaver.

7.4 TimeSaver

This option increases the pressure and

the temperature of the water.

The washing and drying phases are

shorter. The total programme duration

decreases by approximately 50%.
The washing results are the same as

with the normal programme duration but

the drying results can be less

satisfactory.

The option is not applicable

to all the available

programmes.

When the option is

applicable to the

programme, you can choose

to activate or deactivate the

TimeSaver option.

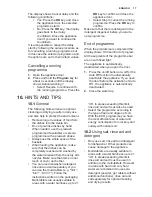
Select a programme and press the OK

key.

If TimeSaver is applicable, the display

shows the conditions Fast and Normal

and the programme duration for each

condition:

• Fast: select this condition to

activate TimeSaver and press the 

OK key to confirm.

• Normal: select this condition to

deactivate TimeSaver and press

the OK key to confirm.

Before you set TimeSaver with the

programme ECO you have to deactivate

the AutoOpen option.

7.5 Child lock

This option prevents children to play with

the keys on the control panel while a

programme is running or when the

appliance is activated and ready for use.
If Child lock option is activated, the

option AutoOpen is automatically

deactivated.
Press at the same time the Program and

the Back keys.

The display shows the message that the

Child lock option is active.

To deactivate the Child lock option,

repeat the procedure.

www.electrolux.com

12

Summary of Contents for ESF8820ROW

Page 1: ...ESF8820ROW ESF8820ROX EN Dishwasher User Manual ...

Page 2: ...e in the knowledge that you ll get great results every time Welcome to Electrolux Visit our website for Get usage advice brochures trouble shooter service information www electrolux com webselfservice Register your product for better service www registerelectrolux com Buy Accessories Consumables and Original spare parts for your appliance www electrolux com shop CUSTOMER CARE AND SERVICE Always us...

Page 3: ...d Do not let children play with the appliance Keep detergents away from children Keep children and pets away from the appliance when the door is open Children shall not carry out cleaning and user maintenance of the appliance without supervision 1 2 General Safety This appliance is intended to be used in household and similar applications such as farm houses staff kitchen areas in shops offices an...

Page 4: ... appliance as it is heavy Always use safety gloves and enclosed footwear 2 2 Electrical connection WARNING Risk of fire and electrical shock The appliance must be earthed Make sure that the parameters on the rating plate are compatible with the electrical ratings of the mains power supply Always use a correctly installed shockproof socket Do not use multi plug adapters and extension cables Make su...

Page 5: ...ishes The appliance can release hot steam if you open the door while a programme operates Do not put flammable products or items that are wet with flammable products in near or on the appliance 2 5 Internal light WARNING Risk of injury This appliance has an internal lamp that comes on when you open the door and goes off when the door is closed The lamp in this appliance is not suitable for househo...

Page 6: ... 13 3 4 2 1 1 Worktop 2 Top spray arm 3 Upper spray arm 4 Lower spray arm 5 Filters 6 Rating plate 7 Salt container 8 Air vent 9 Rinse aid dispenser 10 Detergent dispenser 11 Lower basket 12 Upper basket 13 Cutlery drawer www electrolux com 6 ...

Page 7: ...time Program and Back to activate or deactivate the option Child lock MyFavourite key Short press selects the MyFavourite programme If no programme has been saved the display will show the setting Set MyFavourite Long press shows the setting Set MyFavourite Delay key Press to set the delay start of a programme Option key Press this key to enter the option and the setting list OK key Confirms the s...

Page 8: ...ou have the most efficient use of water and energy consumption for crockery and cutlery with normal soil This is the standard programme for test institutes 2 The appliance senses the degree of soil and the quantity of items in the baskets It auto matically adjusts the temperature and the quantity of water the energy consumption and the programme duration 3 With this programme you can wash a load w...

Page 9: ... information for test performance send an email to info test dishwasher production com Write down the product number PNC that is on the rating plate 6 SETTINGS 6 1 Setting list Settings Values Description Set MyFavourite List of programmes Set your favourite daily programme Refer to spe cific information provided in this chapter AutoOpen On default value Off Set the automatic door opening for prog...

Page 10: ...s will remain valid until you change the value again 1 Press the Option key 2 Use the navigation keys to scroll the settings list 3 Select a setting 4 Press the OK key to enter the value level 5 Set the condition of the setting 6 Press the OK key to confirm The display shows the programme list If you want to save another setting repeat the procedure 6 3 How to save the MyFavourite programme It is ...

Page 11: ...ptions must be activated every time before you start a programme It is not possible to activate or deactivate options while a programme is running Not all options are compatible with each other If you have selected non compatible options the appliance will automatically deactivate one or more of them Only the indicators of the options still active will stay on 7 1 Option list Options Values Descri...

Page 12: ...at any time Activating XtraDry option deactivates TimeSaver 7 4 TimeSaver This option increases the pressure and the temperature of the water The washing and drying phases are shorter The total programme duration decreases by approximately 50 The washing results are the same as with the normal programme duration but the drying results can be less satisfactory The option is not applicable to all th...

Page 13: ...only after this procedure is completed The procedure will be repeated periodically 8 1 The water softener The water softener removes minerals from the water supply which would have a detrimental effect on the washing results and on the appliance The higher the content of these minerals the harder your water is Water hardness is measured in equivalent scales The water softener should be adjusted ac...

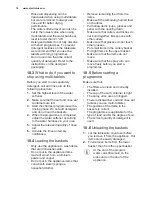
Page 14: ... the salt container 5 Turn the cap of the salt container clockwise to close the salt container Water and salt can come out from the salt container when you fill it Risk of corrosion To prevent it after you fill the salt container start a programme When the salt container needs refilling the display shows a message 8 3 The rinse aid dispenser The rinse aid helps to dry the dishes without streaks an...

Page 15: ...kets 4 Add the detergent 5 Set and start the correct programme for the type of load and the degree of soil 9 1 Using the detergent A B C CAUTION Only use detergent specifically designed for dishwashers 1 Press the release button A to open the lid C 2 Put the detergent in powder or tablets in the compartment B 3 If the programme has a prewash phase put a small quantity of detergent on the inner par...

Page 16: ... 2 Press the Delay key The display shows Start Starting time of the programme End Ending time of the programme 3 Press repeatedly the navigation key on your right to increase the number of hours of the delay start You can delay the start of the programme from 1 to 24 hours Press the navigation key on your left to decrease the number of hours The time indicated by Start and End is updated 4 Press t...

Page 17: ...owing hints will ensure optimal cleaning and drying results in daily use and also help to protect the environment Remove larger residues of food from the dishes into the waste bin Do not pre rinse dishes by hand When needed use the prewash programme if available or select a programme with a prewash phase Always use the whole space of the baskets When loading the appliance make sure that the dishes...

Page 18: ...re dishwasher safe Do not put in the appliance items made of wood horn aluminium pewter and copper Do not put in the appliance items that can absorb water sponges household cloths Remove remaining food from the items Make soft the remaining burned food on the items Put hollow items cups glasses and pans with the opening down Make sure that cutlery and dishes do not bond together Mix spoons with ot...

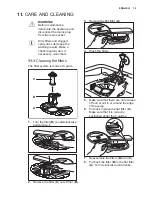
Page 19: ...r system is made of 3 parts C B A 1 Turn the filter B counterclockwise and remove it 2 Remove the filter C out of filter B 3 Remove the flat filter A 4 Wash the filters 5 Make sure that there are no residues of food or soil in or around the edge of the sump 6 Put back in place the flat filter A Make sure that it is correctly positioned under the 2 guides 7 Reassemble the filters B and C 8 Put back...

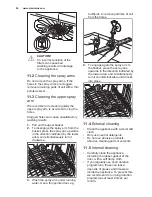
Page 20: ...ise 3 Wash the spray arm under running water Use a thin pointed tool e g toothpick to remove particles of soil from the holes 4 To engage again the spray arm to the basket press the spray arm upwards in the direction indicated by the lower arrow and simultaneously turn it counterclockwise until it locks into place 11 4 External cleaning Clean the appliance with a moist soft cloth Only use neutral ...

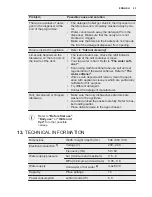
Page 21: ... The duration of the procedure is approximately 5 mi nutes The appliance does not fill with water The display shows the mes sage Attention no intake of water possible Make sure that the water tap is open Make sure that the pressure of the water supply is not too low For this information contact your local water authority Make sure that the water tap is not clogged Make sure that the filter in the ...

Page 22: ... dishes The released quantity of rinse aid is not sufficient Adjust the rinse aid level to a higher level The quality of the rinse aid can be the cause The dishes are wet For the best drying performance activate the option XtraDry and set AutoOpen The programme does not have a drying phase or has a drying phase with low temperature The rinse aid dispenser is empty The quality of the rinse aid can ...

Page 23: ...unctional tabs use salt and set regeneration of the water softener Refer to The water softener If lime scale deposits still remain clean the appli ance with appliance cleaners which are particularly suitable for this purpose Try different detergent Contact the detergent manufacturer Dull discoloured or chipped tableware Make sure that only dishwasher safe items are washed in the appliance Load and...

Page 24: ...nsumption 14 ENVIRONMENTAL CONCERNS Recycle the materials with the symbol Put the packaging in applicable containers to recycle it Help protect the environment and human health and to recycle waste of electrical and electronic appliances Do not dispose appliances marked with the symbol with the household waste Return the product to your local recycling facility or contact your municipal office www...

Page 25: ...ENGLISH 25 ...

Page 26: ...www electrolux com 26 ...

Page 27: ...ENGLISH 27 ...

Page 28: ...www electrolux com shop 117880520 A 102017 ...

Reviews: