background image

• Make sure the mains cable or plug (if

applicable) does not touch the hot

appliance or hot cookware, when you

connect the appliance to the near

sockets

• Do not use multi-plug adapters and

extension cables.

• Make sure not to cause damage to the

mains plug (if applicable) or to the

mains cable. Contact an Authorised

Service Centre or an electrician to

change a damaged mains cable.

• The shock protection of live and

insulated parts must be fastened in

such a way that it cannot be removed

without tools.

• Connect the mains plug to the mains

socket only at the end of the

installation. Make sure that there is

access to the mains plug after the

installation.

• If the mains socket is loose, do not

connect the mains plug.

• Do not pull the mains cable to

disconnect the appliance. Always pull

the mains plug.

• Use only correct isolation devices: line

protecting cut-outs, fuses (screw type

fuses removed from the holder), earth

leakage trips and contactors.

• The electrical installation must have an

isolation device which lets you

disconnect the appliance from the

mains at all poles. The isolation device

must have a contact opening width of

minimum 3 mm.

2.3 

Use

WARNING!

Risk of injury, burns and

electrical shock.

• Remove all the packaging, labelling

and protective film (if applicable) before

first use.

• Use this appliance in a household

environment.

• Do not change the specification of this

appliance.

• Make sure that the ventilation openings

are not blocked.

• Do not let the appliance stay

unattended during operation.

• Set the cooking zone to “off” after each

use.

• Do not rely on the pan detector.

• Do not put cutlery or saucepan lids on

the cooking zones. They can become

hot.

• Do not operate the appliance with wet

hands or when it has contact with

water.

• Do not use the appliance as a work

surface or as a storage surface.

• If the surface of the appliance is

cracked, disconnect immediately the

appliance from the power supply. This

to prevent an electrical shock.

• Users with a pacemaker must keep a

distance of minimum 30 cm from the

induction cooking zones when the

appliance is in operation.

• When you place food into hot oil, it

may splash.

WARNING!

Risk of fire and explosion

• Fats and oil when heated can release

flammable vapours. Keep flames or

heated objects away from fats and oils

when you cook with them.

• The vapours that very hot oil releases

can cause spontaneous combustion.

• Used oil, that can contain food

remnants, can cause fire at a lower

temperature than oil used for the first

time.

• Do not put flammable products or

items that are wet with flammable

products in, near or on the appliance.

WARNING!

Risk of damage to the

appliance.

• Do not keep hot cookware on the

control panel.

• Do not let cookware to boil dry.

• Be careful not to let objects or

cookware fall on the appliance. The

surface can be damaged.

• Do not activate the cooking zones with

empty cookware or without cookware.

• Do not put aluminium foil on the

appliance.

• Cookware made of cast iron,

aluminium or with a damaged bottom

can cause scratches on the glass /

glass ceramic. Always lift these objects

up when you have to move them on

the cooking surface.

ENGLISH

5

Summary of Contents for EHH6540F9K

Page 1: ...EHH6540F9K HOB TABLE DE CUISSON EN FR USER MANUAL 2 NOTICE D UTILISATION 20 ...

Page 2: ... ll get great results every time Welcome to Electrolux Visit our website for Get usage advice brochures trouble shooter service information www electrolux com Register your product for better service www registerelectrolux com Buy Accessories Consumables and Original spare parts for your appliance www electrolux com shop CUSTOMER CARE AND SERVICE Always use original spare parts When contacting our...

Page 3: ...appliance Keep all packaging away from children Keep children and pets away from the appliance when it operates or when it cools down Accessible parts are hot If the appliance has a child safety device we recommend you activate it Cleaning and user maintenance shall not be made by children without supervision Children of less than 3 years should be kept away unless continuously supervised 1 2 Gene...

Page 4: ...revents hot cookware to fall from the appliance when the door or the window is opened If the appliance is installed above drawers make sure that the space between the bottom of the appliance and the upper drawer is sufficient for air circulation The bottom of the appliance can get hot Make sure to install a non combustile separation panel under the appliance to prevent access to the bottom Make su...

Page 5: ...e appliance stay unattended during operation Set the cooking zone to off after each use Do not rely on the pan detector Do not put cutlery or saucepan lids on the cooking zones They can become hot Do not operate the appliance with wet hands or when it has contact with water Do not use the appliance as a work surface or as a storage surface If the surface of the appliance is cracked disconnect imme...

Page 6: ... cloth Only use neutral detergents Do not use abrasive products abrasive cleaning pads solvents or metal objects 2 5 Disposal WARNING Risk of injury or suffocation Contact your municipal authority for information on how to discard the appliance correctly Disconnect the appliance from the mains supply Cut off the mains cable and discard it 3 PRODUCT DESCRIPTION 3 1 Cooking surface layout 145 mm 180...

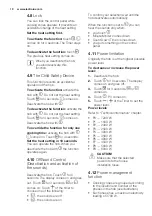
Page 7: ...etting 8 To increase or decrease the time 9 To select the cooking zone 10 STOP GO To activate and deactivate the function 3 3 Heat setting displays Display Description The cooking zone is deactivated The cooking zone operates STOP GO function operates Automatic Heat Up function operates Power function operates digit There is a malfunction OptiHeat Control 3 step Residual heat indicator continue co...

Page 8: ...ates automatically after 2 minutes You do not deactivate a cooking zone or change the heat setting After some time comes on and the hob deactivates See below The relation between heat setting and times of the function 1 3 6 hours 4 7 5 hours 8 9 4 hours 10 14 1 5 hours 4 3 The heat setting To set or change the heat setting Touch the control bar at the correct heat setting or move your finger along...

Page 9: ...ch CountUp Timer The count up timer You can use this function to monitor how long the cooking zone operates To set the cooking zone touch again and again until the indicator of a necessary cooking zone comes on To activate the function touch of the timer comes on When the indicator of the cooking zone starts to flash slowly the time counts up The display switches between and counted time minutes T...

Page 10: ...e sounds Deactivate the hob Touch for 3 seconds The display comes on and goes out Touch for 3 seconds or comes on Touch of the timer to choose one of the following the sounds are off the sounds are on To confirm your selection wait until the hob deactivates automatically When the function is set to you can hear the sounds only when you touch Minute Minder comes down Count Down Timer comes down you...

Page 11: ...okware For induction cooking zones a strong electro magnetic field creates the heat in the cookware very quickly Use the induction cooking zones with correct cookware Cookware material correct cast iron steel enamelled steel stainless steel the bottom made of multi layer with correct mark from a manufacturer not correct aluminium copper brass glass ceramic porcelain Cookware is correct for an indu...

Page 12: ...e heat setting and the cooking zone consumption of power is not linear When you increase the heat setting it is not proportional to the increase of the cooking zone consumption of power It means that the cooking zone with the medium heat setting uses less than a half of its power The data in the table is for guidance only Heat setting Use to Time Hints 1 Keep cooked food warm as nec essary Put a l...

Page 13: ...with sugar If not the dirt can cause damage to the hob Put the special scraper on the glass surface at an acute angle and move the blade on the surface Remove when the hob is sufficiently cool limescale rings water rings fat stains shiny metallic discoloration Clean the hob with a moist cloth and some detergent After cleaning rub the hob dry with a soft cloth 7 TROUBLESHOOTING WARNING Refer to Saf...

Page 14: ...e operated suffi ciently long to be hot speak to an Authorised Service Centre Automatic Heat Up function does not operate The zone is hot Let the zone become suffi ciently cool The highest heat setting is set The highest heat setting has the same power as the function The heat setting changes between two levels Power management func tion is activated Refer to Daily use chapter The sensor fields be...

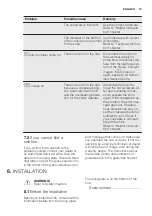
Page 15: ... the error mes sage goes out Residual heat indicator can stay on Let the cookware become sufficiently cool Check if your cookware is compati ble with the hob Refer to Helpful hints and tips chapter 7 2 If you cannot find a solution If you cannot find a solution to the problem yourself contact your dealer or an Authorised Service Centre Give the data from the rating plate Give also three digit lett...

Page 16: ...ified electrician CAUTION Do not drill or solder the wire ends This is strictly forbidden CAUTION Do not connect the cable without cable end sleeve Two phase connection 1 Remove the cable end sleeve from black and brown wires 2 Remove an insulation of the brown and black cable ends 3 Apply a new wire end sleeve of 1 5 mm on each cable end special tool required Cable cross section N L1 N L 230V 400...

Page 17: ... 500mm min 2mm 20 mm min 2 mm A B A 12 mm 28 mm 38 mm B 57 mm 41 mm 31 mm min 30 mm min 500 mm 20 mm min 2 mm A B A 12 mm 28 mm 38 mm B 57 mm 41 mm 31 mm min 500 mm R 5mm min 55mm 560 1mm 490 1 mm min 38 mm min 2 mm ENGLISH 17 ...

Page 18: ...r You can not use the protection box if you install the hob above an oven 9 TECHNICAL INFORMATION 9 1 Rating plate Modell EHH6540F9K PNC 949 596 277 00 Typ 58 GAD D5 AT 220 240 V 50 60 Hz Induction 7 2 kW Made in Germany Ser Nr 7 2 kW ELECTROLUX 9 2 Cooking zones specification Cooking zone Nominal pow er maximum heat setting W Power func tion W Power func tion maximum duration min Cookware di amet...

Page 19: ...al and dimensions of the cookware For optimal cooking results use cookware not larger than the diameter in the table 10 ENVIRONMENTAL CONCERNS Recycle the materials with the symbol Put the packaging in applicable containers to recycle it Help protect the environment and human health and to recycle waste of electrical and electronic appliances Do not dispose appliances marked with the symbol with t...

Page 20: ...action Bienvenue chez Electrolux Visitez notre site Internet pour Obtenir des conseils d utilisation des brochures de l aide des informations www electrolux com Enregistrez votre produit pour obtenir un meilleur service www registerelectrolux com Acheter des accessoires consommables et pièces de rechange d origine pour votre appareil www electrolux com shop SERVICE APRÈS VENTE Utilisez toujours de...

Page 21: ...sation sécurisée de l appareil et de comprendre les risques encourus Ne laissez pas les enfants jouer avec l appareil Ne laissez pas les emballages à la portée des enfants Tenez les enfants et les animaux éloignés de l appareil lorsqu il est en cours de fonctionnement ou lorsqu il refroidit Les parties accessibles sont chaudes Si l appareil est équipé d un dispositif de sécurité enfants nous vous ...

Page 22: ... qualifié Retirez l intégralité de l emballage N installez pas et ne branchez pas un appareil endommagé Suivez scrupuleusement les instructions d installation fournies avec l appareil Respectez l espacement minimal requis par rapport aux autres appareils et éléments Soyez toujours vigilants lorsque vous déplacez l appareil car il est lourd Portez toujours des gants de sécurité Isolez les surfaces ...

Page 23: ...e courant qu à la fin de l installation Assurez vous que la prise de courant est accessible une fois l appareil installé Si la prise de courant est lâche ne branchez pas la fiche d alimentation secteur Ne tirez jamais sur le câble d alimentation pour débrancher l appareil Tirez toujours sur la fiche N utilisez que des systèmes d isolation appropriés des coupe circuits des fusibles les fusibles à v...

Page 24: ... sans aucun récipient de cuisson Ne placez jamais de papier aluminium sur l appareil N utilisez pas de récipients en fonte ou en aluminium ni de récipients dont le fond est endommagé et rugueux Ils risqueraient de rayer le verre ou la surface vitrocéramique Soulevez toujours ces objets lorsque vous devez les déplacer sur la surface de cuisson Cet appareil est exclusivement destiné à un usage culin...

Page 25: ...diquent les fonctions activées Touche sensi tive Fonction Commentaire 1 MARCHE ARRÊT Pour allumer et éteindre la table de cuis son 2 Verrouillage Dispositif de sécurité enfants Pour verrouiller ou déverrouiller le ban deau de commande 3 Voyants du minuteur des zones de cuisson Pour indiquer la zone à laquelle se réfère la durée sélectionnée 4 Affichage du minuteur Pour indiquer la durée en minutes...

Page 26: ... produite OptiHeat Control voyant de chaleur résiduelle 3 niveaux continu er la cuisson maintien au chaud chaleur résiduelle La fonction Verrouillage Dispositif de sécurité enfants est activée Le récipient est inapproprié ou trop petit ou bien il n y a pas de ré cipient sur la zone de cuisson La fonction Arrêt automatique est activée 3 4 OptiHeat Control voyant de chaleur résiduelle 3 niveaux AVER...

Page 27: ... le niveau de cuisson et les durées de la fonction 1 3 6 heures 4 7 5 heures 8 9 4 heures 10 14 1 5 heures 4 3 Niveau de cuisson Pour régler ou modifier le niveau de cuisson Appuyez sur le niveau de cuisson souhaité sur le bandeau de sélection ou déplacez votre doigt sur le bandeau de sélection jusqu à atteindre le niveau de cuisson souhaité 4 4 Démarrage automatique de la cuisson Cette fonction v...

Page 28: ...le signal sonore appuyez sur CountUp Timer Minuteur progressif Cette fonction permet de vérifier la durée de fonctionnement de la zone de cuisson sélectionnée Pour sélectionner la zone de cuisson appuyez sur à plusieurs reprises jusqu à ce que l indicateur de la zone de cuisson correspondante s affiche Pour activer la fonction appuyez sur la touche du minuteur s allume Lorsque le voyant de la zone...

Page 29: ...yez sur pendant 4 secondes s allume Éteignez la table de cuisson en appuyant sur Pour désactiver la fonction le temps d une cuisson allumez la table de cuisson en appuyant sur s allume Appuyez sur pendant 4 secondes Réglez le niveau de cuisson dans les 10 secondes qui suivent Vous pouvez utiliser la table de cuisson Lorsque vous éteignez la table de cuisson avec la fonction est de nouveau activée ...

Page 30: ...la charge électrique totale des zones de cuisson raccordées à une phase simple dépasse 3 700 W La fonction diminue la puissance des autres zones de cuisson raccordées à la même phase L affichage du niveau de cuisson des zones à puissance réduite oscille entre deux niveaux Fonction Gestionnaire de puissance avec la fonction Limitation de puissance Lorsque vous réglez la fonction Limitation de puiss...

Page 31: ...ones de cuisson avec des niveaux de puissance élevés et le récipient est composé de différents matériaux conception sandwich un bourdonnement vous utilisez des niveaux de puissance élevés un cliquetis des commutations électriques se produisent un sifflement un bourdonnement le ventilateur fonctionne Ces bruits sont normaux et n indiquent pas une anomalie de la table de cuisson 5 3 Économies d éner...

Page 32: ...s soupes 60 150 min Ajoutez jusqu à 3 l de liquide en plus des ingrédients 9 12 Faire revenir escalopes cor dons bleus de veau côte lettes rissoles saucisses foie roux œufs crêpes beignets au be soin Retournez à la moitié du temps 12 13 Poêler à feu vif des galettes de pommes de terre des fil ets des steaks 5 15 min Retournez à la moitié du temps 14 Faire bouillir de l eau cuire des pâtes griller ...

Page 33: ...onnement Problème Cause probable Solution Vous ne pouvez pas mettre en fonctionnement la table de cuisson La table de cuisson n est pas connectée à une source d alimentation élec trique ou le branchement est incorrect Vérifiez que la table de cuis son est correctement bran chée à une source d ali mentation électrique Re portez vous au schéma de branchement Le fusible a disjoncté Vérifiez que le fu...

Page 34: ...onnaire de puissance est activée Reportez vous au chapitre Utilisation quotidienne Les touches sensitives sont chaudes Le récipient est trop grand ou vous l avez placé trop près des commandes Placez les récipients de grande taille sur les zones arrière si possible Aucun signal sonore ne se fait entendre lorsque vous appuyez sur les touches sensitives du bandeau Les signaux sonores sont désactivés ...

Page 35: ...ution au problème veuillez contacter votre revendeur ou un service après vente agréé Veuillez lui fournir les informations se trouvant sur la plaque signalétique Donnez également la combinaison à 3 lettres et chiffres pour la vitrocéramique située dans un des coins de la surface en verre et le message d erreur qui s affiche Veillez à faire fonctionner la table de cuisson correctement En cas d erre...

Page 36: ...strictement interdit ATTENTION Ne raccordez pas le câble sans gaine à l extrémité Raccordement biphasé 1 Retirez le câble et la gaine des fils noir et marron 2 Dénudez les extrémités des fils noir et marron 3 Appliquez un nouvelle gaine de 1 5 mm à chaque extrémité du câble nécessite un outil spécial Coupe transversale du câble N L1 N L 230V 400V 2 N L2 Raccordement monophasé 230 V Raccordement bi...

Page 37: ... A B A 12 mm 28 mm 38 mm B 57 mm 41 mm 31 mm min 30 mm min 500 mm 20 mm min 2 mm A B A 12 mm 28 mm 38 mm B 57 mm 41 mm 31 mm min 500 mm R 5mm min 55mm 560 1mm 490 1 mm min 38 mm min 2 mm min 12 mm min 2 mm FRANÇAIS 37 ...

Page 38: ... max W Power func tion W Power func tion durée maximale min Diamètre du récipient mm Avant gauche 2300 3600 10 180 210 Arrière gauche 1800 2800 10 145 180 Avant droite 1400 2500 4 125 145 Arrière droite 1800 2800 10 145 180 La puissance des zones de cuisson peut légèrement différer des données du tableau Elle dépend de la matière et des dimensions du récipient Pour des résultats de cuisson optimau...

Page 39: ...FRANÇAIS 39 ...

Page 40: ...www electrolux com shop 892965563 A 042014 ...

Reviews: