background image

30" ELECTRIC RANGE INSTALLATION INSTRUCTIONS

(For 4 Wire, 60 Hz. Systems)

4

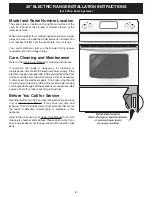
Model and Serial Number Location

The serial plate is located on the right-hand surface of the
oven front frame at the storage or warmer drawer; or the
lower panel area.

When ordering parts for or making inquires about your range,
always be sure to include the model and serial numbers and
a lot number or letter from the serial plate on your range.

Your serial plate also tells you the Kilowatt rating (power
requirements) and Voltage ratings

Care, Cleaning and Maintenance

Refer to the Use & Care Manual for cleaning instructions.

If removing the range is necessary for cleaning or
maintenance, disconnect the electrical power supply. If the
electrical supply is inaccessible, lift the unit slightly at the front
and pull out away from the wall. Pull only as far as necessary
to disconnect the electrical supply. Finish removing the unit
for servicing and cleaning.  Reinstall in reverse order making
sure to level the range and check electrical  connections. See
pages 2 and 3 for proper anchoring instructions.

Before You Call for Service

Read the "Before You Call" and operating instruction sections
in your Use & Care Manual. It may save you time and
expense. The list includes common occurrences that are not
the result of defective workmanship or materials in this
appliance.

Refer to the warranty in your Use & Care Manual for our toll-
free service number and address. Please call or write if you
have inquiries about your range product and/or need to order
parts.

Summary of Contents for 316454915

Page 1: ...Installation Instructions 30 Free Standing Electric Range Instructions d installation Cuisinière électrique de 30 316454915 ...

Page 2: ...station ...

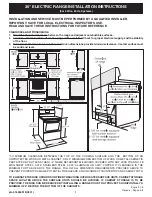
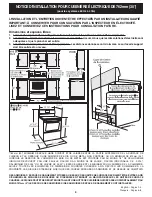
Page 3: ... BETWEEN THE TOP OF THE COOKING SURFACE AND THE BOTTOM OF AN UNPROTECTED WOOD OR METAL CABINET OR 24 MINIMUM WHEN BOTTOM OF WOOD OR METAL CABINET IS PROTECTED BY NOT LESS THAN 1 4 FLAME RETARDANT MILLBOARD COVERED WITH NOT LESS THAN NO 28 MSG SHEET STEEL 0 015 STAINLESS STEEL 0 024 ALUMINUM OR 0 020 COPPER 0 CLEARANCE IS THE MINIMUM FOR THE REAR OF THE RANGE FOLLOW ALL DIMENSION REQUIREMENTS PROVI...

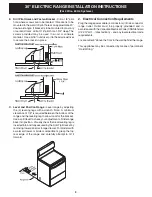
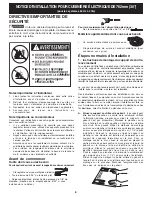
Page 4: ...ing To reduce the risk of tipping of the range the range should be secured to the floor by properly installed anti tip bracket and screws packed with the range Failure to install the anti tip bracket will allow the range to tip over if excessive weight is placed on an open door or if a child climbs upon it Serious injury might result from spilled hot liquids or from the range itself If range is ev...

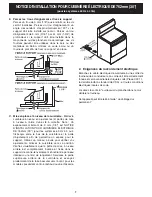
Page 5: ...etween the bottom of the range and the leveling leg to allow room for the bracket Use a spirit level to check your adjustments Slide range back into position Visually check that rear leveling leg is inserted into and fully secured by the Anti Tip Bracket by removinglowerpanelorstoragedrawer Formodelswith a warmer drawer or broiler compartment grasp the top rear edge of the range and carefully atte...

Page 6: ...enance disconnect the electrical power supply If the electricalsupplyisinaccessible lifttheunitslightlyatthefront and pull out away from the wall Pull only as far as necessary to disconnect the electrical supply Finish removing the unit for servicing and cleaning Reinstall in reverse order making sureto leveltherangeandcheckelectrical connections See pages 2 and 3 for proper anchoring instructions...

Page 7: ...DE CUISSON ET LE DESSOUS D UNE ARMOIRE DE BOIS OU DE MÉTAL NON PROTÉGÉ OU UN MINIMUM DE 610mm 24 LORSQUE LE DESSOUS DE L ARMOIRE DE BOIS OU DE MÉTAL EST PROTÉGÉ PAR AU MOINS 1 4 DE CELLODERME IGNIFUGE RECOUVERT PAR UNE FEUILLE D ACIER D AU MOINS 28 DE JAUGE D ACIER INOXYDABLE DE 0 015 D ALUMINIUM DE 0 024 OU DE CUIVRE DE 0 020 L ESPACE LIBRE EST LE MINIMUM POUR L ARRIÈRE DE LA CUISINIÈRE SUIVEZ TO...

Page 8: ...e du support de contre renversement La cuisinière doit être fixée au plancher par l installation adéquate de vis et de support de contre renversement empaquetés avec la cuisinière afin de réduire le risque de renversement de celle ci La cuisinière peut s incliner si un poids excessif est placé sur une porte ouverte ou si un enfant monte sur la porte si vous négligez d installer le support de contr...

Page 9: ...RE ÉLECTRIQUE DE 762mm 30 pour les systèmes 60 Hz à 3 ou 4 fils requis entre le bas de la cuisinière et la patte d ajustement afin de permettre un espace pour le support Utilisez un niveau à bulle pour vérifier vos ajustements Glissez la cuisinière vers sa position Vérifiez visuellement que la patte de mise à niveau arrière est complètement insérée et fixée dans le support de contre renversement e...

Page 10: ... et tirez afin de l éloigner du mur si l accès à l alimentation électrique est inaccessible N éloignez du mur que de la distance nécessaire pour débrancher l alimentation électrique Finissez de déplacer l appareil pour l entretien et le nettoyage Réinstallez en ordre inverse en vous assurant de mettre la cuisinière à niveau et vérifiez les raccordements électriques Voyez les pages 2 et 3 pour les ...

Page 11: ...station ...

Page 12: ......

Reviews: