Step 2
Applying Electric Paint with the tube
When you apply the paint with the tube, you can
work from two angles: either 90⁰ or 45⁰. If you hold
the tube at a 90⁰ angle while applying, then you will
get a nice thin layer of Electric Paint. If you apply
the paint at an angle of 45⁰, you get a thicker line
of paint. Thicker lines of paint are generally less
resistive than the thin layer, but it takes longer to dry.
To get the least resistance with Electric Paint, we’d
recommend screen printing or stenciling.
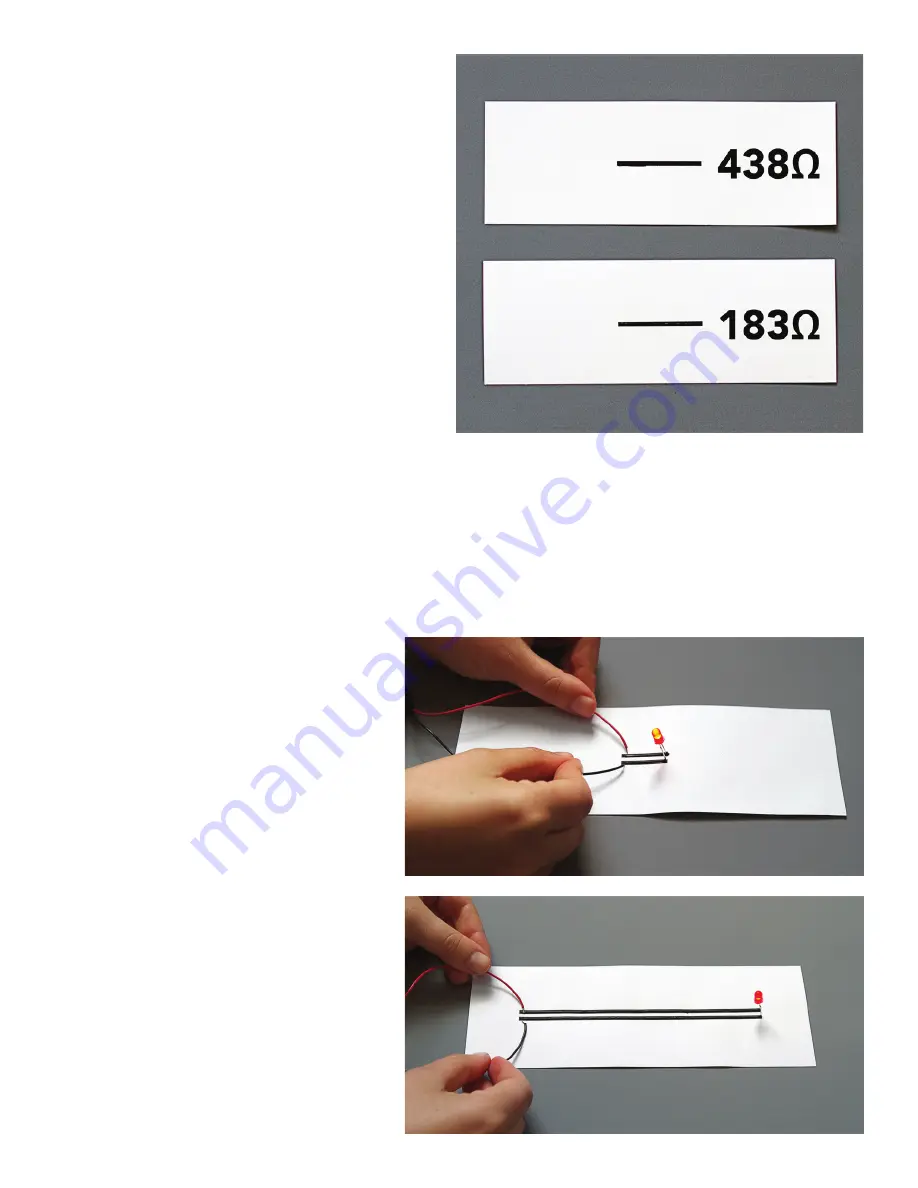
On the right, we have two lines. The upper line was
made with the paint applied at a 90⁰ angle, the
bottom line at a 45⁰ angle. When the resistance is
measured with a multimeter, it shows that the paint
applied at a 45⁰ angle has less resistance than the
paint applied at a 90⁰ angle. Click here to find more
information about how to measure the resistance of
the paint with a multimeter.
Step 3
Resistance and LEDs
The amount of resistance in the circuit
matters, because the larger the resistance,
the less current there is for the LED. So if you
draw very long lines and attach an LED at the
end of the lines, then the LED might not get
enough current to won’t light up.
On the right are two examples, one where
there are short Electric Paint tracks and one
with tracks that are three times as long. As
you can see on the example with the longer
tracks, the LED isn’t as bright.


