background image

36

NL

• 

OPGELET! 

Gooi de gebruikte spijsolie niet weg met uw 

huisvuil en giet het niet in een afvoer (gootsteen, toilet). 

Uw leidingen kunnen verstopt raken. Contacteer uw 

gemeente voor de juiste verwijderingsmethode.

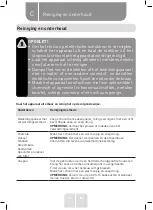
De filter reinigen of vervangen

Vervang de oliefilter (reservefilter niet inbegrepen) elke 12 maanden.

Breng de vier klemmen omhoog met behulp van een tang en verwijder het filterdeksel.

Verwijder de gaasfilter.
Breng een nieuwe gaasfilter of een volledig schone en droge gaasfilter aan. Controleer 

of de filter juist is aangebracht.
Vouw de vier klemmen aan de bovenkant van het filterdeksel opnieuw dicht zodat de 

filter mooi op zijn plaats vastzit.

Opslag

• Zorg dat de stekker uit het stopcontact is gehaald en het 

apparaat volledig is afgekoeld voordat u het opbergt.

• Berg het apparaat in een schone ruimte op. Vermijd elke 

blootstelling aan direct zonlicht.

• Berg het product op buiten het bereik van baby‘s, kinderen en 

dieren.

• Bewaar de verpakking om het apparaat in op te bergen wanneer 

u het langere tijd niet denkt te gebruiken.

Reiniging en onderhoud

C

Summary of Contents for COSY LIFE 969176

Page 1: ... damage caused by failure to install the device correctly incorrect use of the product or excessive wear and tear proof of purchase required NL GARANTIEVOORWAARDEN Dit product wordt gegarandeerd voor een periode van 2 jaar vanaf de aankoopdatum voor elke storing die het gevolg is van een fabricagefout of het materiaal Gebreken of schade door slechte installatie onjuist gebruik of abnormale slijtag...

Page 2: ......

Page 3: ...ue chaque utilisation vous apportera satisfaction Bienvenue chez ELECTRO DEPOT Visitez notre site Internet www electrodepot fr www electrodepot be VOTRE AVIS COMPTE PARTAGEZ VOTRE EXPERIENCE SUR LES PRODUITS Parce que votre satisfaction est notre priorité nous vous proposons de donner votre avis sur ce produit Il sera transmis et analysé par nos équipes afin d améliorer continuellement le produit ...

Page 4: ...ot fr sav notices http www electrodepot be fr sav notices A Aperçu de l appareil C Nettoyage et entretien B Utilisation de l appareil Avant la première utilisation Utilisation de la friteuse Nettoyage et entretien Rangement Composants Aperçu de l appareil Utilisation prévue Caractéristiques ...

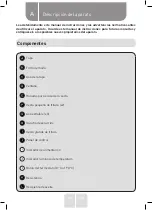
Page 5: ... panier à friture Panneau de commande Voyant d alimentation Voyant lumineux de température Bouton du thermostat 0 C à 190 C Résistance Récipient à huile Lisez attentivement ce mode d emploi ainsi que le livret d avertissements réglementaires avant d utiliser l appareil Gardez ce mode d emploi pour vous y reporter ultérieurement et transmettez le aux nouveaux propriétaires potentiels de l appareil ...

Page 6: ...iste un risque d accident si les enfants jouent avec les matériaux d emballage Utilisation prévue Utilisez cette friteuse pour cuire des viandes et des légumes Cet appareil est conçu exclusivement pour un usage domestique et ne doit pas être utilisé à un usage commercial Toute autre utilisation est susceptible d endommager l appareil ou de provoquer des blessures Caractéristiques Modèle 969176 Ten...

Page 7: ...teuse Assemblage Placez le socle sur une surface ferme plane et thermorésistante Assurez vous qu il soit installé à au moins 50 cm de tout autre objet et que la zone soit bien aérée Ne placez pas l appareil près d une flamme nue ou d une source de chaleur telle qu une cuisinière des plaques de cuisson ou un four Placez le récipient à huile sur le socle Faites glisser le panneau de commande avec la...

Page 8: ...e vidange de l huile ATTENTION Nous recommandons de n utiliser que de l huile de friture dans cet appareil N utilisez jamais de graisse Branchement à l alimentation secteur Vérifiez que le bouton du thermostat est sur la position OFF Arrêt Déroulez complètement le cordon d alimentation Branchez l appareil sur une prise de courant Le voyant d alimentation rouge s allume Fonctionnement ATTENTION Ass...

Page 9: ...ion des poignées lorsqu il est en train de chauffer pendant l utilisation ou pendant son refroidissement Nous vous recommandons de ne pas toucher le bouton du thermostat pendant la cuisson Cela dit si vous devez changer la température de cuisson pendant la cuisson portez un gant de protection comme un gant de cuisine Ensuite vous devez retirer le couvercle et laisser s échapper de la vapeur avant ...

Page 10: ...sez le s égoutter pendant une minute Ensuite pour éliminer davantage d huile placez les aliments sur du papier absorbant ATTENTION Risque de brûlures Ne touchez jamais les paniers lorsqu ils sont chauds Utilisez toujours les poignées Si vous faites frire une autre fournée d aliments attendez que l huile soit à nouveau à la température de cuisson souhaitée Lorsque l appareil n est plus utilisé plac...

Page 11: ...uire des aliments à 170 C ou moins aide à réduire leur teneur en acrylamide Lorsque vous faites frire des aliments riche en féculents comme des pommes de terre faites les cuire partiellement à une température plus basse de 170 C pour les ramollir et les cuire complètement Laissez ensuite les aliments s égoutter pendant que vous faites chauffer la friteuse à 190 C Faites alors cuire les aliments pe...

Page 12: ... la manière suivante Composants Méthode de nettoyage Panneau de commande avec résistance Essuyer avec du papier absorbant puis nettoyer avec un chiffon légèrement humide et sécher REMARQUE La résistance ne doit être ni pliée ni bosselée Socle Couvercle Paniers Poignées détachables Filtre à maille et couvercle du filtre Nettoyer avec de l eau chaude savonneuse et sécher REMARQUE Le couvercle les pa...

Page 13: ...tre Retirez le filtre à maille Insérez un nouveau filtre à maille ou un filtre à maille propre et complètement sec Vérifiez que le filtre repose bien dans le renfoncement Repliez les quatre clips en haut du couvercle du filtre pour le maintenir en place Rangement Vérifiez toujours que l appareil est débranché et complètement refroidi avant de le ranger Rangez l appareil dans un endroit propre frai...

Page 14: ...13 FR ...

Page 15: ...I F E p r o d u c t s a r e c h o s e n t e s t e d a n d recommended by ELECTRO DEPOT so you can be sure you are getting a top quality easy to use product that won t let you down We re confident your new device will be a pleasure to use every day Welcome to ELECTRO DEPOT ...

Page 16: ...able of Contents A Product overview C Cleaning and maintenance B Product usage Before first use Using the deep fryer Cleaning and maintenance Storage List of parts Product overview Intended use Specifications ...

Page 17: ...handle x3 Draining hook Large frying basket Control panel Power indicator light Temperature indicator light Thermostat knob 0 C to 190 C Heating element Oil container Before using the unit carefully read both the Manual and Regulatory Warnings booklet Keep these instructions for future reference and pass them onto any new owners of the unit ...

Page 18: ...the reach of children There is a risk of accidents if children play with packaging materials Intended use Use this deep fryer to cook meats and vegetables This unit is intended for household use only and should not be used for commercial purposes Any other use may damage the unit or cause injury Specifications Model 969176 Voltage 220 240 V 50 60 Hz Power consumption 2000 W Minimum capacity 3 L Ma...

Page 19: ... stable level and heat resistant surface Make sure it is used at least 50 cm away from other objects and that the area is well ventilated Do not place the unit near open flames or heat sources such as a stove hob or oven Insert the oil container into the base Slide the control panel with heating element onto the base making sure you line up the grooves on the back of the base with the nodules on t...

Page 20: ...to the mains power Check the thermostat knob is in the OFF position Fully unwind the power cable Plug the unit into a mains socket The red power indicator will turn on Operation WARNING Make sure children are kept a safe distance away from the unit at all times when it is being used or when it is cooling down RISK OF FIRE Overheated oil can ignite very quickly Never leave heating oil unsupervised ...

Page 21: ... clockwise to increase the heat or anti clockwise to lower the heat as required During use the green temperature indicator light will cycle on and off as the thermostat automatically alternates the heating element on and off to keep the temperature at the set level While the oil is heating up prepare the food Remove any excess ice crystals from frozen food and dry any food that is wet WARNING Wate...

Page 22: ...en you have finished using the unit turn the thermostat knob to the OFF position and unplug it from the mains socket Allow the unit and all accessories to cool down completely before cleaning and storage CLEANING AND MAINTENANCE Resetting the unit The fryer is equipped with an overheating protection system If the fryer overheats the overheating protection system will automatically turn off the fry...

Page 23: ... food that requires the lowest temperature setting first Cooking foods at 170 C or below helps to reduce the acrylamide content of the foods When cooking starchy foods such as potatoes partially cook them at a lower temperature of 170 C to soften and cook through Let the food drain while you heat up the fryer to 190 C Then cook for the shortest possible time until the food is golden brown and cris...

Page 24: ...mble the unit and clean it as follows Parts Cleaning method Control panel with heating element Wipe with absorbent paper kitchen towel and then clean with a slightly damp cloth and dry NOTE Do not bend or dent the heating element Base Lid Baskets Detachable handles Mesh filter and filter cover Clean with warm soapy water and dry NOTE The lid baskets and detachable handles are dishwasher safe Oil c...

Page 25: ...he filter cover Remove the mesh filter Insert a new mesh filter or a clean and completely dry one Make sure the filter piece rests in the recess Fasten the four clips back down on top of the filter cover to secure it into place Storage Always check the unit is unplugged and has cooled completely before putting it away Store the unit in a clean cool and dry place Avoid exposure to direct sunlight S...

Page 26: ...25 EN ...

Page 27: ...RO DEPOT We staan garant voor de kwaliteit van de toestellen van COSYLIFE die uitmunten in hun eenvoudig gebruik hun betrouwbare werking en hun onberispelijke kwaliteit ELECTRO DEPOT beveelt de COSYLIFE toestellen aan en is ervan overtuigd dat u uiterst tevreden zal zijn bij elk gebruik van het toestel Welkom bij ELECTRO DEPOT Bezoek onze website www electrodepot be 26 NL ...

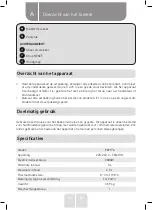
Page 28: ... A Overzicht van het toestel C Reiniging en onderhoud B Gebruik van het toestel Onderdelen Overzicht van het apparaat Doelmatig gebruik Specificaties Voor ingebruikname De friteuse gebruiken Reiniging en onderhoud Opslag ...

Page 29: ...e frituurmand Bedieningspaneel Aan uit controlelampje Temperatuurcontrolelampje Thermostaatknop 0 C tot 190 C Verwarmingselement Oliepan Lees deze gebruiksaanwijzing en de gids met wettelijke voorschriften aandachtig door alvorens het apparaat te gebruiken Bewaar deze gebruiksaanwijzing voor toekomstige raadpleging en als u dit apparaat aan een derde geeft doe dan tevens deze handleiding erbij ...

Page 30: ...k van kinderen Er is risico op een ongeval als kinderen met de verpakking spelen Doelmatig gebruik Gebruik deze friteuse voor het bakken van vlees en groente Dit apparaat is alleen bestemd voor huishoudelijk gebruik en mag niet worden gebruikt voor commerciële doeleinden Elk ander gebruik kan schade aan het apparaat of letsel aan personen teweegbrengen Specificaties Model 969176 Spanning 220 240 V...

Page 31: ...igheid aanraken De friteuse gebruiken Montage Plaats het voetstuk op een hard vlak en warmtebestendig oppervlak Zorg dat het apparaat zich op minstens 50 cm van andere voorwerpen en in een goed geventileerde ruimte bevindt Plaats het apparaat niet in de buurt van een open vlam of een warmtebron zoals een fornuis kookplaat of oven Plaats de oliepan in het voetstuk Schuif het bedieningspaneel met he...

Page 32: ...e friteuse en haak ze vast aan de achterkant van het voetstuk in de uitlekpositie OPGELET Wij bevelen aan om alleen frituurolie in dit apparaat te gebruiken Gebruik nooit vet Op de netvoeding aansluiten Controleer of de thermostaatknop de positie OFF uit is ingesteld Wikkel het snoer volledig af voor gebruik Steek de stekker van het apparaat in een stopcontact Het aan uit controlelampje brandt roo...

Page 33: ...len aan om de thermostaatknop tijdens het bakken niet aan te raken Als u de baktemperatuur tijdens het bakproces echter wilt wijzigen draag een ovenwant Verwijder vervolgens het deksel en laat de stoom ontsnappen voordat de temperatuur wordt verwijderd om het ontsnappen van stoom via de rand van het deksel en het risico op brandwonden te vermijden Regel de warmte naar wens door de thermostaatknop ...

Page 34: ...enpapier OPGELET Risico op brandwonden Raak de manden nooit aan wanneer ze warm zijn Gebruik altijd de handvatten Als u verder wilt bakken wacht totdat de olie opnieuw de gewenste baktemperatuur heeft bereikt Als het apparaat niet langer wordt gebruikt stel de thermostaatknop in op de positie UIT en haal de stekker uit het stopcontact Laat het apparaat en alle accessoires volledig afkoelen voordat...

Page 35: ...middelen bakken op 170 C of lager beperkt het acrylamidegehalte Als u levensmiddelen met een hoog zetmeelgehalte wilt bakken zoals aardappelen bak ze eerst op een temperatuur lager dan 170 C om ze zacht te maken en bak ze vervolgens gaar Laat de levensmiddelen vervolgens uitlekken terwijl de friteuse tot 190 C wordt opgewarmd Bak de levensmiddelen vervolgens gedurende een kortere periode totdat ze...

Page 36: ... op de volgende wijze Onderdelen Reinigingsmethode Bedieningspaneel met verwarmingselement Veeg schoon met keukenpapier reinig vervolgens met een licht bevochtigde doek en veeg droog OPMERKING Vermijd het plooien of indeuken van het verwarmingselement Voetstuk Deksel Manden Afneembare handvatten Gaasfilter en deksel van filter Maak het schoon met een warm sopje en veeg droog OPMERKING Het deksel d...

Page 37: ...ieuwe gaasfilter of een volledig schone en droge gaasfilter aan Controleer of de filter juist is aangebracht Vouw de vier klemmen aan de bovenkant van het filterdeksel opnieuw dicht zodat de filter mooi op zijn plaats vastzit Opslag Zorg dat de stekker uit het stopcontact is gehaald en het apparaat volledig is afgekoeld voordat u het opbergt Berg het apparaat in een schone ruimte op Vermijd elke b...

Page 38: ...37 NL ...

Page 39: ...s productos de la marca COSYLIFE le aseguran una utilización sencilla un rendimiento fiable y una calidad incuestionable Con este disposit ivo puede estar s eg uro de qu e siempre quedará satisfecho al utilizarlo Le damos la bienvenida a ELECTRO DEPOT Visite nuestra página web www electrodepot es Muchas gracias 38 ES ...

Page 40: ...scripción del aparato C Limpieza y mantenimiento B Utilización del aparato Antes del primer uso Uso de la freidora Limpieza y mantenimiento Almacenamiento Componentes Descripción del aparato Uso previsto Características ...

Page 41: ...ta grande de fritura Panel de control Indicador de alimentación Indicador luminoso de temperatura Botón del termostato 0 C a 190 C Resistencia Recipiente de aceite Lea detenidamente este manual de instrucciones y las advertencias normativas antes de utilizar el aparato Guarde este manual de instrucciones para futuras consultas y entrégueselo a los posibles nuevos propietarios del aparato ...

Page 42: ...del embalaje fuera del alcance de los niños Podrían producirse accidentes si los niños juegan con los materiales del embalaje Uso previsto Utilice esta freidora para cocinar carnes y verduras Este aparato está concebido únicamente para un uso doméstico y no deberá utilizarse para un uso comercial Cualquier otro uso podría dañar el aparato o provocar lesiones Características Modelo 969176 Tensión 2...

Page 43: ...e la base sobre una superficie firme plana y resistente al calor Asegúrese de que esté instalado al menos a 50 cm de cualquier otro objeto y que la zona esté bien ventilada No coloque el aparato cerca de una llama viva o una fuente de calor como fogones placas de cocción u hornos Coloque el recipiente de aceite en la base Deslice el panel de control con la resistencia en la base asegurándose de al...

Page 44: ...ido del aceite ATENCIÓN Le recomendamos que utilice únicamente aceite para freír en este aparato Nunca utilice grasa Conexión a la alimentación eléctrica Asegúrese de que el botón del termostato esté en la posición OFF Apagado Desenrolle completamente el cable de alimentación Conecte el aparato a una toma de corriente El indicador de alimentación rojo se encenderá Funcionamiento ATENCIÓN Asegúrese...

Page 45: ...inguna parte del aparato excepto las asas cuando se esté calentando utilizando o enfriando Le recomendamos que no toque el botón del termostato durante la cocción Dicho esto si necesita cambiar la temperatura de cocción mientras está cocinando lleve puesto un guante protector como por ejemplo un guante de cocina A continuación deberá quitar la tapa y dejar que se libere el vapor antes de ajustar l...

Page 46: ...je que escurra durante un minuto A continuación para eliminar el exceso de aceite coloque los alimentos sobre papel absorbente ATENCIÓN Riesgo de quemaduras Nunca toque las cestas cuando estén calientes Utilice siempre las asas Si va a freír otra tanda de alimentos espere a que el aceite esté de nuevo a la temperatura de cocción deseada Cuando ya no se vaya a utilizar el aparato ponga el botón del...

Page 47: ...esiten la temperatura más baja Cocinar los alimentos a 170 C o menos ayuda a reducir su contenido de acrilamida Cuando fría alimentos con alto contenido de féculas como las patatas cocínelos parcialmente a una temperatura inferior a 170 C para ablandarlos y cocinarlos completamente A continuación deje que los alimentos escurran mientras calienta la freidora a 190 C Después cocine los alimentos dur...

Page 48: ... Desmonte el aparato y límpielo de la siguiente forma Componentes Método de limpieza Panel de control con resistencia Limpiar con papel absorbente y después pasar un paño ligeramente húmedo y secar NOTA La resistencia no deberá doblarse ni abollarse Base Tapa Cestas Asas extraíbles Filtro de malla y tapa del filtro Limpiar con agua caliente jabonosa y secar NOTA La tapa las cestas y las asas extra...

Page 49: ...filtro de malla o un filtro de malla limpio y completamente seco Asegúrese de que el filtro esté bien colocado en el hueco Repliegue los cuatro enganches arriba de la tapa del filtro para mantenerlo en su posición Almacenamiento Antes de guardar el aparato asegúrese siempre de que esté desenchufado y se haya enfriado completamente Guarde el aparato en un lugar limpio fresco y seco Evite cualquier ...

Page 50: ...49 ES ...
Reviews: