background image

If  the  appliance  is  not  intended  to  be  installed  in  combined  with  any  other  appliance,  please 
installation with the follow:   

  Open the drawer, and use the 2 screws supplied to secure the appliance to the side walls 

of the housing unit.   

  The appliance is supplied with three metal trims which have an adhesive underside.   

  These trims must be stuck on to the warming drawer so that they seal any gaps between 

the housing unit and the appliance. Any air gap created acts as additional insulation and 
helps prevent heat-loss. 

  Carefully pull the protective foil off the underside of each trim.   

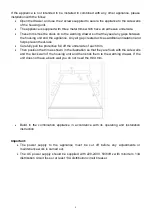
  Then position the trim as shown in the illustration so that they are flush with the side walls 

and the back wall of the housing unit and then stick them to the warming drawer. If the 
unit does not have a back wall you do not need the third trim. 


Build  in  the  combination  appliance  in  accordance  with  its  operating  and  installation 
instruction 


Important: 

  The  power  supply  to  the  appliance  must  be  cut  off  before  any  adjustments  or 

maintenance work is carried out. 

  The  AC  power  supply  should  be  supplied  with  220-240V,  50/60Hz  with  minimum  13A 

distribution circuit fuse or at least 13A distribution circuit breaker. 


3

Summary of Contents for EWMD-H6060TS(BK)

Page 1: ...Please read this manual carefully before operating your set Retain it for future reference Record model number and serial number of the set See the label attached on the set and quote this information...

Page 2: ...ON A POWER SUPPLY CABLE 4 4 2 CONNECTING THE SUPPLY CABLE TO THE MAINS 4 5 FOR THE FIRST TIME USING 5 6 PRODUCT DESCRIPTIONS 5 6 1 CONTROL PANEL 6 7 PROGRAMS AND FUNCTIONS 7 7 1 SELECTING THE WARMING...

Page 3: ...be removed except provided accessory Do not cover slag pan or other parts with tinsel since it will result overheat Accessible parts may become hot during use please keep away from children Never obs...

Page 4: ...wer The warming drawer should not be exposed to rain or direct sunshine Do not use or store flammable objects near to the warming drawer Distributors decline all liability for not following above inst...

Page 5: ...prevent heat loss Carefully pull the protective foil off the underside of each trim Then position the trim as shown in the illustration so that they are flush with the side walls and the back wall of...

Page 6: ...se contact a qualified technician to check the connection The manufacturer declines all liability of damage resulting from a connection which has not been earthed properly Before plugging the applianc...

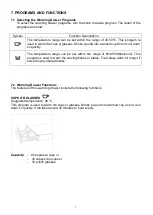
Page 7: ...hour with nothing in it with the door shut completely Then open the door and let the air in The odor that is often detected during this initial use is due to the evaporation of substances used to pro...

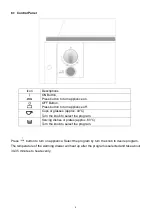
Page 8: ...es approx 40 C Turn the knob to select the program Serving dishes or plates approx 60 C Turn the knob to select the program Press button to turn on appliance Select the program by turn the knob to des...

Page 9: ...so quickly The temperature range can be set within the range of 60 80 C Maximum This program is used to warm the serving dishes or plates Food stays warm for longer if served in pre heated dishes 7 2...

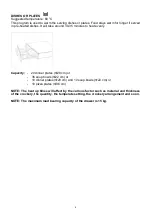
Page 10: ...nutes to heat evenly Capacity 20 dinner plates 28 cm or 36 soup bowls 22 cm or 10 dinner plates 28 cm and 10 soup bowls 22 cm or 10 pizza plates 36 cm NOTE The heat up times will affect by the various...

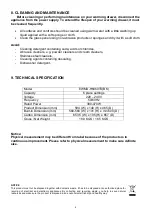
Page 11: ...washer detergent 9 TECHNICAL SPECIFICATION Notice Physical measurement may be different from label because of the products is in continuous improvement Please refer to physical measurement to make sur...

Page 12: ......

Reviews: