background image


Quick Start Guide 

Quick Start Guide 

Getting started 

1.


Unpack the appliance 
 

2.


Connect  the  AC  Adapter  to  a  wall  outlet  and  then  the  other  end  to  the 
appliance 


3.


Connect an Ethernet cable (not included) to your PC or laptop and the other 
end to the first Ethernet interface/port on the appliance (closest to the Serial 
Console port) 


4.


Connect to your appliance 


The NLX-microUCS appliance is configured by default with the following static 
IP  address  on  its  Ethernet  interface:  192.168.1.251/255.255.255.0  
Note: if it is not already configured that way, you may need to set your PC or 
laptop’s  network  interface  card  (NIC)  to  have  an  IP  address  like 
192.168.1.X/255.255.255.0. If this is not possible, contact Technical Assistance 
(See page 9) 
 

5.


Login into the appliance 
 
Once the appliance is connected to your network, you can access the Elastix 
Admin  Interface  through  a  web  browser.  Just  direct  your  browser  to 

http://192.168.1.251

 , we recommend the use of Firefox. 

 
At the login screen use the following information to access the system: 
 

o


Username: admin 

o


Password: palosanto 


6.


Change passwords (strongly recommended) 
 
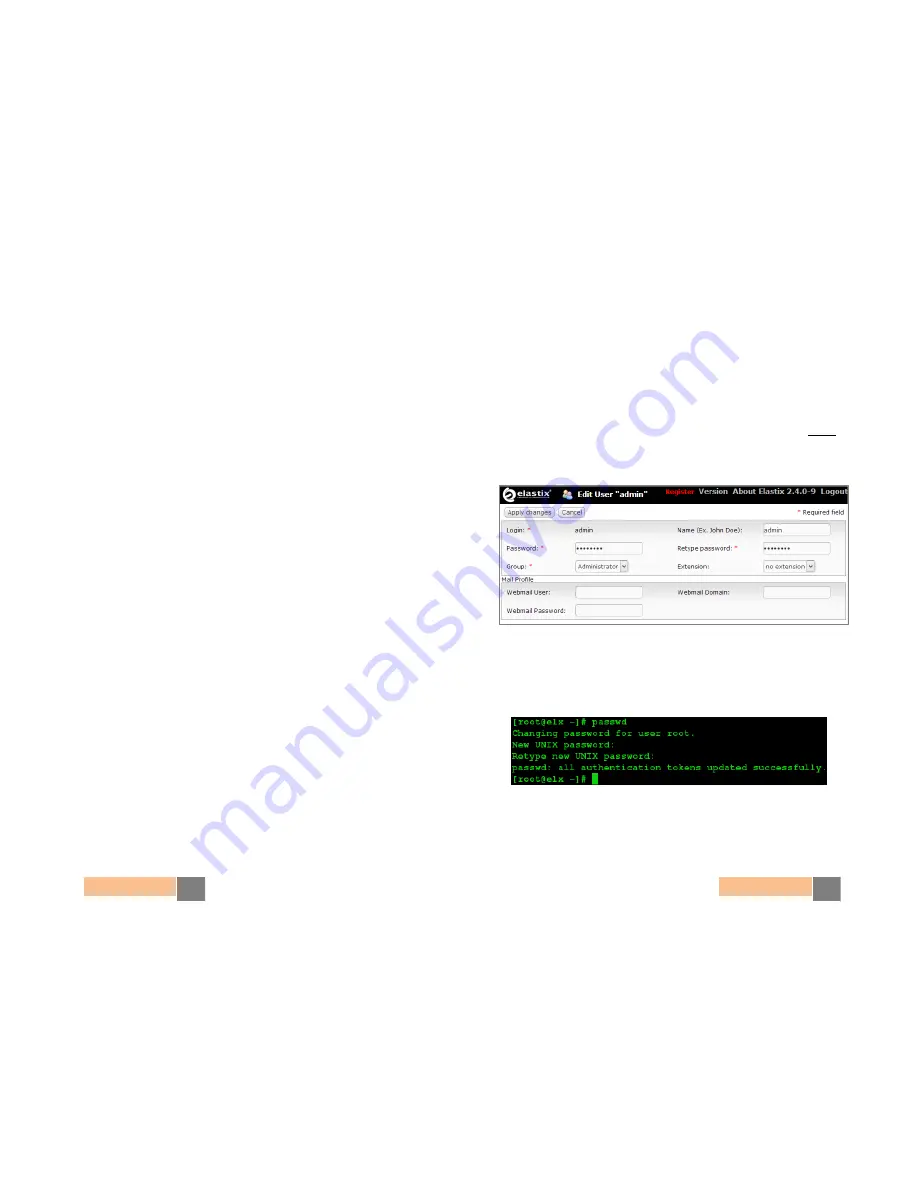
After  logging  in,  go  the  admin  user  edition  module  by  placing  your  mouse 
cursor over the Elastix logo at the top left corner of the Elastix’s web UI and 
hovering over “System” and then clicking on “Users”. There click on “admin” 
and finally on the “Edit” button. After typing the new password just click on 
the “Apply changes” button (Figure 1) 


Figure 1. Changing Elastix’s Admin Interface password 


To change Elastix’s root password (Linux console), connect via ssh to the 
appliance: 

ssh [email protected]

 (default password is: palosanto). Once 

inside execute the command: 

passwd 

(Figure 2) 


Figure 2. Changing Elastix’s Console password 


Summary of Contents for NLX-microUCS

Page 1: ...Quick Start Guide V 02 10 NLX microUCS APPLIANCE Unified Communications Server ...

Page 2: ...t configurations each NLX microUCS comes pre installed with PARAMETER VALUE Networking Hostname elx localdomain com Primary DNS 192 168 1 1 eth0 static IP Address 192 168 1 251 Netmask 255 255 255 0 Gateway 192 168 1 1 Log In credentials Admin Interface webUI Username admin Password palosanto Linux console Username root Password palosanto MySQL Username root Password palosanto Serial Console conne...

Page 3: ...ance Once the appliance is connected to your network you can access the Elastix Admin Interface through a web browser Just direct your browser to http 192 168 1 251 we recommend the use of Firefox At the login screen use the following information to access the system o Username admin o Password palosanto 6 Change passwords strongly recommended After logging in go the admin user edition module by p...

Page 4: ... your OS if you find yourself wanting to have your microUCS restored back to a clean default installation WARNING partitioning as well as the mkfs commands can destroy all data in your PC or Laptop Make completely sure you are pointing to the correct device drive corresponding to the SD card when using these commands 1 Remove the SD memory card from the microUCS and insert it in an SD card reader ...

Page 5: ...umount dev sdd1 Thank you for your purchase Technical assistance The Elastix Technical Assistance Center is ready to assist you For information on how to get this professional support please visit http elx ec elxsupport Limited warranty All Elastix Appliances come with a limited warranty Please contact your local reseller for more information and instructions on how to claim it 2013 PaloSanto Solu...

Reviews: