


38
VGA
VIDEO
HDMI
MENU
INPUT
FREEZE
MUTE
BLANK
LAMP
PATTERN
KEYSTONE
TIMER
INFO.
SCREEN
IMAGE
AUTO
+
+
-
-
D.ZOOM VOLUME
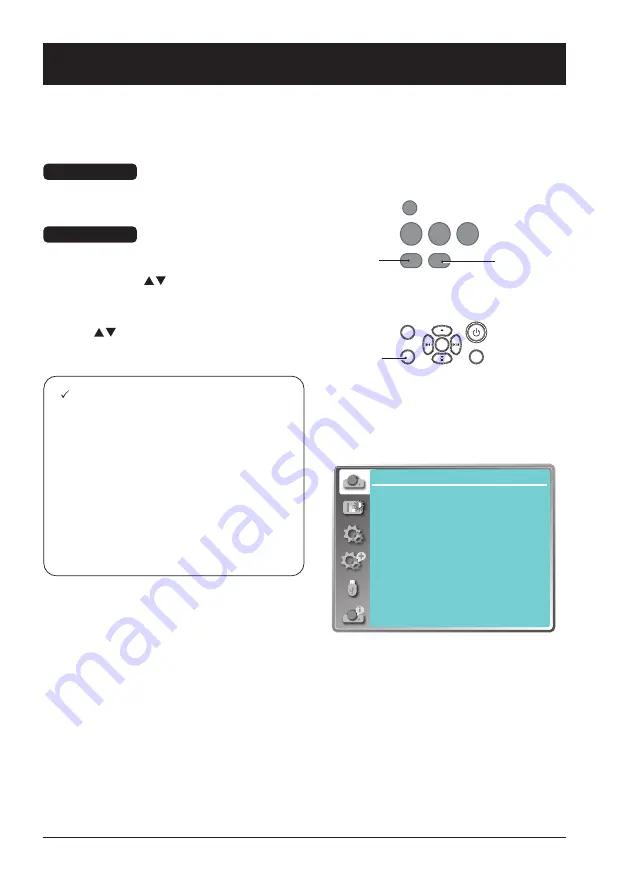
Display menu
OSD Setting-Display
Auto PC Adjusting
The Auto PC Adjusting function may get Total Dots, Horizontal and Vertical position, Display area H,
and Display area V aligned with computer input.
Menu Operation
1 Press the MENU button on the control panel
or on the remote controller and the OSD
displays. Press
button to select Display
icon. Press
button or OK button and get
into Display selection menu.
2 Press
button to point to Auto PC Adj.
option, press OK button to launch it.
Note:
-
The projector executes the Auto PC
adjustment automatically when the computer
signals input the projector for the first time.
-
Auto PC adjustment may not work depending
on the model of the computer and the input
signal.
-
The Auto PC adjustment cannot be operated
when 480i, 576i, 480p, 576p, 720p 1080i or
1080p is selected in the "Display" menu →
"System", or when the signal is coming from
the HDMI terminal.
Direct Operation
Press Auto button on the remote control to
launch the Auto PC Adj. function.
Display
Auto PC adj.
Fine sync
H Position
V Position
H. Size
Aspect
Project way
Menu position
Background display
System
17
0
0
0
Normal
Front
Center
Blue
1024 x 768, 60Hz
Auto
Menu
MENU
INPUT
EXIT
ENTER
Menu
Remote control
Control Panel
Summary of Contents for EK-700LU
Page 1: ...V1 0 Owner s manual Multimedia Projector EK 700LU...
Page 18: ...This chapter presents names and functions of individual component Overview...
Page 23: ...This chapter introduces the information of install Installation...
Page 29: ...This chapter introduces you to basic operation of your projector Operation...
Page 53: ...Description on using useful function...
Page 69: ...Appendix...


