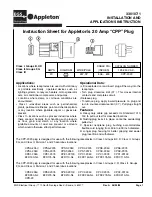
Instruction Sheet for Appleton’s 20 Amp “CPP” Plug
Page 2 330107-1 Rev. A
06/25/02
EGS Electrical Group • 7770 North Frontage Road • Skokie, IL 60077
Instructions:
1. To disassemble device as shown, remove clinch ring
(1) from plug housing (2) interior.
2. Remove terminal block assembly (5) and insulator
clamp assembly (3) from plug housing (2).
3. Strip the cable jacket and individual conductors per
Table A
.
Caution:
Care must be taken not to cut into the individual
conductor insulation when removing the outer cable
jacket and to not damage the conductors when
removing individual wire insulation.
Failure to do so will seriously degrade the electrical
properties of the cable and may produce
overheating/electrical hazard leading to
electrocution.
4. Slide plug housing (2) over cord (4).
• The self sealing neoprene bushing will adjust to cord
diameter.
5. Loosen four clamp screws (7) from insulator clamp
assembly (3).
Note:
The CPP Plug should be wired with three conductor
rubber covered #12 AWG through #14 AWG Type
SO Cords with copper conductors
ONLY
.
6. Slide insulator clamp assembly (3) over cord (4).
7. Separate front terminal block (9) from rear terminal
block (5). Fasten individual conductor wires to terminal
block assembly as follows:
For 125V: Green wire to grounding plug terminal “G”
(11).
White wire to lug terminal “W”.
Black wire to remaining lug terminal.
For 250V: Green wire to grounding plug terminal “G”
(11).
Other 2 wires to remaining 2 lug terminals.
Tighten terminal screw to a torque of 9 in.-lb.
Minimum/11 in.-lb. Maximum.
8. Slide insulator clamp (3) over cord (4) until it is seated
against the terminal block assembly.
9. Place the cord clamp (8) as shown in
Table B
according to cable diameter and tighten the four
clamp screws (7) to a torque of 10 in. -lb. Minimum/11
in.-lb. Maximum.
Caution:
DO NOT
attempt to over-tighten the screws or
bottom the clamp.
10. Slide plug housing (2) over insulator clamp
assembly (3) and terminal block assembly. Rotate
housing to find correct orientation
11. Insert clinch ring into plug housing interior.


