background image

REPAIR GUIDELINE

Backpack Battery_BAX1500

Version: 1

Issue Date: 2018/03/16

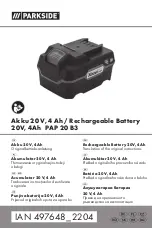
Summary of Contents for POWER+ BAX1500

Page 1: ...REPAIR GUIDELINE Backpack Battery_BAX1500 Version 1 Issue Date 2018 03 16...

Page 2: ...ge 1 Maintenance equipment 4 2 Replace external parts Without removing housing cover 5 13 3 Replace the PCBA 14 18 4 Replace the housing cover 19 27 5 Assembly flow chart 28 42 G1 Measurement BAX1500...

Page 3: ...You must follow the steps described in this manual very strictly Any deviations from the described actions may cause a fire or an explosion It may lead to serious injury or even death BAX1500 Backpack...

Page 4: ...4 Maintenance Equipment Notice Make sure you have got all the recommended equipment before proceeding with the repair BAX1500 Backpack Battery...

Page 5: ...5 Replace The External Parts Without Removing Housing Cover 1 Remove the backpack harness from battery pack referring to user manual Backpack harness Battery pack...

Page 6: ...Cover 2 Loosen the six screws and remove the belt mounting plate from the lower housing If the belt mounting plate is damaged replace with a new one Description Part Number Qty Screw 5610329001 6 Belt...

Page 7: ...the ten screws and remove the harness mounting plate from the lower housing If the harness mounting plate is damaged replace with a new one Description Part Number Qty Screw 5610329001 10 Harness Mou...

Page 8: ...Removing Housing Cover 4 Loosen the two screws 2 and remove the leaf spring from the lower housing If the leaf spring is damaged replace with a new one Description Part Number Qty Screw 2 5610250001 2...

Page 9: ...ver 5 Loosen the two screws and remove fuse cover and seal ring 1 from the battery pack If they are damaged replace with a new one Description Part Number Qty Screw 5610329001 2 Fuse Cover 3128803001...

Page 10: ...hout Removing Housing Cover 6 Take out the fuse from the mounting groove directly Measure the fuse referring to G1 Measurement and if the fuse is damaged replace with a new one Description Part Number...

Page 11: ...r 7 Loosen the seven screws and remove service cover and seal ring 2 from the battery If they are damaged replace with a new one Screw Service cover Seal ring 2 Description Part Number Qty Screw 56103...

Page 12: ...and remove the cable Measure the cable referring to G1 Measurement and if the cable is damaged replace with a new one Connectors Cable Notice The green seal ring 3 in the cable can be replaced indepe...

Page 13: ...ver 9 The two rubber covers can be replaced with new ones if necessary Description Part Number Qty Right Rubber Cover 3128880001 1 Left Rubber Cover 3128881001 1 Protective Film 3706274001 1 Rubber co...

Page 14: ...e The Housing Cover remove upper cover from the battery pack Replace The PCBA Notice Before you remove the upper cover wear your antistatic gloves or antistatic wrist strap or other antistatic device...

Page 15: ...with washer in sequence and insulate the joint with insulating tape to prevent accidental electrical risks See next slide Replace The PCBA 1 2 3 Description Part Number Qty Screw with Washer 562061800...

Page 16: ...16 Replace The PCBA Insulating tape Joint BAX1500 Backpack Battery...

Page 17: ...17 Replace The PCBA 3 Disconnect the 5 connectors in sequence 4 8 4 5 6 8 7 1 2 3 BAX1500 Backpack Battery...

Page 18: ...PCBA 4 Remove the six screws to separate the PCBA from the battery pack If it is damaged replace with a new one PCBA Screw Description Part Number Qty Screw 5610283001 6 PCBA 2830248001 1 BAX1500 Bac...

Page 19: ...19 1 Referring to Replace the external parts remove the cable leaf spring fuse and belt mounting plate from the battery pack Replace The Housing cover BAX1500 Backpack Battery...

Page 20: ...sing from the battery pack Replace The Housing cover Description Part Number Qty Screw 5610277002 12 Upper Housing 2825460001 1 WARNING Take out all the screws from its mounting groove and take away f...

Page 21: ...ace the handle assembly if any part is damaged Handle assembly Description Part Number Qty Screw 5620617001 2 Left Guide Bush 2825131001 1 Right Guide Bush 2825132001 1 Handle Assembly 2825720001 1 Ri...

Page 22: ...22 Replace The Housing cover 4 Referring to Replace the PCBA remove the PCBA from the cell assembly PCBA BAX1500 Backpack Battery...

Page 23: ...23 Replace The Housing cover 5 Remove the two screws to disconnect the cell assembly from lower housing Cell assembly Description Part Number Qty Screw 5610329001 2 BAX1500 Backpack Battery...

Page 24: ...ean flat surface If the cell assembly is broken it is recommended to buy a new battery pack Replace The Housing cover Cell assembly WARNING Any extra actions on cell assembly is very dangerous Never e...

Page 25: ...from the cell assembly and replace with a new one Replace The Housing cover Cell assembly Wire harness 1 Wire harness assembly Description Part Number Qty Wire Harness 1 4860428001 1 Wire Harness Ass...

Page 26: ...two screws and take out the USB DC port If it is damaged replace with a new one Replace The Housing cover Description Part Number Qty Screw 5610330001 2 USB DC Port 2830251001 1 USB DC port BAX1500 B...

Page 27: ...e wire harness from the lower housing If they are damaged replace with a new one Replace The Housing cover Wire harness Description Part Number Qty Wire Harness 4860427001 1 Lower housing 3128800001 1...

Page 28: ...28 Assembly Flow Chart 1 BAX1500 Backpack Battery...

Page 29: ...29 Assembly Flow Chart 2 BAX1500 Backpack Battery...

Page 30: ...30 Assembly Flow Chart 3 BAX1500 Backpack Battery...

Page 31: ...31 Assembly Flow Chart 4 BAX1500 Backpack Battery...

Page 32: ...32 Assembly Flow Chart 5 1 2 3 WARNING You must connect the wire to the PCBA in sequence 4 5 BAX1500 Backpack Battery...

Page 33: ...33 Assembly Flow Chart 6 7 8 6 WARNING You must connect the wire to the PCBA in sequence BAX1500 Backpack Battery...

Page 34: ...34 Assembly Flow Chart 7 WARNING You must connect the wire to the PCBA in sequence BAX1500 Backpack Battery...

Page 35: ...35 Assembly Flow Chart 8 WARNING You must connect the wire to the PCBA in sequence BAX1500 Backpack Battery...

Page 36: ...36 Assembly Flow Chart 9 BAX1500 Backpack Battery...

Page 37: ...37 Assembly Flow Chart 10 BAX1500 Backpack Battery...

Page 38: ...38 Assembly Flow Chart 11 BAX1500 Backpack Battery...

Page 39: ...39 Assembly Flow Chart 12 BAX1500 Backpack Battery...

Page 40: ...40 Assembly Flow Chart 13 BAX1500 Backpack Battery...

Page 41: ...41 Assembly Flow Chart 14 BAX1500 Backpack Battery...

Page 42: ...42 Assembly Flow Chart 15 BAX1500 Backpack Battery Upon continuous product improvement please using the latest SBOM Parts list to order spare parts if necessary...

Reviews: