background image


2.  Connect IP Camera Gateway to your Wi-Fi 

 
With Smartphone/tablet 


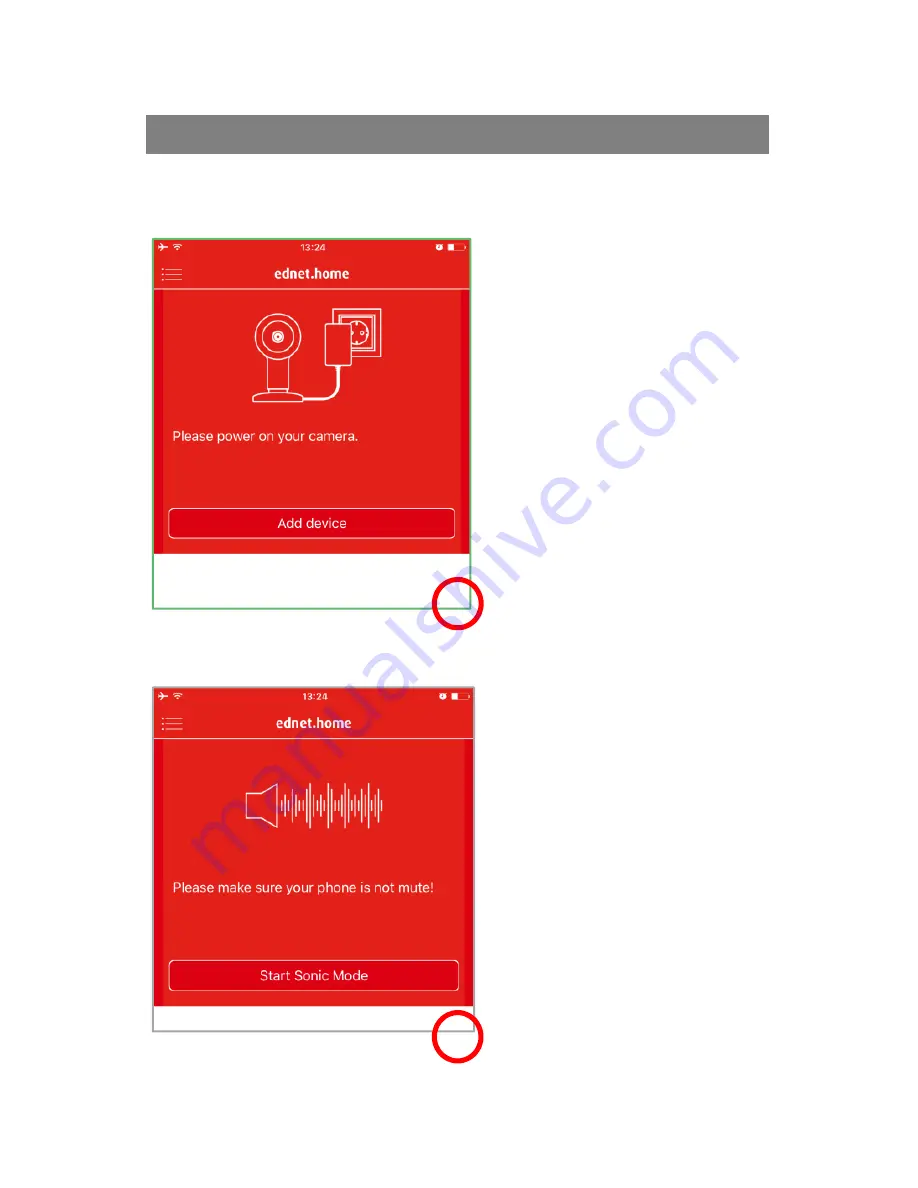
Please power ON the IP 
camera Gateway with the 
power adapter. The audio 
assistant from the camera 
would inform you when the 
camera is booted up and 
enters “Sonic Mode”. 
 
Please follow the 
instructions in the App to 
connect your IP camera 
gateway to your WiFi. 
 
Please select “Add device” 
to start. 

(1)


Please make sure your 
smart phone is not in mute 
mode and if possible please 
increase the speaker 
volume up on your smart 
phone to prepare for Sonic 
mode. 
 
Please press “Start Sonic 
Mode” on the App. 

(2)


2

1

Summary of Contents for 84293

Page 1: ...ednet Smart Home Quick Installation Guide 84299...

Page 2: ...art Home does not replace adult supervision Safeguard the health of your children family members or pets by regularly looking after them Ensure that the indoor IP cameras and indoor sensors and indoor...

Page 3: ...power adapter Never try to repair ednet smart home system by yourself Repair and maintenance work must be carried out by specialists In case of problems contact our customer service Observe all applic...

Page 4: ...o protect it from unauthorized access The password should contain at least 8 characters we recommend case sensitive letters and alphanumeric characters Furthermore the standard password of the camera...

Page 5: ...Batteries for the contact sensors 1 x Motion Sensor 2 x AAA batteries for the Motion sensor 1 x Quick Installation Guide IP Camera Gateway Motion Sensor Door Window Sensor Thank you for choosing ednet...

Page 6: ...rophone 5 Speaker 1 Setting up the ednet home User Account In order to use your ednet smart home you need to register an user account The setup and control can be done from your Smartphone tablet 1 1...

Page 7: ...Play In the Search results the ednet home App will be marked with this symbol Then please download and install the App on your mobile device Start the App and you will enter the login page For first...

Page 8: ...supported 3 Accept the privacy policy for using the ednet home 4 Press Signup to finish the account registration Next you will also receive an e mail notification for successfully account registratio...

Page 9: ...when the camera is booted up and enters Sonic Mode Please follow the instructions in the App to connect your IP camera gateway to your WiFi Please select Add device to start 1 Please make sure your s...

Page 10: ...ess Start Sonic Mode on the App 3 Then please wait for the camera to connect to Internet The audio assistant from the camera would tell you when the Internet is connected Please give a name to your IP...

Page 11: ...different one immediately after camera registration 5 After camera password change you will enter the camera live view page Under this page you can also check the event playback by clicking Recording...

Page 12: ...or LED flashes once detects motion LED flashes once every 3s Low voltage indication Please change to the new battery as soon as possible Anti tamper Function When the sensor s back cover is opened the...

Page 13: ...on the motion sensor to be OFF or ON Below example means interval of 5S and LED OFF 1 Interval 5 Min 5S 2 LED Off On Installation Installation location should avoid too close to window air conditioner...

Page 14: ...or on the bracket and change the detecting angel and distance through adjusting the installation height and the bracket The installation height is suggested to be 2 meters high from ground Top View Fl...

Page 15: ...Part A is the transmitter that communicates with the Gateway Part B is the magnet So when Part A and Part B are separated when the door window is opened the contact sensor is triggered Front Please i...

Page 16: ...the alarm notification via APP Installation First please clean the corresponding position and then adhere both Part A and Part B of the Contact sensor with the double sided tape included in the packag...

Page 17: ...o add a sensor or actor Please select the type of your sensor or actor to add 2 For Contact sensor please select the Door Window detector to add For Motion sensor please select Motion Sensor to add Le...

Page 18: ...n your Motion sensor and trigger the motion sensor with any movement 4 Then the IP camera gateway would detect the motion sensor to complete the learning paring process Please press Apply to complete...

Page 19: ...an be activated in relation with the event triggered by Transmitter sensors such as motion sensor So let s try to setup the Receiver device After pressing the Sensor Actor icon on the camera live view...

Page 20: ...r Plug is powered and entered learning mode already Please long press the Learn button on the Power Plug 84291 or 84292 for 5 seconds until you see the flashing LED on the Power Plug to enter the Lear...

Page 21: ...Then you can enter the just added Power Plug on the App to control Power ON or Power OFF by pressing the icons on the App 6 6...

Page 22: ...e lamp automatically Please enter the Transmitter sensor motion sensor in this case from the Sensor Actor list on your App by clicking into it Please press the sign next to Trigger and setup the rules...

Page 23: ...so the programmed rules will work To set up the Partial Arm Mode for the sensor please go into the sensor settings and activate Enable Partial Alarm 6 Install MicroSD Card ednet Smart Home camera gate...

Page 24: ...Setting on the App of the IP Camera gateway then select Motion Detection Please switch to On to enable motion detection By enabling image or video you will create event snapshot or event recording at...

Page 25: ...rating steps and do not imply that they are freely available In any case they are the property of the respective holder of the rights Hereby ASSMANN Electronic GmbH declares that this device is in com...

Reviews: