background image


Some experts believe that the incorrect or prolonged use of almost any product may 
cause serious injury or death. To help reduce your risk of serious injury or death, refer 
to the information below. For more information, see www.datastreamserver.com/safety 


Consult all documentation, packaging and product 
labelling before use. Note that some products feature 
documentation available online. It is recommended to 
print and retain the documentation. 


Before each use, check the product for loose/broken/ 
damaged/missing parts, wear or leaks (if applicable). 
Never use a product with 
loose/broken/damaged/missing parts, wear or leaks. 


Products must be inspected and serviced (if 
applicable) by a qualified technician every 6 months. 
This is based on average residential use by persons of 
average size and strength, and on a property of 
average metropolitan size. Use beyond these 
recommendations may require more frequent 
inspections/servicing. 


Ensure that all users of the product have completed a 
suitable industry recognised training course before 
being allowed access to the product. 


If this product has been purchased in error when 
considering the information presented here, contact 
the retailer directly for details of their returns policy, if 
required. 


The product has been supplied by a general 
merchandise retailer that may not be familiar with your 
specific application or description of application. Be 
sure to attain third-party approval from a qualified 
specialist for your application before use, regardless of 
any assurances from the retailer or its representatives. 


This product is not intended for use where fail-safe 
operation is required. As with any product (for 
example, automobile, computer, toaster), there is the 
possibility of technical issues that may require the 
repair or replacement of parts, or the product itself. If 
the possibility of such failure and the associated time it 
may take to rectify could in any way inconvenience the 
user, business or employee, or financially affect the 
user, business or employee, then the product is not 
suitable for your requirements. This product is not 
intended for use where incorrect operation or a failure 
of any kind, including but not limited to, a condition 
requiring product return, replacement, parts 
replacement or service by a technician may cause 
financial loss, loss of employee time or an 
inconvenience requiring compensation. 


Summary of Contents for mtm MBX300

Page 1: ...Pack Pole Trimmer and Brush Cutter User Manual RETAIN THIS MANUAL FOR FUTURE REFERENCE PLEASE READ THIS MANUAL CAREFULLY BEFORE USE Click to Watch Starting a 2 Stroke How to Reload Your Twister Bump...

Page 2: ...Contents Safety 1 Included Items 3 Safety Wear 3 Tools 4 Accessories 4 Set Up 5 Quick Start Guide 11 Maintenance 12 Spark Plug 12 Compatible Spark Plugs 12 Spark Plug Specifications 12 Air Filter 12...

Page 3: ...om windows doors and vent Do not operate in a hazardous location Such areas include where there is a risk of explosion of petrol fumes leaking gas or explosive dusts Do not operate in a confined area...

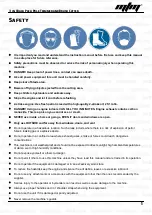
Page 4: ...le properly secure your machine to prevent turnover fuel spillage and damage Petrol is an extremely flammable fuel Keep clear of naked flames Do not spill any fuel Do not smoke near fuel or the machin...

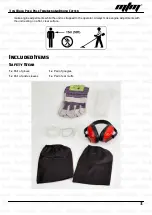
Page 5: ...e engine adjustments while the unit is strapped to the operator Always make engine adjustments with the unit resting on a flat clear surface Included Items Safety Wear 1x Pair of gloves 1x Pair of ank...

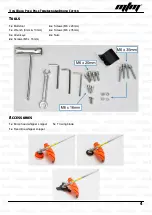
Page 6: ...and Brush Cutter 4 Tools 1x Multi tool 1x Wrench 8mm 10mm 3x Allen keys 2x Screws M6 x 16mm 4x Screws M6 x 20mm 4x Screws M6 x 35mm 4x Nuts Accessories 1x Bump head whipper snipper 1x Fixed line whipp...

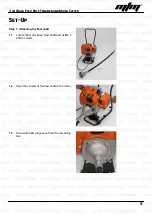
Page 7: ...and Brush Cutter 5 Set Up Step 1 Attaching the flexi shaft 1 1 Locate the motor base flexi shaft and 4x M6 x 20mm screws 1 2 Align the coupler of the flexi shaft to the motor 1 3 Screw alternate diag...

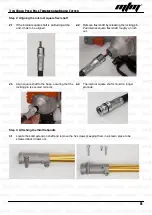
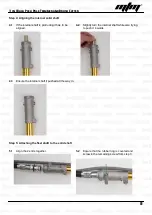
Page 8: ...shaft by releasing the locking pin Pull internal square flexi shaft roughly an inch out 2 3 Align square shaft to the base ensuring that the locking pin is secured correctly 2 4 The internal square s...

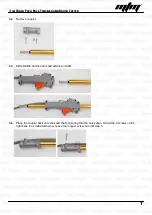
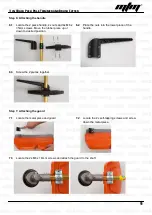
Page 9: ...2 Remove coupler 3 3 Slide throttle handle onto solid extension shaft 3 4 Place the coupler back onto the solid shaft ensuring that the holes align Screw the 2 screws on the right back in as indicate...

Page 10: ...ding it has to be aligned 4 2 Slightly turn the internal shaft while also trying to push it inwards 4 3 Ensure the internal shaft it pushed all the way in Step 5 Attaching the flexi shaft to the solid...

Page 11: ...ove the rubber piece up or down to desired position 6 2 Place the nuts into the lower piece of the handle 6 3 Screw the 2 pieces together Step 7 Attaching the guard 7 1 Locate the metal piece and guar...

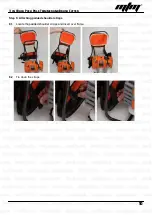
Page 12: ...3 in1 Back Pack Pole Trimmer and Brush Cutter 10 Step 8 Attaching padded shoulder straps 8 1 Locate the padded shoulder straps and insert over frame 8 2 Tie down the straps...

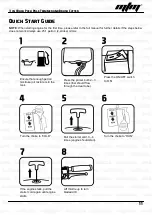
Page 13: ...s use 25 1 petrol 2 stroke oil mix Ensure that enough petrol 2 stroke oil mixture is in the tank Press the primer bulb 2 3 times fuel should flow through the clear tube Press the ON OFF switch to ON T...

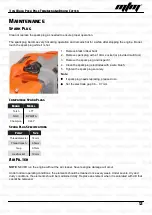
Page 14: ...lectrodes with a wire brush 5 Tighten the spark plug securely Note If spark plug needs replacing please do so Set the electrode gap 0 6 0 7 mm Compatible Spark Plugs Brand Model Torch L7T NGK BPMR7A C...

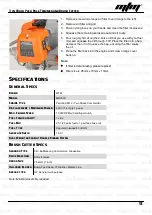
Page 15: ...ge cover back on Note If filter is deteriorating please replace Filter size is 85mm x 70mm x 13mm Specifications General Specs Brand MTM Model MBX300 Engine Type Petrol EURO 2 Two Stroke Commercial Di...

Page 16: ...has been purchased in error when considering the information presented here contact the retailer directly for details of their returns policy if required The product has been supplied by a general mer...

Reviews: