background image


Quick Installation Guide 

ECWO5213-L  Access  Point 

ENGLISH 


Pole mount 

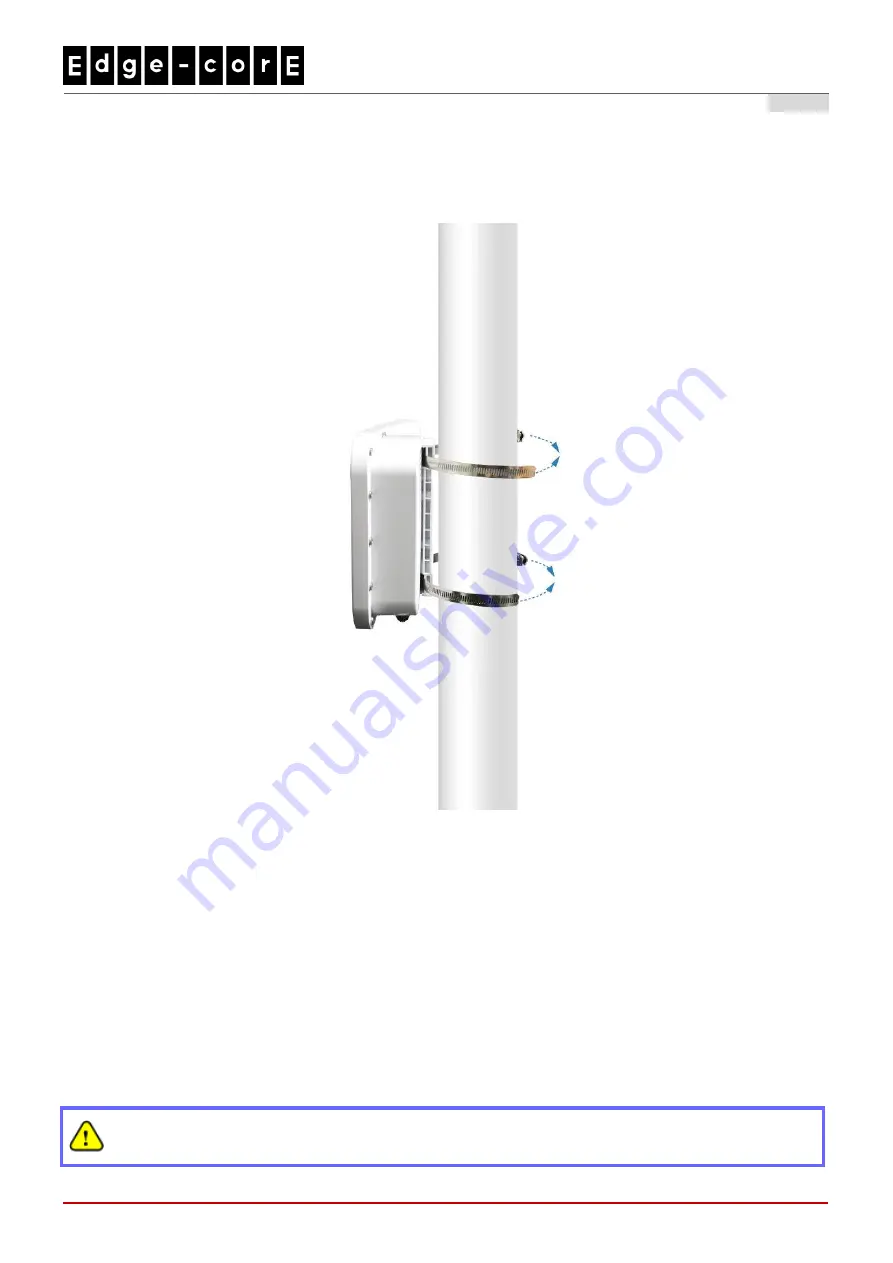
1.  Insert the metal strips through the pole mounting gap. 

2.  Join the two ends of the metal strips and adjust the length for tight fitting around the pole. 


2. Connect the ECWO5213-L to your network device. 

Connect  one  end  of  the Ethernet  cable  to  the  LAN1  (PoE)  port  of  ECWO5213-L  and  the  other  end  of  the 

cable to a switch, a router, or a hub. ECWO5213-L is then connected to your existing wired LAN network. 


3. Power on the ECWO5213-L. 

ECWO5213-L LAN1 (PoE) port is capable of receiving DC currents. Connect an IEEE 802.3at-compliant PSE 

device (e.g. a PoE-switch) to the LAN1 (PoE) port of ECWO5213-L with the Ethernet cable. 


Now, the Hardware Installation is complete.   


To verify the wired connection between ECWO5213-L and your switch / router / hub, please also 

check the LED indicator of the respective network devices. 

Summary of Contents for ECWO5213-L

Page 1: ...ECWO5213 L Access Point...

Page 2: ...u may not copy reproduce distribute publish display perform or modify any part of this publication in any form or by any means without prior written permission from Edgecore Networks Corporation You m...

Page 3: ...not expressly approved by the party responsible for compliance could void the user s authority to operate this equipment This transmitter must not be co located or operating in conjunction with any o...

Page 4: ...equency MHz Peak Gain dBi Antenna Type Connecter Type 1 2400 2500 10 9 PIFA IPEX 2 2400 2500 11 4 5GHz antenna spec Antenna No Frequency MHz Peak Gain dBi Antenna Type Connecter Type 1 5150 5825 10 5...

Page 5: ...0 4 11 Safety EN 60950 1 2006 A11 2009 A1 2010 A12 2011 A2 2013 Caution This declaration is only valid for configurations combinations of software firmware and hardware provided and supported by Edgec...

Page 6: ...multiple Virtual APs great for enterprise applications such as separating traffic from different departments using different ESSIDs As an Outdoor Access Point ECWO5213 L supports wall mounting and po...

Page 7: ...er finishing booting the Power LED will always on 2 LAN1 LED Uplink status The LAN1 LED will light up when there is traffic passing through the LAN1 port 3 LAN2 LED LAN status The LAN LED will light u...

Page 8: ...is also supported 7 Ventilation Valve Due to extreme weather conditions water vapor in the ECWO5213 L may condense The valve allows ventilation to prevent moisture buildup within the ECWO5213 L 8 LAN...

Page 9: ...w the steps mentioned below to install the hardware of ECWO5213 L 1 Place the ECWO5213 L at the best location The best location for ECWO5213 L is usually at the center of your intended wireless networ...

Page 10: ...ECWO5213 L and the other end of the cable to a switch a router or a hub ECWO5213 L is then connected to your existing wired LAN network 3 Power on the ECWO5213 L ECWO5213 L LAN1 PoE port is capable of...

Page 11: ...To access the web management interface connect the administrator PC to the LAN port of ECWO5213 L via an Ethernet cable Then set a static IP address on the same subnet mask as ECWO5213 L in TCP IP of...

Page 12: ...Edgecore ECWO5213 L is installed and configured successfully After ECWO5213 L s network configuration is completed please remember to change the IP Address of your PC Connection Properties back to its...

Reviews: