background image

EN

When using an electrical appliance, certain basic safety 

instructions must be followed, including:

· This appliance must only be plugged into an outlet that 

supplies the voltage indicated on the appliance.

· Unplug the appliance when not in use, after each use 

and before cleaning it.

· Do not put it or store it in a place where it may fall on 

the floor, on a bathtub or a sink.

· Do not use it in the bath or shower.

· Do not submerge it in water or any other liquid.

· Do not pick up a device that has fallen in water. Unplug 

it immediately.

· This hair clipper is only intended for domestic use. Use 

this appliance just for the use intended as described in 

this manual.

· Do not use accessories not recommended by the 

manufacturer.

· This appliance should not be left unattended when 

plugged in.

· This appliance can be used by children of 8 years of 

age above and persons with reduced physical, sensory or 

mental abilities or lack of experience and knowledge if 

they have been given supervision or training regarding 

the proper use of the equipment in a safe manner and 

understand the dangers involved. Children should not 

play with the appliance. Cleaning and maintenance 

should only be carried out by the user, not by 

unsupervised children.

· Avoid contact with the moving parts.

· Do not handle the appliance with wet hands.

· Do not operate the appliance if the cable or head is 

damaged or does not work properly.

· Keep the power cable away from hot surfaces.

· Hold the plug when removing from the socket. Do not 

pull the cable to unplug.

· Do not pull, twist or wrap the cord around the appliance.

· Do not drop or insert any object into any openings on 

this appliance.

· Before using, make sure the blades are aligned properly.

· Do not put the appliance on any surface while it is in use.

· Do not use this appliance with a damaged or broken 

comb, or if the blades have missing teeth because it 

could cause physical injury.

· If the power cord is damaged, it must be replaced by 

the manufacturer, by its service agent or similarly 

qualified personnel in order to avoid injury. Never try to 

fix it yourself.

· 

WARNING: keep the appliance in a dry place.

35

Summary of Contents for AD 836A

Page 1: ...ES IT EN AD 836A M QUINA CORTAPELOS MACCHINETTA TAGLIACAPELLI HAIR CLIPPER MANUAL DE USUARIO MANUALE D USO USER MANUAL...

Page 2: ...2...

Page 3: ...safety instructions included in this manual carefully In it you will find important advice on how to use maintain and clean the appliance Put this manual in a safe place and keep it so that you can re...

Page 4: ...a el consumidor 2 Se llevar a cabo en un plazo razonable y sin mayores inconvenientes para el consumidor 3 La reparaci n suspender el c mputo del plazo de dos a os para manifestar la falta de conformi...

Page 5: ...ESCRIPCI N DE LOS COMPONENTES 1 Hoja inferior 2 Hoja superior 3 Interruptor encendido apagado I O 4 Palanca de hojas ACCESORIOS n 1 3 mm n 2 6 mm n 3 9 mm n 4 12 mm Peine Tijeras Aceite Pincel ES 3 4...

Page 6: ...uso y antes de proceder a su limpieza No lo coloque ni lo guarde donde se pueda caer al suelo a una ba era o a un lavabo No lo utilice en la ba era ni en la ducha No lo sumerja ni lo deje caer en agu...

Page 7: ...que implica Los ni os no deben jugar con el aparato La limpieza y el mantenimiento a realizar por el usuario no deben realizarlo los ni os sin supervisi n Evite el contacto con las piezas m viles No...

Page 8: ...ntras est en funcionamiento No utilice este aparato con un peine accesorio roto o da ado ni si faltan dientes de las cuchillas porque podr a producir lesiones f sicas Si el cable de red est da ado deb...

Page 9: ...9 ES...

Page 10: ...e su cortador con el croquis Si la alineaci n de las hojas es incorrecta ponga unas gotas de aceite a las hojas encienda el cortador por unos momentos apague y desconecte Afloje los Para mantener su c...

Page 11: ...baja la palanca dejar el cabello aproximadamente del mismo largo que el peine 1 La palanca tambi n extender el uso de sus hojas puesto que se usa un borde de corte diferente en cada ajuste Adem s si...

Page 12: ...vemente Limpie cualquier exceso de aceite Esto debe hacerse 12 INSTRUCCIONES PARA EL CORTE DE CABELLO despu s de cada uso Mientras use la unidad desenrosque el cable para evitar enredos 2 Siente a la...

Page 13: ...e del peine se asiente firmemente contra la hoja de corte INICIO DEL CORTE Para quitar el peine simplemente deslice el peine hacia arriba y fuera de la hoja de corte Para un corte parejo deje que el a...

Page 14: ...OSTERIOR DE LA CABEZA Cambie al accesorio de peine m s largo que sigue 9mm 12mm y corte la parte posterior de la cabeza ver dibujo 2 PASO 3 LADOS DE LA CABEZA Cambie a uno de los peines m s cortos 3mm...

Page 15: ...para lograr un corte rapado o corto 3 Para que el cabello quede m s largo arriba use el peine suministrado y levante el cabello sobre la cabeza Corte encima del peine con el cabello levantado o sosten...

Page 16: ...omo el de una navaja de afeitar CORTES PLANO Y MILITAR 1 Empezando con el accesorio de peine m s largo 12mm corte desde la parte posterior del cuello a la corona Mantenga el accesorio de peine plano c...

Page 17: ...cabello y compruebe las reas disparejas y delinee los lados y la l nea del cuello como se describi anteriormente Si se desea llevar el corte rapado en los costados y en la parte posterior de la cabez...

Page 18: ...unperiododitemporagionevoleesenzamaggioriinconvenientiperilconsumatore 3 La riparazione sospender il calcolo del periodo di due anni per dichiarare la mancanza di conformit del bene fino alla consegna...

Page 19: ...ZIONE DEI COMPONENTI 1 Lama inferiore 2 Lama superiore 3 Interruttore di accensione spegnimento I O 4 Leva di regolazione lame ACCESSORI N 1 3 mm N 2 6 mm N 3 9 mm N 4 12 mm Pettine Forbici Olio Penne...

Page 20: ...sa cadere per terra in una vasca da bagno o lavandino Non utilizzare nella vasca da bagno n nella doccia Non immergerlo mai n in acqua n in nessun altro liquido Non usare un dispositivo che sia caduto...

Page 21: ...chio La pulizia e la manutenzione a carico dell utente non devono essere effettuate da bambini a meno che non siano supervisionati Evitare il contatto con parti in movimento Non utilizzare l apparecch...

Page 22: ...parecchio con un pettine danneggiato o rotto o se le lame hanno denti mancanti perch potrebbe causare lesioni fisiche Se il cavo di alimentazione danneggiato deve essere sostituito dal produttore dal...

Page 23: ...23 IT...

Page 24: ...iore confrontare le lame del tagliacapelli con il disegno Se l allineamento delle lame scorretto mettere alcune gocce di olio sulle lame accendere per Per mantenere il tagliacapelli in buone condizion...

Page 25: ...r i capelli approssimativamente della stessa lunghezza del pettine n 1 La leva estende anche l uso delle lame a patto che si usi un diverso bordo di taglio per ogni regolazione Inoltre se il taglio di...

Page 26: ...ioni senza intoppi Pulire dall olio in eccesso Ci dovrebbe ISTRUZIONI PER IL TAGLIO DEI CAPELLI essere fatto dopo ogni utilizzo Mentre si usa l unit srotolare il cavo per evitare grovigli 2 Far sedere...

Page 27: ...pettine non alloggi saldamente contro la lama INIZIO DEL TAGLIO Per rimuovere il pettine basta semplicemente farlo scorrere verso l alto e fuori dalla lama Per un taglio uniforme lasciare che l access...

Page 28: ...RTE POSTERIORE DELLA TESTA Posizionare il pettine pi lungo da 9 mm o 12 mm e tagliare la parte posteriore della testa vedi fig 2 PASSO 3 LATI DELLA TESTA Passare ad uno dei pettini pi corti da 3 mm o...

Page 29: ...n taglio rasato o corto 3 Perch il capelli siano pi lunghi in alto utilizzare il pettine fornito ed alzare i capelli sopra la testa Tagliare sull estremit del pettine con i capelli sollevati o tenere...

Page 30: ...o come se si fosse usato un rasoio a mano TAGLI PIATTO E MILITARE 1 Cominciando con il pettine pi lungo 12 mm tagliare dalla parte posteriore del collo alla zona coronale Mantenere il pettine piatto c...

Page 31: ...a Pettinare i capelli e controllare le zone irregolari e delineare i lati e la linea del collo come descritto sopra Se si vogliono portare i capelli a spazzola sui lati e nella parte posteriore della...

Page 32: ...arge for the consumer 2 It shall be carried out within a reasonable period of time and without causing the consumer great inconvenience 3 The repair shall suspend the counting of the two year period f...

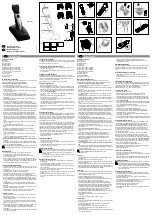
Page 33: ...EN 33 COMPONENTS DESCRIPTION 1 Lower blade 2 Upper blade 3 Switch on off I O 4 Blade lever ACCESSORIES 1 3 mm 2 6 mm 3 9 mm 4 12 mm Comb Scissors Oil Brush 3 4 1 2...

Page 34: ...ng it Do not put it or store it in a place where it may fall on the floor on a bathtub or a sink Do not use it in the bath or shower Do not submerge it in water or any other liquid Do not pick up a de...

Page 35: ...ontact with the moving parts Do not handle the appliance with wet hands Do not operate the appliance if the cable or head is damaged or does not work properly Keep the power cable away from hot surfac...

Page 36: ...er cord is damaged it must be replaced by the manufacturer by its service agent or similarly qualified personnel in order to avoid injury Never try to fix it yourself WARNING keep the appliance in a d...

Page 37: ...EN 37...

Page 38: ...blades of your cutter with the diagram If the blades are not aligned correctly put a few drops of oil on the blades turn the cutter on for a few moments turn off and disconnect Loosen the screws To k...

Page 39: ...gth as comb 1 when the lever is in the lowest position BLADE LEVER The lever will also extend the use of its blades since a different cutting edge is used in each setting Also if cutting very thick ha...

Page 40: ...works smoothly Clean off any excess oil This should be done after every use While you use unravel the cable to avoid tangles INSTRUCTIONS FOR HAIR CUTTING 2 Seat the person so that their head is appr...

Page 41: ...move the comb just slide it up and out of the blade START OF CUT For an event cut let the comb attachment cutter to cut its way through the hair Do not force it through quickly Also remember to comb y...

Page 42: ...k area of the head see figure 2 STEP 3 SIDES OF THE HEAD Change to one of the shorter combs 3mm or 6mm cut the sideburns i e the hair directly in front of the ears Then change to one of the longer com...

Page 43: ...ories are used to achieve a shaved or short cut 3 For longer hair on top use the comb provided and lift the hair on top of the head Cut above the comb with the hair raised or held up between the finge...

Page 44: ...achieve a razor clean cut FLAT TOP AND MILITARY STYLE CUTS 1 Starting with the longest cutting accessory 12mm cut from the nape of the neck to the crown of the head Hold the comb attachment at agains...

Page 45: ...red Comb the hair and check for the uneven areas and trace the sides and the neckline as described previously If you want your hair shaved at the sides and the upper part of the head follow the diagra...

Page 46: ...plan gratuito de recogida selectiva de su comunidad o del punto de venta en el que adquiera el sustituto de este producto La gesti n ecol gica de los aceites usados generados tras la utilizaci n de e...

Reviews: