background image


Quick Start USER GUIDE


ECOSTONE


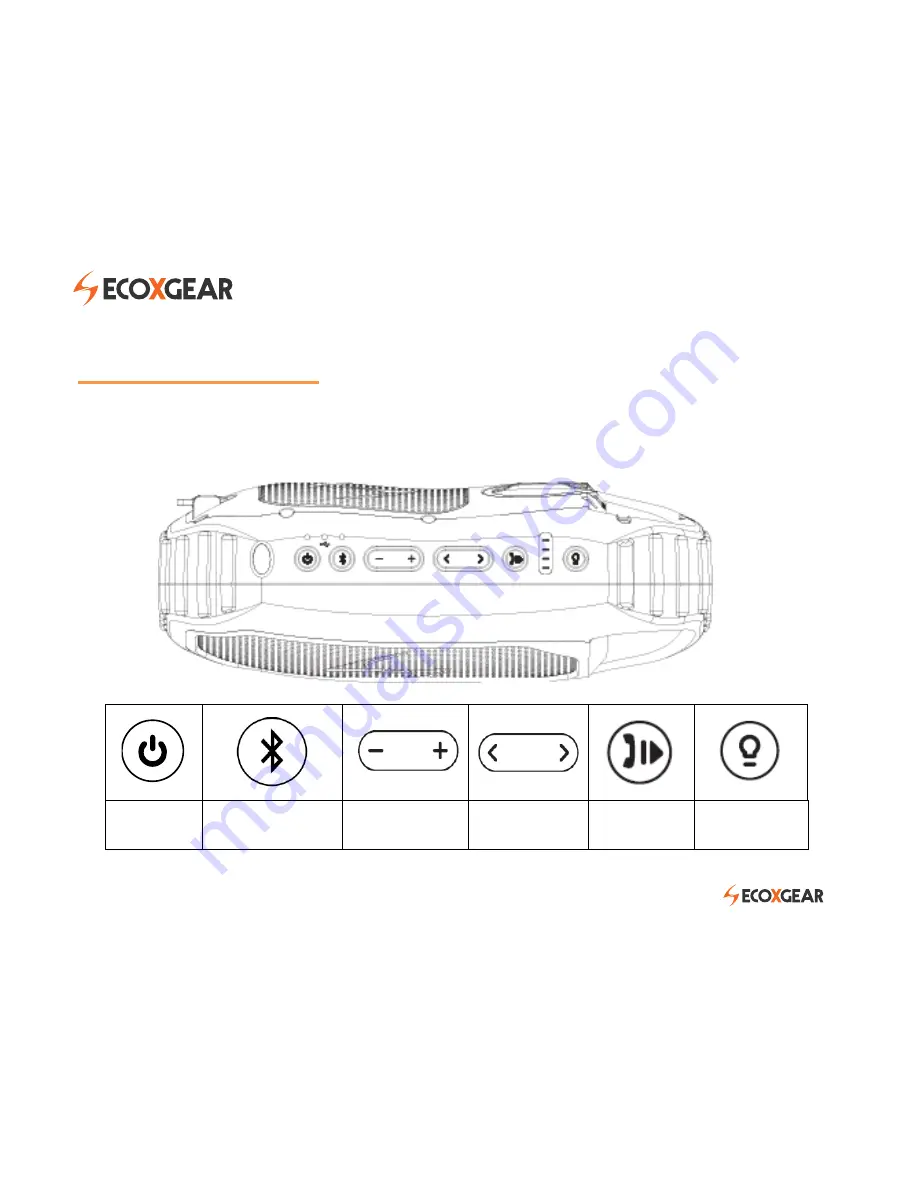
Features & Operation

    Models: GDI-EGST700--710


QUICK START 1-2-3 


STEP 1:

    Power ON your ECOSTONE 

STEP 2

SEARCH your Bluetooth Connection on your Smart-device 

STEP 3

:   PAIR & PLAY 


STANDBY 

ON/OFF 

BLUETOOTH 

SPEAKER 

VOLUME 

TRACK 

SELECTION 

PLAY PAUSE 

ANSWER 

LED 

FLASHLIGHT 


Summary of Contents for GDI-EGST700--710

Page 1: ...eration Models GDI EGST700 710 QUICK START 1 2 3 STEP 1 Power ON your ECOSTONE STEP 2 SEARCH your Bluetooth Connection on your Smart device STEP 3 PAIR PLAY STANDBY ON OFF BLUETOOTH SPEAKER VOLUME TRACK SELECTION PLAY PAUSE ANSWER LED FLASHLIGHT ...

Page 2: ... Recommend always using the USB cable included with your ECOSTONE RECOMMENDATION always use the USB cable included with your ECOSTONE STEP 2 Power ON Battery LED Status Indicators Once fully charged press the STANDBY POWER button on the top of your ECOSTONE You will see the green LED light you will hear an ascending bell tone when powering ON IMPORTANT be sure the MAIN POWER switch located in the ...

Page 3: ...when ready to pair to a new device NOTE Your ECOSTONE shall sync wirelessly pair with most Bluetooth enabled devices The unit remembers the last device paired and will automatically search for previous connections when the speaker is turned ON or when a device comes back into Bluetooth range If a connection is lost due to range the speaker will look to re establish that connection IF Bluetooth is ...

Page 4: ...er on and search for your Bluetooth Refer to STEP 3 for details SPEAKER VOLUME PRESS to decrease the volume PRESS to increase the volume NOTE Some Bluetooth devices may require they are manually set at max for max level audio Your ECOSTONE will beep to indicate when the button is pressed and maximum volume setting is reached TRACK SELECTION PRESS for previous track selection PRESS to advance the t...

Page 5: ...connections TURN the cap to the LEFT so the cap s arrow point lines up with UNLOCKED along the back edge of the unit STEP 1 Select UNLOCKED STEP 2 Open Cap Step 3 Access Connections BACK PANEL under the Cap Master Power Switch Connections ...

Page 6: ...mes will vary depending on the device being charged the device s battery specs and the device features In some instances your personal device may not indicated charge is in process CAUTION Do NOT charge if unit and or connections are wet or damp INPUT 5V 1A USB INPUT Connect your ECOSTONE to the USB micro INPUT using the USB cable to charge your ECOSTONE RECOMMENDATION Use the USB cable included w...

Page 7: ...nel is not properly closed the unit is NOT watertight To ensure the unit is watertight waterproof ALWAYS CLOSE the CAP PROPERLY TURN the cap to the RIGHT so the cap s arrow point lines up with LOCKED along the back edge of the unit BACK PANEL CAP CLOSED LOCKED ...

Page 8: ...cy Range 125Hz 18 000Hz S N Ratio 88db 3dB Bluetooth Bluetooth CSR 4 0 Power Source 3 7V 2800mAh Lithium Polymer Battery Charging Options USB to AC adapter or Computer Playtime 12 hours from full charge at 75 vol level Charging Time Approximately 3 hours Recommended Storage Battery Temperature 59 F 15 C Operating Temperature 23 F to 104 F US Military Certification MIL STD 810G Dust Waterproof Rati...

Page 9: ...feet of water for 30 minutes without any damage However the speaker is not intended for constant underwater use Always make sure the cap s covers s are clean free from sand or debris and correctly fitted The speaker will only meet IPX7 ratings if all rubber seals gaskets and cover s cap s are in place If you notice a muffling of audio after submersion gently shake the unit to clear excess water If...

Page 10: ...t water environment and the unit properly rinsed off after use 4 Properly clean the ECOXGEAR and ensure the gaskets have no sand dirt or water on them prior to storage or removing the back cover 5 Store your unit with all caps properly sealed to avoid long term internal moisture damage inside your unit 6 Completely dry and clean your ECOXGEAR prior to attempting to charge the unit 7 Return the ECO...

Page 11: ...traviolet radiation UV sunlight and strong magnetic fields 7 Periodically check the rubber seal for premature wear 8 Periodically clean the rubber with a soft moist cloth and ensure no objects such as dirt hair sand are on the rubber seal ring Do NOT use any oily solvent or chemicals for cleaning 9 Rinse off the unit with tap water after use in salt water or swimming pool 10 Power and or charge th...

Reviews: