Locked layer contains
placeholder marks.
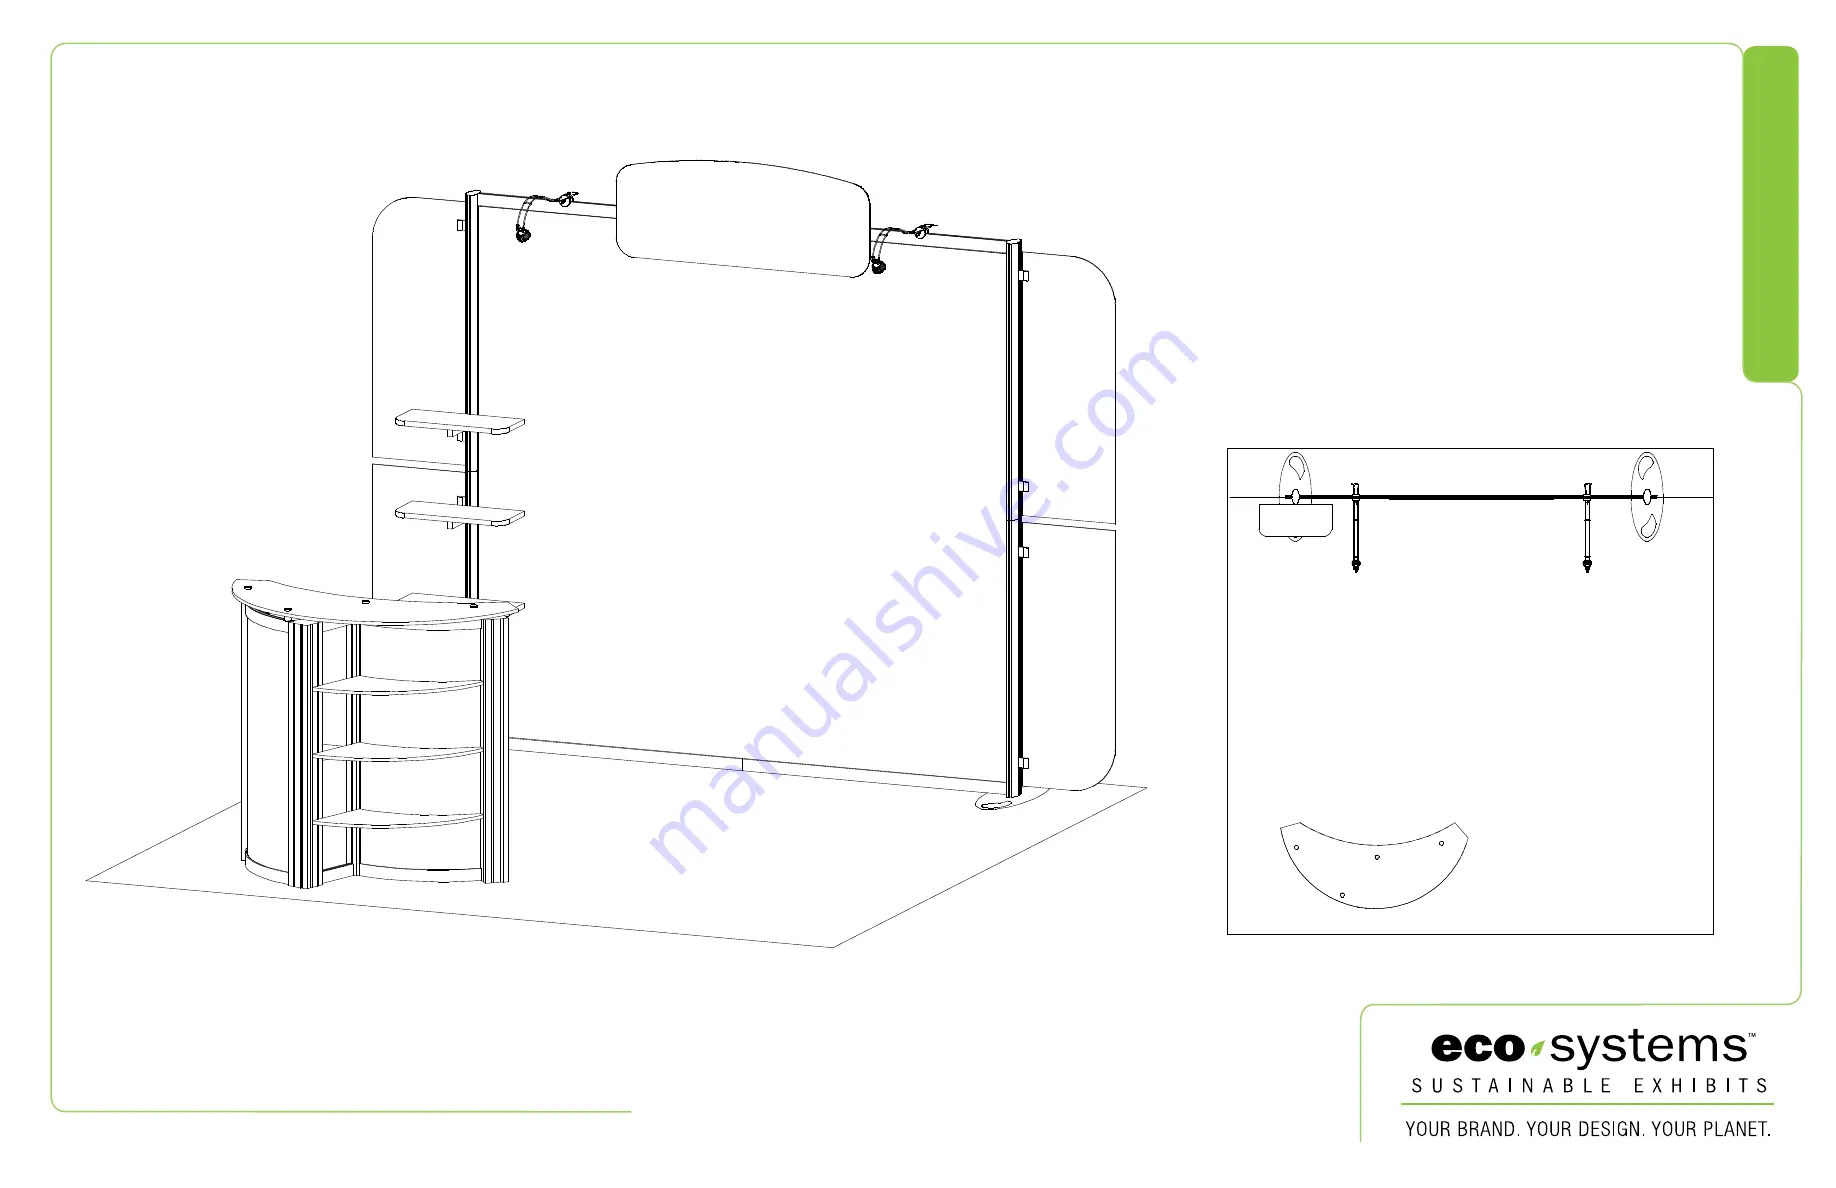
866.463.2611 • www.ecosystemsdisplays.com
Setups
Plan View
10’
Order #
XXXXX
ECO-1036
with ECO-4C Podium -
10’x10’ Sustainable Exhibit
Page 1: ...866 463 2611 www ecosystemsdisplays com Setups Plan View 10 10 Order XXXXX ECO 1036 with ECO 4C Podium 10 x10 Sustainable Exhibit ...
Page 2: ...866 463 2611 www ecosystemsdisplays com 1 sq foot Grid View ...
Page 3: ...s for Setups Packing Inline Connection between Extrusions Baseplate Connection for Vertical Extrusions Cleaning and Packing Use non abrasive cleaners when cleaning extrusions or ECO Glass inserts Use mild cleaners and soft materials such as cotton to clean all laminates Keep exhibit components away form extreme heat and long exposure to sun light This will prevent warping and fading Retain all pac...
Page 4: ...m Case 1 Setup Hardware Top View of Each Level Level 1 Bottom level Level 2 Level 3 Level 4 Base Plate Wings qty 4 2A 2 3 3A 4 4A Shelf Shelf Shelf 5 5A Spline connectors Spline connectors Header Graphic Base Plate Top level Level 5 Level 6 ...
Page 5: ...2611 www ecosystemsdisplays com Case 2 Top View of Each Level Level 1 Bottom level Level 2 Level 3 Level 4 Level 5 Top level Counter Top 1 2 3 5B 7B 7A 5A 4 6A 6B Infills Shelf Shelf Shelf Shelf Graphics Lights ...
Page 6: ... TSP3 TSP3 TSP3 TSP3 TSP3 TSP3 TSP3 TSP3 5A 4 5 SEG Graphic Installation Corner A Corner D Corner B Corner C It is important to first insert graphic into each alternate corner then to the sides of the frame If this is not done graphic will not fit into the frame correctly Step 1 Insert corner A Turn edge of graphic so silicon welt is perpendicular to face of graphic Insert narrow side of welt with...
Page 7: ...secure A10 to extrusion 3 Insert Wing into Clamp 4 Tighten knob to secure wing in place Wing Attachment Wing 1 2 3 4 Steps 1 Affix Header Graphic to top horizontals using Velcro 2 Connect Lights to top horizontals See Light Attachment detail 3 Attach Shelves to vertical 2 2A See Shelf Attachment detail 4 Connect Wings to verticals 2 2A 3 3A See Wing Attachment detail Completed Assembly Shelf Light...
Page 8: ...d Horizontal Extrusion Steps 1 Attach lower horizontal extrusions 5A 6A 7A between vertical extrusions 1 2 3 4 as shown 2 Slide infills into place between verticals as shown except clear infills Note Slide clear infills into place after three clear shelves are installed 3 Attach upper horizontal extrusions 5B 6B 7B between vertical extrusions 1 2 3 4 as shown 4 Place shelves on pins as shown 5 Sli...