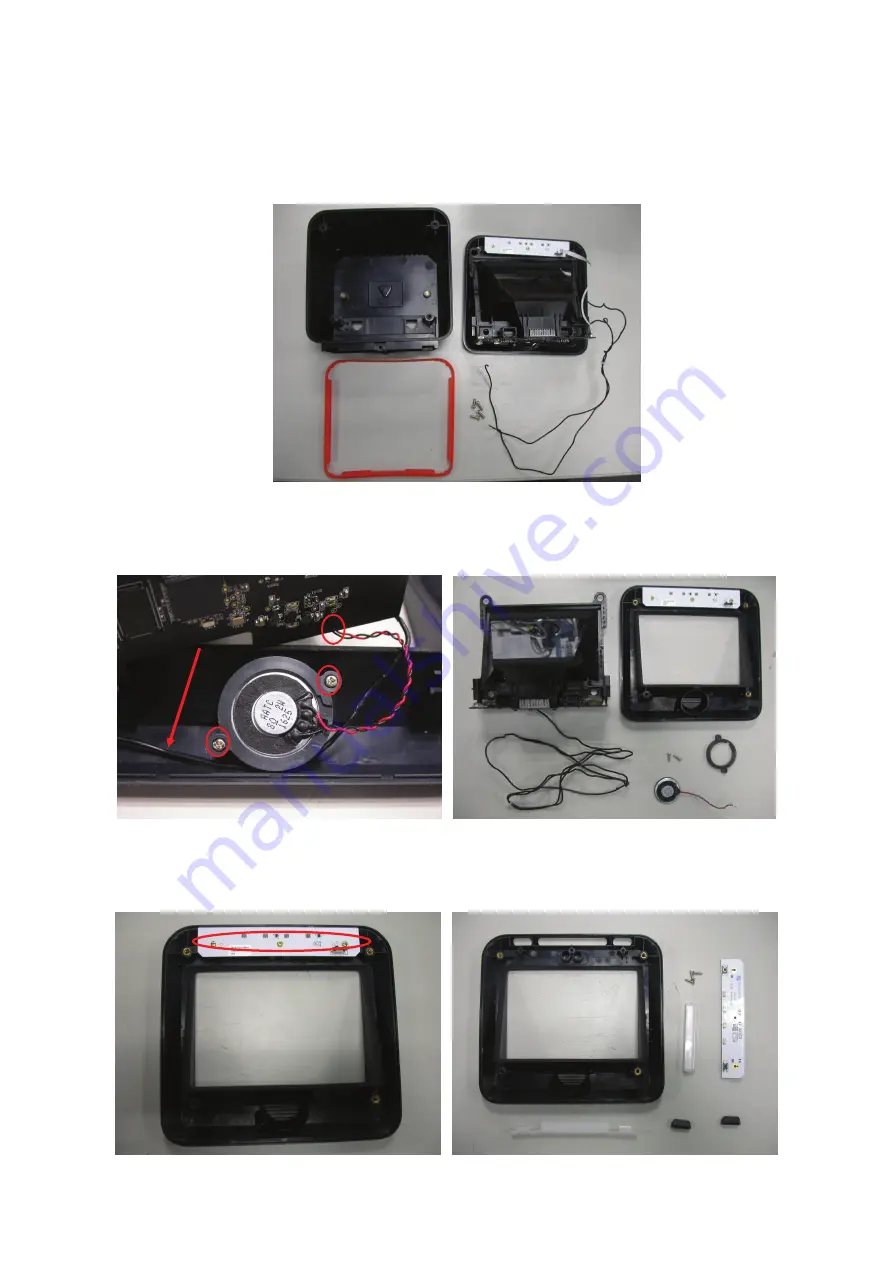
3.
Separate the back cover and remove the front cover rubber.
4.
Remove the screws, the speaker, and the EAS wire.
5.
Remove the screws and separate the front cover, LED board, trigger, and the light guide panel.
Page 1: ...unter 2D Image Scanner Service Guide Revision History Changes to the original manual are listed below Version Date Description of Version 1 0 June 29 2017 Initial release 1 1 June 5 2019 Security code...
Page 2: ...Table of Contents Table of Contents 2 Scanner Parts 3 Take Apart 4 Before You Start 4 Important Instructions 4 Tools to Prepare 4...
Page 3: ...R0 Self tapping screw M2 5 0mm 4 9 520 0040R5 010 Screw M3 0 5 10 0mm 4 10 866 808200 007 Z 8082 speaker assembly for repair 1 11 160 001001 301 Z 8082 EAS wire S D161122 1 1 12 531 1302R7 041 Nut M3...
Page 4: ...these instructions completely before you begin Follow all instructions Heed all warnings Tools to Prepare Philips screwdriver Please follow these steps to take apart Z 8082 1 Slide out the bottom cove...
Page 5: ...Separate the back cover and remove the front cover rubber 4 Remove the screws the speaker and the EAS wire 5 Remove the screws and separate the front cover LED board trigger and the light guide panel...
Page 6: ...6 Remove the screws and separate the LED board and the optical mirror base red circles 7 Remove the nuts...