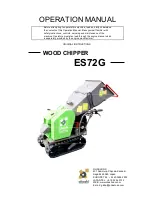
6
6 INCH CHIPPER
Section
2
ASSEMBLY
1. Remove the chipper from its shipping crate. Place the
unit on a level surface before attempting to assemble.
2. Raise the trailer several inches from the ground with a
hoist or jack. Support the chipper securely.
3. Lift one wheel to a hub and align the wheel lug holes
with the hub lug bolts. Thread the lug nuts onto the
bolts and tighten them to 75 ft-lbs. Follow a star
pattern when tightening the lug bolts. Repeat this step
for the remaining wheel.
2.1 ATTACH TRAILER WHEELS
1.
Place jack (1) onto hitch pole at mounting location and insert snap ring to secure.
2.
Attach coupler mount (2) to hitch pole (3) using two 5/8 x 4-1/2" bolts (4), washers and centerlock nuts. Torque to
150 ft-lbs. Attach 2" coupler (5) to coupler mount using two 1/2 x 4" bolts (6) and nylock nuts. Torque to 75 ft-lbs.
3. Attach the two safety plates
(7) to the hitch pole using
the front two holes, 1/2 x
4-1/2" hex bolts (8) and
nylock nuts. Keep the bolts
loose when attaching to the
frame.
4. Slide the hitch pole up to
the axle. From underneath,
place one 1/2 x 4" hex bolt
(6) through the hole in the
middle of the hitch pole and
front of the frame. Attach
with nylock nut. Torque to
75 ft-lbs.
5. Secure the safety plates
using the back two holes,
1/2 x 3-1/4" hex bolts (9)
and nuts. Torque all safety
plate bolts to 75 ft-lbs.
6. Use the hitch pole as a
guide for the wiring harness.
Use the 1/4" hex bolt (10),
nut (11) and clamp (12)
located at the front of the
chipper trailer to secure the
harness.
If any bolts or nuts are dropped in the machine, be sure
to remove them before starting the machine.
WARNING
2.2 ATTACH HITCH ASSEMBLY
Figure 2.1, Hitch Assembly (Non-CE Compliant Model Shown)
1
2
3
4
5
6
6
7
7
8
9
10
11
12


