EC Line EC-1200 User Manual Download Page 3

2

Chapter I: Overview

Dear customer

Thank you for purchasing the EC Line All - In One touch POS devices, we are

committed to continuously improve the product quality and provide better after-sales

service. In order to take full advantage of our devices, we strongly recommend that

you take the time to read this manual before diving into software solution.

1.1 The Structure of the Manual

This manual is divided into parts and chapters in order to help you better focus on the

key topics.

You are not required to have prior knowledge of any point of sale to use this manual.

This Manual contains an overview of the installation guide, instructions for use,

Common Faults and exclusion, the main technical indicators content and the product

warranty commitments. You can access to appropriate help by browse the topics

upon your need.

1.2. Safety Information:

This product is in full compliance with the relevant requirements of the

national standard GB/4943-2001 IT equipment security.

Before plug in the product, please make sure the power you provide meets

the power requirements (such as voltage, frequency); please make sure the

ground terminal of the power outlet is working normally.

Lightning may damage this product or even your personal safety, during

lightning storms; unplug the network cable, power cable and any other

connections.

Summary of Contents for EC-1200

Page 1: ...User Manual EC 1200 All in one Touch POS Terminal...

Page 2: ...ompatibility statement 4 Chapter II Installation Guide 4 2 1 EC 1200 Appearances 4 2 2 The front panel Function definition 4 2 3 The rear panel I O signs and description 5 Chapter III Instructions for...

Page 3: ...manual This Manual contains an overview of the installation guide instructions for use Common Faults and exclusion the main technical indicators content and the product warranty commitments You can a...

Page 4: ...t remove the packaging and allow the computer to restore the natural temperature and avoid heating up too fast to cause the computer to generate the occurrence of frost and condensation that might bri...

Page 5: ...ment This product is in full compliance with the relevant requirements of the national standards GB 9254 1998 The limits and measurement methods of radio disturbance characteristics of information tec...

Page 6: ...M 1 3 4 5 6 External serial devices such as mouse fax machines printers equipment etc USB USB interface to connect a USB device LAN1 Connect RJ 45 connector to 100M bps LAN interface enable the device...

Page 7: ...if you want to change the factory default settings based on customer characteristics boot by DEL to enter the BIOS interface If the message disappears before you respond to you can turn off the machin...

Page 8: ...p 2 Select main Standard CMOS Features Bios information BIOS Vendor Core Version American megatrends 4 6 4 0 Item Help Compliency Project Version Bulit Date andTime UEFI Z 0 PT00C000X64 11 24 2011 14...

Page 9: ...On Dislabled Boot Option Priorities BOOT OPTION Hard Drive BBS Priorities SATA ST3800 Move Value Enter select F10 Save and Exit F9 load Defaults Settings F1 General Help Esc Exit Step 5 Select the me...

Page 10: ...ge and Exit Discard Change Load Optimal Default Exit system setup with Move Value Enter select F10 Save and Exit F9 load Defaults Settings F1 General Help Esc Exit Total Memory 2048MB Share Memory Siz...

Page 11: ...the installer directory to find the setup exe file double click the installation when apply CD ROM installation the path is shown below Step 2 Double click the installation as the following figure sh...

Page 12: ...11 Step 3 Install In progress Step 4 Tick install PS 2 interface driver and click Next to proceed installation...

Page 13: ...12 Step 5 If the touch interface is RS232 tick install RS232 interface driver and click Next to proceed installation Step 6 When choosing the calibrations select NONE click Next to proceed...

Page 14: ...13 installation Step 7 When installing USB touch please connect the USB controller and USB cable...

Page 15: ...more touch screen please tick Support multi monitor system Step 9 Select the destination location to store the driver the default path is C Program Files eGalaxtouch we use the default path here click...

Page 16: ...installation Step 10 Check the projects to create a desktop shortcut icon in the following figure After install the driver successfully identify the USB controller card and RS232 control card as the...

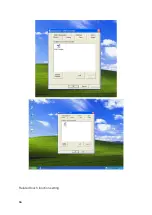
Page 17: ...16 Related touch function setting...

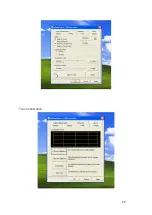
Page 18: ...17 Touch calibration...

Page 19: ...18 Touch device line test Touch screen setting...

Page 20: ...19 Touch device edge correction setting Touch device hardware information display...

Page 21: ...POS device such as high temperature causes the POS device automatically shut down in protection mode please disconnect the power of the machine to improve the internal environment 4 If the POS device...

Page 22: ...able problems please re check the external network cable is connected 3 Check the network connection icon in the Toolbar if the icon cannot be found so network card driver might not be installed prope...

Page 23: ...supply or other high frequency equipment affect the screen or controller make sure that the touch screen is away from the high voltage equipment 3 The touch screen driver is not installed correctly i...

Page 24: ...play properties 2 The screen display resolution is set in the best condition 1024 768 3 Power supply or other high frequency devices affect the screen or machine keep the distance between the POS devi...

Page 25: ...OS USB2 0J is enabled 3 The cable of USB external device should not be too long Otherwise the USB device can not be found due to the insufficient supply 4 Re install the USB driver see motherboard dri...

Reviews: