


ASG Tech Note: Connecting and Communicating with DSA
Page 5 of 10
Step 9: While still in the diagnostic window, click on the ‘Set to Defaults’ button to bring
the DSA module back to factory default settings.
Step 10: After setting back to factory default, click on the ‘Warm Reboot’ button to reboot
the DSA module.
At this point, the DSA module should be reset to factory default with the latest firmware.
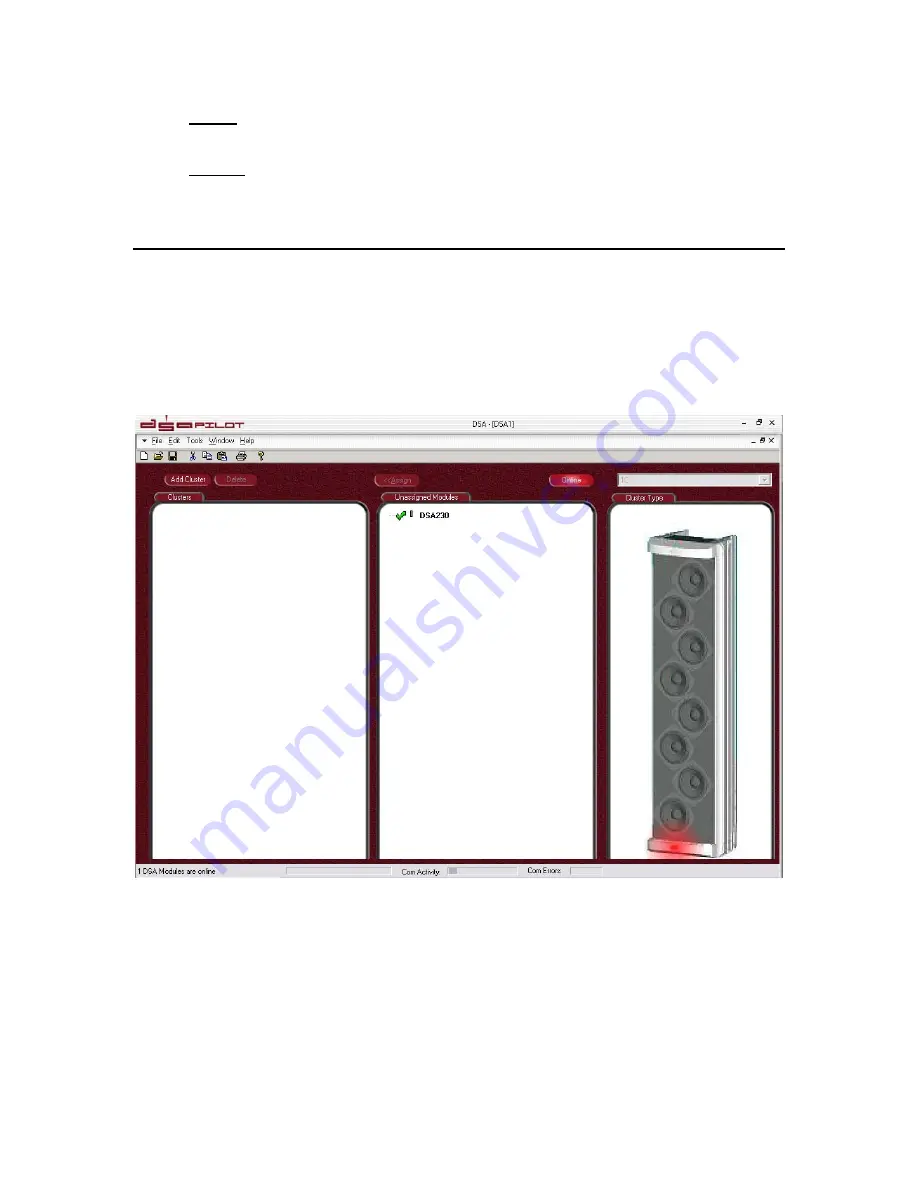
5. Communicating with DSA
5A. Go ‘Online’
Once you have the proper connection to the DSA module, launch DSA Pilot and click the
‘Online’ button. This will poll your network and find the unassigned DSA modules. These
will appear in the ‘Unassigned Modules’ section of DSA Pilot. Individual DSA
loudspeakers will be referred to as ‘Modules’ when not assigned to a cluster.
Clicking on an individual DSA module will light up its respective LED on the front. It is
here you can right click on the individual DSA module and run diagnostics, as well as
rename the individual DSA module and upgrade firmware.
5B. Adding DSA Cluster(s).
Click ‘ADD CLUSTER’. This will add an ‘Unnamed Cluster’ in the “Clusters” window in
DSA Pilot and engage the drop down menu for choosing your cluster type, as well as
bring up a picture of what that cluster type looks like. Using the drop down menu, choose
the cluster type you will be working with.


