


Document Part # 026-4417 Rev 2
Page 8 of 9
©2020 Emerson Retail Solutions, Inc. This document may be photocopied for personal use.
Visit our website at http://www.emerson.com for the latest technical documentation and updates.
6. Connect MRLDS-450 to MRLDS-400 Series App
(User Discretion)
The MRLDS-450 uses a smartphone application to allow users to interface with the gas detector.
IMPORTANT:
Default alias, passkey, and unlock code can be changed via the MRLDS-400 Series App’s configuration menu.
1. Enable Bluetooth® discovery by tapping
MAG#1
for 1 second. (After 10 seconds, the device will indicate that it is
discoverable with audible heartbeat until it has been paired, discovery has timed-out or has been canceled.)
2. Launch the MRLDS-400 App and click the Bluetooth® icon at the bottom of the screen to initiate a scan.
3. Select the instrument (
default is
18TMAE
) from the list of available gas detectors.
4. When prompted, enter the passkey (
default is
123456
).
5. Go to
Configure
tab to set up the device. When prompted, enter unlock code to access device configuration
(
default is
1234
).
6. Operation Overview
#
APP DESCRIPTION
1
Main Menu
(App Settings)
2
Status
(Gas Concentration)
3
Calibrate
(Calibration/Bump Test)
4
Details
(Instrument Information)
5
Disconnect Bluetooth®
6
Restart Connected Device
7
Test Mode
(LED/Buzzer/Relays/Analog
Output)
8
Device Configuration
9
Logs
Table 3 - App Description
OUTPUT
STATE
LED
RELAY 1
RELAY 2
RELAY 3
Buzzer
Warm-up
OFF
OFF
OFF
Normal
OFF
OFF
OFF
Low Alarm
ON
OFF
OFF
High Alarm
ON
ON
OFF
Offline
OFF
OFF
OFF
Fault
OFF
OFF
ON
Negative Gas Fault
OFF
OFF
ON
Zero Cal. Fault
OFF
OFF
OFF
Special Cal. Fault
OFF
OFF
OFF
Table 4 - Outputs
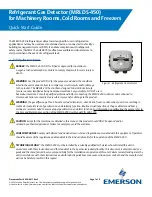
Figure 9 - App