background image

Polar Air Electric Operated, Piston Compressors

11

1.  

Plug auto drain into 120V outlet.

2.   Set timers to desired settings. See figure 4. If drain is used for multiple units, increase timer settings as    
 needed.

3.   Use test button to check proper operation. Refer to maintenance section for proper care.

1.  

Follow all NEC and local codes for electrical wiring. Allow only authorized Polar Air service person or  


certified electrician to install electrical components.

2.   Put unit on dedicated circuit and make sure no other electrical equipment is wired into it. Failure to wire   
 

unit on independent circuit can cause circuit overload and/or imbalance in motor phasing. Install proper No  


Fuse Breaker (NFB) according to kW output of compressor.

3.   Ensure incoming service has adequate ampere rating.

4.   Ensure supply line has the same electrical characteristics (voltage, cycles and phase) as the electric motor.

5.   Refer to amp load information on motor tag and use correctly sized wiring. 

Be sure to consider distance  


between power supply and machine.

6.   Install surge protection device between power supply and compressor motor.

7.  

Make sure to install properly sized breakers and fuses.

8.   The unit must be properly grounded. 

DO NOT

 connect ground wire to air or cooling lines.

Be sure only trained and authorized personnel install and maintain this 
compressor in accordance with all applicable federal, state and local 
codes, standards and regulations. Follow all NEC (National Electric 
Code) standards especially those concerning equipment grounding 
conductors.

DANGER

Electronic Safety

Summary of Contents for POLAR AIR PP20H240V3

Page 1: ...Polar Air Electric Operated Piston Compressors 1 ...

Page 2: ...erators and maintenance persons are responsible for maintaining safety All safety precautions are included to provide a guideline for minimizing the possibility of accidents and property damage while equipment is in operation Keep these instructions for reference ELECTRIC OPERATED PISTON COMPRESSORS ...

Page 3: ...V 230V 208 230 460 575 208 230 460 575 Pump Model APP2I0524T APP4V1043T APP3Y1544T APP4V1043T APP3Y1544T Pump RPM 650 640 600 640 600 Noise DB A 73 73 76 73 76 Outlet Connection NPT 3 4 NPT 3 4 NPT 1 NPT 3 4 NPT 1 Weight 5 lbs 715 958 1095 958 1095 Shipping Weight 800 1043 1242 1043 1242 Model Specification Charts 3 4 Description 4 Safety Information 5 Tag Definitions 5 Basic Guidelines 5 Breathab...

Page 4: ...ank Size 120 Gallon Vertical 120 Gallon Horizontal 120 Gallon Horizontal 120 Gallon Horizontal Pump Model APP3Y2062T APP3Y2062T APP4V2598T APP4V2598T Pump RPM 640 640 640 740 Noise DB A 76 76 78 79 Outlet Connection NPT 1 NPT 1 NPT 1 NPT 2 Dimensions 33 x 24 x 73 79 x 32 x 62 72 x 30 x 51 72 x 30 x 51 Weight lbs 1410 1410 1500 1703 Shipping Weight 1512 1512 1609 1810 Polar Air Electric Operated Tw...

Page 5: ...e condition is corrected 3 Install use and operate the compressor only in full compliance with all pertinent OSHA regulations and all applicable Federal State Local codes standards and regulations 4 NEVER modify the compressor and or controls in any way 5 Keep a first aid kit in a convenient place Seek medical assistance promptly in case of injury Avoid infection by caring for any small cuts and b...

Page 6: ...pressor and its controls comply with all applicable OSHA Federal State and Local regulations codes and standards relating to personal protective equipment This includes respiratory protective equipment protection for the extremities protective clothing protective shields and barriers electrical protective equipment and personal hearing protective equipment A forklift may be necessary for unloading...

Page 7: ... to lifting feature 2 Make sure lifting points are in good condition and tighten any loose nuts or bolts before lifting 3 Use provided lifting feature or appropriate sling A sling must be used when moving compressor with a helicopter or other air borne equipment Be sure to follow OSHA standards 29 CFR 1910 Subpart N 4 Use guide ropes or equivalent to prevent twisting or swinging of the compressor ...

Page 8: ...d motor is recommended Check nameplate for motor type 6 Insulate cold water or other low temperature pipes that pass overhead to avoid condensation dripping on compressor which could cause rust and or motor shorting Safety Steps 1 Install appropriate flow limiting valves as necessary according to pipe size s used and run lengths This will reduce pressure in case of hose failure per OSHA Standard 2...

Page 9: ...ins See figure 2 Refer to figure 3 for recommended closed loop installation 5 Make sure any tube pipe or hose connected to the unit can withstand operating temperatures and retain pressure 6 Never use reducers in discharge piping Keep all piping and fittings the same size in the piping system Never install a shut off valve such as a glove or gate valve between the pump discharge and the air tank u...

Page 10: ...tions of compressed air systems determine total length of system and select correct pipe size Make sure underground lines are buried below frost line and avoid areas where condensation could build up and freeze 8 Test entire piping system before underground lines are buried Be sure to find and repair all leaks before using compressor One auto drain can be used for multiple compressor units Install...

Page 11: ...Breaker NFB according to kW output of compressor 3 Ensure incoming service has adequate ampere rating 4 Ensure supply line has the same electrical characteristics voltage cycles and phase as the electric motor 5 Refer to amp load information on motor tag and use correctly sized wiring Be sure to consider distance between power supply and machine 6 Install surge protection device between power supp...

Page 12: ...stall power leads into terminals opposite motor wires Ensure power supply and internal wiring is adequate according to voltage and frequency stated on motor nameplate and starter Voltage should not vary more than 12 to ensure proper operation of compressor DANGER Improperly grounded electrical components are shock hazards Make sure all the components are properly grounded to prevent death or serio...

Page 13: ...power leads 1 Make sure all operators receive product training read and understand all instructions Three Phase Motors See figure 7 WARNING Ensure wiring is installed according to voltage required for proper motor operation 220V or 460V Keep all flammable combustible poisonous and noxious materials away from operating area Make sure there are no oily rags trash leaves litter or other combustible m...

Page 14: ...body parts and clothing away from couplings flywheel and other moving parts of the equipment 11 DO NOT use air tools that are rated below the maximum rating of the compressor Select air tools air hoses pipes valves filters and other fittings accordingly DO NOT exceed manufacturer s rated safe operating pressures for these items 12 Make sure all hose connections are adequately secured to prevent to...

Page 15: ...ee figure 9 Stop continuous run feature by closing valve so compressor will start and stop according to pressure switch Always make sure main power is off before touching belts or other moving parts of compressor WARNING Figure 9 Continuous run feature Disconnect tag and lock out power source then release all pressure from the system before attempting to install service relocate or perform ANY mai...

Page 16: ...ssor 6 DO NOT leave compressor unattended with exposed electrical components Be sure to tag and disconnect all power if temporary absence is necessary 1 Proper belt tension is determined by pressing on belt midway between motor pulley and flywheel There should be approximately 1 2 inch of deflection 2 Adjust belt tension as needed by loosening the four motor frame nuts then adjusting single bolt h...

Page 17: ...ype oil Change oil every 90 days or if oil becomes milky Check proper operation of safety valve before each use Refer to figure 12 If valve does not open manually replace immediately Discharge pressure is generally set at 175 PSI 12 1 bar DO NOT attempt to open valve while machine is under pressure NOTICE Use only Airbase Industries Oil PN APOL03000G1 Use of any other product will cause product da...

Page 18: ... Check CFM requirements change tool or use compressor with higher air output 4 Remove valves from cylinder head repair or replace as necessary 5 Check power supply rewire as necessary 1 Keep duty cycle at 60 40 to maintain pump life 2 When facing flywheel ensure counterclockwise rotation 3 Clean or replace 4 Replace gasket s 5 Clear blockage 6 Add oil Ensure oil level is at middle of site glass Se...

Page 19: ...REE FROM DEFECTS IN MATERIAL WORKMANSHIP AND PARTS FOR 5 YEARS FOR THE COMPRESSOR PUMP AND 2 YEARS ON THE REMAINDER OF THE UNIT FROM THE DATE OF PURCHASE The UNIT also carries a 1 year labor warranty Eaton Compressor and Fabrication Co Inc and each of its subsidiaries is not responsible for downtime during warranty service If downtime is necessary it is the Purchaser s discretion and obligation at...

Page 20: ...ents and property damage while equipment is in operation Keep these instructions for reference AMNU000001 0810 Operating Instructions Model Specification Charts 2 Safety Information 3 Tag Definitions 3 Basic Guidelines 3 Breathable Air 3 Personal Protective Equipment 4 Inspection 4 Installation 4 Area 4 Piping Safety Steps 5 Tank Installation 5 Pump Installation 5 Operation 8 Safety Rules 8 Start ...

Page 21: ...nches Model APP3Y0521T APP2I0524T APP3Y0732T APP4V1043T APP3Y1544T APP3Y2062T APP4V2598T Description 5HP 3cyl 5HP 2cyl 7 5HP 10HP 15HP 20HP 25HP CFM Displacement 21 24 32 43 44 62 98 CFM Pressure 100 psi 18 17 24 34 35 52 91 Max PSI 175 175 175 175 175 175 175 Noise DB A 74 75 75 75 75 75 79 Outlet Connection NPT 3 4 NPT 3 4 NPT 3 4 NPT 3 4 NPT 1 1 4 NPT 1 1 4 NPT 1 1 4 Pump RPM 895 795 830 600 64...

Page 22: ...to use this compressor pump Failure to follow the instructions procedures and safety precautions in this manual can result in accidents and injuries 2 NEVER start or operate the compressor pump under unsafe conditions Tag the compressor disconnect and lock out all power to it to prevent accidental start up until the condition is corrected 3 Install use and operate the compressor pump only in full ...

Page 23: ... lit area Be sure installation area can maintain a temperature range between 35 110 F 2 Insulate cold water or other low temperature pipes that pass overhead to avoid condensation dripping on compressor which could cause rust and or motor shorting Inspect compressor pump prior to any use Check for external damage that might have occurred during transit Be careful of moving parts then test pulley b...

Page 24: ...pe size and rated CFM Select appropriate valves accordingly in accordance with the manufacturer s recommendations 1 Place tank feet on 1 4 thick rubber pads Thicker padding will increase vibration and the possibility of cracking the tank or other unit damage Do not place unit on dirt floor or uneven surface 2 Fasten anchor bolts snugly but do not overtighten so normal vibration will not damage uni...

Page 25: ...g system to minimize noise vibration unit damage and pump wear Pulley Size Chart Pulley size in inches Pump Model No Electric Motor Hp 1750 RPM 4 Pole Motor 3450 RPM 2 Pole Motor Gas Engine Hp Gas Engine Pulley Size APP2V0313S 3 5 5 2 75 5 5 3 APP3Y0518S 3 5 5 2 75 6 5 3 APP3Y0518S 5 5 75 2 75 6 5 3 APP3Y0521T 5 7 3 5 8 3 5 APP2V0732S 5 5 5 2 75 8 3 APP2I0524T 5 7 7 3 8 11 4 APP3Y0732T 5 6 3 11 3 ...

Page 26: ...round lines are buried Be sure to find and repair all leaks before using compressor Never install a shut off valve such as a glove or gate valve between the pump discharge and the air tank unless a safety valve is installed in the line between valve and pump WARNING Never use plastic PVC pipe for compressed air Serious injury or death could result Never exceed recommended pressure or speed while o...

Page 27: ...shut off compressor and allow it to cool Keep sparks flames and other ignition sources away and DO NOT permit smoking in the vicinity 9 Stop compressor and disconnect power if a hazardous condition arises 10 Wear snug fitting clothing and confine long hair when around compressor Keep all body parts and clothing away from couplings flywheel and other moving parts of the equipment Keep all flammable...

Page 28: ...g 4 3 Push power switch to make sure system is working 4 Ensure motor rotation is correct Refer to unit operating instructions if necessary 1 Make sure repairs are done in a clean dry well lighted and ventilated area 2 When cleaning use air pressure less than 30 PSIG 2 1bar NEVER use flammable solvents for cleaning purposes Also use effective chip guarding and personal protective equipment per OSH...

Page 29: ...oil every 90 days or if oil becomes milky High humidity and excessive temperature changes can cause moisture to form in the pump This moisture will cause oil to break down and become milky Be sure to check oil regularly for proper lubrication Make sure to dispose of used parts such as oil and filters in accordance with all applicable regulations Some units are shipped with break in oil Change oil ...

Page 30: ... 3 Check CFM requirements change tool or use compressor with higher air output 4 Remove valves from cylinder head repair or replace as necessary 5 Check power supply rewire as necessary 1 Keep duty cycle at 60 40 to maintain pump life 2 When facing flywheel ensure counter clockwise rotation 3 Clean or replace 4 Replace gasket s 5 Clear blockage 6 Add oil Ensure oil level is at middle of site glass...

Page 31: ...herein will void this warranty Exclusions include service such as OIL CHANGES FILTER REPLACEMENTS GASKET TIGHTENING TO CORRECT OIL SEEPAGE or DRIVE BELT TIGHTENING and VALVE CLEANING and are not covered under warranty Warranty shall be void under the following conditions Failure to routinely change oil and to maintain a clean filter or exceeding 70 duty cycle resulting in overheating and excessive...

Page 32: ...APP3Y2062T EC20T ...

Page 33: ...OR EYE STARTS AUTOMATICALLY MOVING PARTS DO NOT TOUCH KEEP GUARDS IN PLACE COMPRESSOR DOES NOT SUPPLY BREATHABLE AIR RISK OF BURSTING DO NOT ADJUST REGULATOR TO RESULT IN OUTPUT PRESSURE GREATER THAN MARKED MAXIMUM PRESSURE OF ATTACHMENT IF A REGULATOR HAS NOT BEEN INSTALLED USE ONLY ATTACHMENT RATED AT 200 PSI OR HIGHER DO NOT WELD ON OR REPAIR TANK REPLACE DO NOT OPERATE WITHOUT PROPER ASME SAFE...

Page 34: ...ed at the end of the pipes with a hood to protect them from the elements Special size filters are required for that pipe If the compressor has to be located where the motor will be exposed to appreciable quantities of water dirt oil acid or alkaline fumes the motor must be of special construction to avoid rapid deterioration i e TEFC Unless the base is exactly level shims will be required Any spac...

Page 35: ...on the motor and check for proper rotation The pump must run counter clockwise when facing the pulley side of the compressor The compressor pumps are equipped with intake filters that require no piping If it necessary to pipe the intake outdoors see paragraph 3 Location A flexible connector should be used between the compressor tank and building piping or connection to after cooler or other simila...

Page 36: ...tion of the arrow on the flywheel and be sure that the direction of rotation is correct when the machine is started Correct direction is counter clockwise when standing facing the flywheel Air should be drawn through the intercooler onto the cylinders for maximum cooling Starting Service Oil should be changed every 90 days Oil level should be at halfway level in sight lass If oil is milky it shoul...

Page 37: ...oapy water if necessary replace or tighten threaded parts Compressor too small for equipment being operated Check air requirements an add to compressor capacity consult dealer Leaking head valves Remove hold down covers and remove valves for examination Repair or replace faulty valves Compression of air generates heat much of which is dissipated as air passes over the intercooler and or after cool...

Page 38: ...ING are not covered under warranty Warranty shall be void under the following conditions Failure to routinely change oil and to maintain a clean filter Exceeding 65 duty cycle resulting in overheating and excessive wear and tear Exposing electrical components to rain or water Installing the unit in a hostile environment such as acid vapors or any caustic or abrasive matter that may be ingested int...

Page 39: ......

Page 40: ......

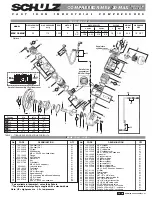
Page 41: ...GASKET084 CYLINDER GASKET PCS 3 Item Part No Part Description UNIT QTY 34 WASHER010 LOCK WASHER 12MM PCS 12 35 BOLT024 BOLT HEX M12 1 75 30MM PCS 12 36 CYLINDER15 CYLINDER LP PCS 2 37 GASKET029 HEAD GASKET LP PCS 2 38 HEAD011 HEAD LP PCS 2 39 TEE004 EXHAUST TEE FITTING PCS 1 40 WASHER009 LOCK WASHER 10MM PCS 16 41 BOLT036 BOLT S H M10 1 50 35MM PCS 16 42 GASKET026 VALVE GASKET LP COPPER PCS 4 43 V...

Page 42: ...10 UNLOADING PLUNGER ORING HP PCS 1 79 PLUNGER007 UNLOADING PLUNGER HP PCS 1 80 STOPPER006 INTAKE VALVE COVER STOPPER HP PCS 1 81 STOPPER005 EXH VALVE COVER STOPPER HP PCS 1 82 TEE005 UNLOADING TEE 1 8 PIPE TO 6MM PCS 2 83 LINE114 UNLOADING LINE 6MM COOPER PCS 2 84 VALVE008 200 PSI POPOFF VALVE PCS 1 85 COOLER011 EXHAUST AFTERCOOLER PCS 1 86 FITTING014 REDUCER PCS 1 87 FITTING100 FLARE FITTING 1 T...

Reviews: