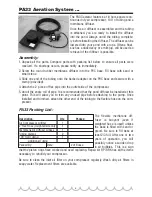
PA33 Aeration System ...
The PA33 aerator features a 1/4 horse power con-
tinuous duty air compressor, 100' of tubing and a
membrane diffuser.
Once the air diffuser is assembled and the tubing
is attached, you are ready to install the diffuser
into the pond. Always unroll the tubing complete-
ly before installing the diffuser. The diffuser can be
lowered into your pond with a rope. Often a float,
such as a duck decoy or a milk jug, will be used so
retrieval of the diffuser is possible.
Assembly:
1. Unpack all the parts. Compare parts with packing list below to ensure all parts were
received. If a shortage occurs, please notify us immediately.
2. Screw the round rubber membrane diffuser into the PVC base. Fill base with sand or
small stone.
3. Slide one end of the tubing onto the barbed adapter on the PVC base and secure with a
clamp (provided).
4. Attach the 2' piece of flex pipe into the outlet side of the compressor.
5. Unroll the entire roll of pipe. It is recommended that the pond diffuser be installed at this
point. This will allow you to trim any unused pipe before attaching to the pump. Once
installed and trimmed, attach the other end of the tubing to the flexible hose on the com-
pressor.
PA33 Packing List:
The flexible membrane dif-
fuser is buoyant (even if
weighted hose is used) unless
the base is filled with sand or
gravel. Be sure to fill base at
least 2/3 full. After one or two
years of operation, you will
possibly notice a sudden drop
in air bubbles. This is a sign
that the piston rings have cracked and need replacing. Repair kit RP74RK has all the items
necessary to rebuild your compressor.
Be sure to clean the inlet air filter on your compressor regularly. Wash dirty air filters in
soapy water. Replacement filters are available.
5
Description.
Qty.
Packed
Air Compressor w/filter
1
2" Flex Hose (weighted kits only)
1
Membrane Air Diffuser w/base
1
Tubing Clamps
2
100' Roll Tubing
1
____' Additional Tubing
Packed By:
Date:
# of Boxes:


