14
8
9
10
11
5. APP Introduction
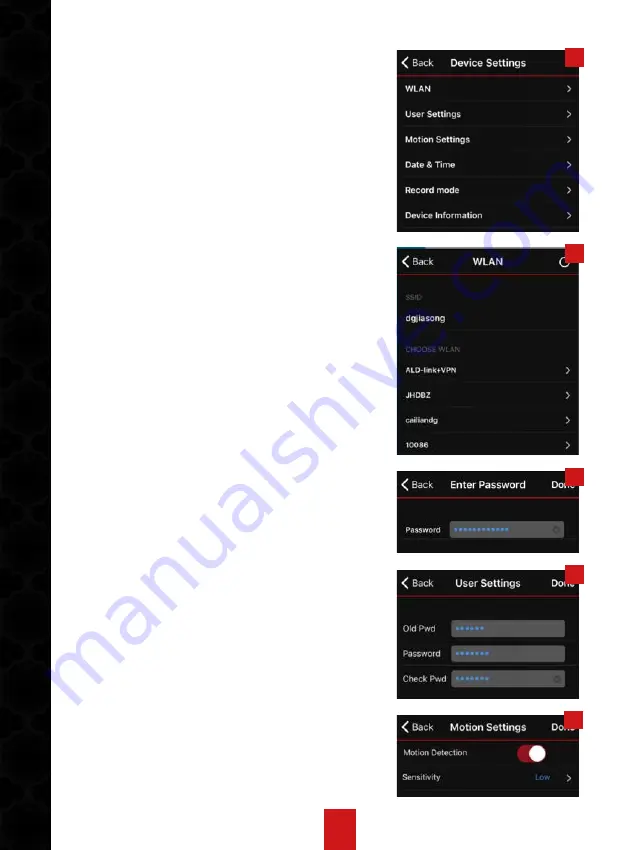
(1). MAIN SETTINGS
Tap “setting button” for each basic function (see
Pic 8). Click “Done” button after each revision.
a. WLAN: check the network that IP camera is
linked to (view Pic 9). Selectively IP camera can be
connected to other router Wi-Fi by enter security
details (as Pic 10 shows). After WLAN is changed,
camera will re-start. APP status is offline and then
online.
b. USER SETTINGS: change password here. Origi-
nal password “888888”. Input a new password and
click “Done” (see Pic 11). IP camera will re-start
after password change.
Note: after password is revised, the new one need
inputting in “Edit”; then APP status will be online.
c) MOTION SETTINGS: enable or disable motion
detection function (see Pic12); and select sensitiv-
ity (view Pic 13). “Low” option is recommended. If
motion detection is enabled, push notification will
be sent to mobiles after motion is triggered.
d) DATE & TIME: synchronize device’s time with
local time and change time zone (see pic 14).
e) RECORD MODE: check capacity of TF card and
reformat it (as pic 15 shows). And select record
mode here. Optionally models are timer record,
motion record and no record (see Pic 16). For timer
record and motion record mode, a certain time
period can be set to enable record (see Pic 17).
Click “Save” after setting. Then record period is
set (view Pic 18).
f) Device Information: check IP camera software
version and upgrade to latest version. As pic 19
shows.
12
Summary of Contents for EasyGuard
Page 3: ...3 3 KOBLE TIL EASYGUARD...
Page 9: ...9 24 25 26 27 28 29...
Page 18: ...18 24 25 26 27 28 29...


