To order parts and supplies: 800.343.9353 >> eastwood.com
17
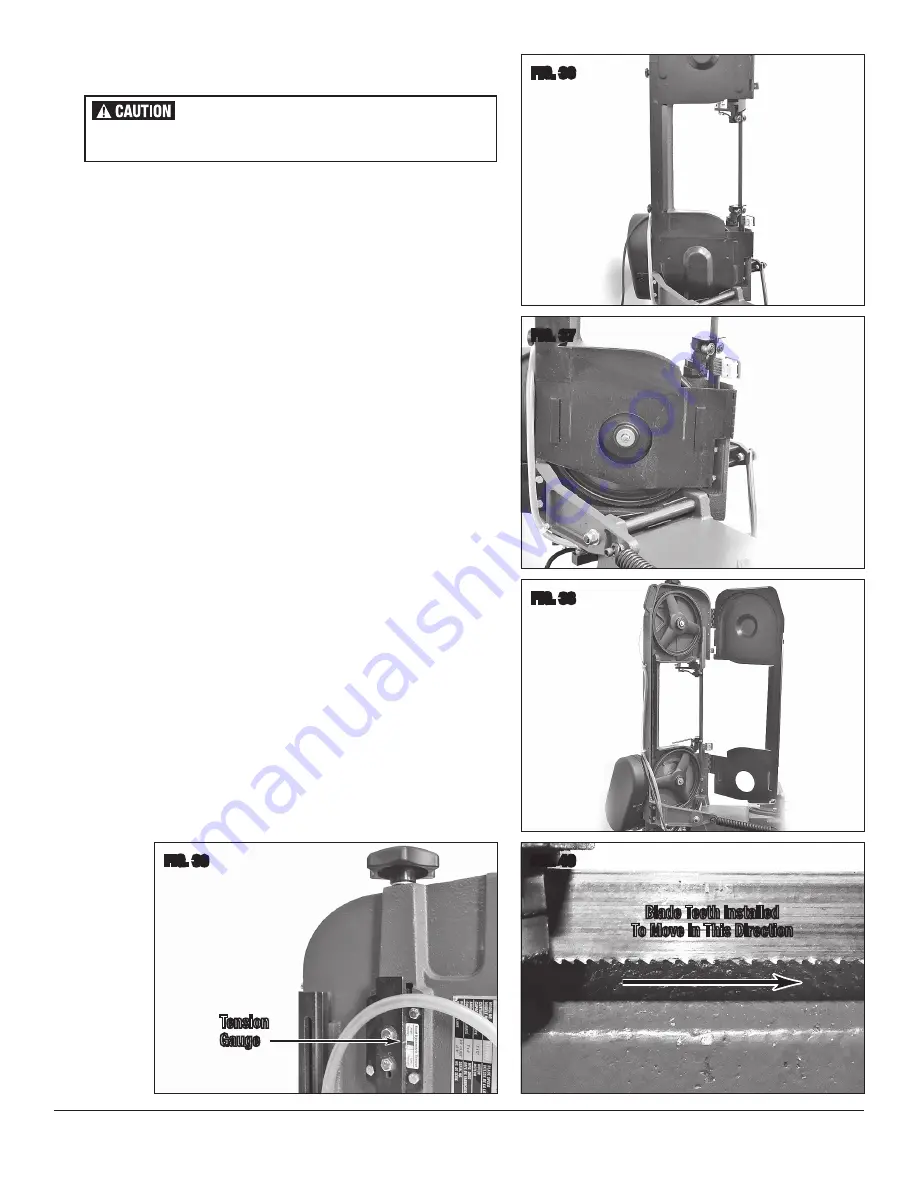
FIG. 36
FIG. 37
FIG. 38
FIG. 40
MAINTENANCE
BLADE REPLACEMENT
Blade Removal
1.
Raise the Cutting Head and rotate the Lock Lever Counter-Clockwise 90° down
to a horizontal position locking it in the UP position
(FIGS 33 & 36)
.
2.
Slide the Lower Blade Guard Clearance Panel upward and remove it
(FIG 37)
.
3.
Open the hinged Blade Guard by removing two Threaded Knobs and swinging it
open
(FIG 38)
.
4.
If Blade is not broken, release tension on Blade by rotating the Blade Tensioning
Knob Clockwise
(FIG 39)
so that the White Gauge Mark moves into the Yellow
“LOW TENSION” block of the Band Dynamic Tension label
(FIG 39)
.
5.
Slip the Blade off the Wheels and from between the Blade Support Rollers.
6.
If Blade was previously broken in use, pull out the remnant of the broken Blade
then rotate the Blade Tensioning Knob Clockwise
(FIG 39)
so that the White
Gauge Mark moves into the Yellow “LOW TENSION” block of the Band Dynamic
Tension label
(FIG 39)
.
Blade Installation
1.
Make sure that the Blade Tension Knob was adjusted so that White Gauge Mark
was moved into the Yellow “LOW TENSION” block of the Band Dynamic Tension
label
(FIG 39)
.
2.
Place new Blade over Wheels and between the Roller Guides with the cutting
teeth set in the proper direction
(FIG 40)
.
3.
Push on side of Blade to test tension. Finger pressure should cause approximately
0.004” deflection. Rotate Blade tension Knob until proper tension is achieved. For
more precise measurement use a Blade tension gauge (not included).
4.
Close the hinged Blade Guard, secure with the two Threaded Knobs and slide the
Lower Blade Guard Clearance Panel back down into place.
5.
Plug the Saw in, and run with no load for several minutes, switch off and re-
check the Blade tension.
6.
Re-adjust tension if necessary.
7.
Follow Blade Break in procedure as described in this Manual.
FIG. 39
INJURY HAZARD!
Unplug the Bandsaw from the power supply before beginning ANY
of the following adjustments!
Tension
Gauge
✓
✓
Blade Teeth Installed
To Move In This Direction


