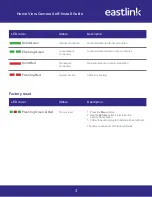
Home View Camera Self-Install Guide
2
How to install:
1. Connect Ethernet Cable from Camera to Modem
2. Connect Power - Wait for LED to be Solid Green - 60 seconds
3. Log in to
alarm.com
account
4. Select the
Video
tab
• If 1st camera on account click
Add Camera
to account
• If cameras already on account select
Video Device Settings
and select
Add Video Device
5. Click
Find Video Devices
6. A new camera should be displayed in the list
• Make sure
Camera Status
says
New Camera
• If Camera Status says
Firmware Updating
wait until
New Camera
is
displayed. (LED on camera should be solid green)
7. Click
Continue
8. Enter desired name for the camera and click
Continue
9. Camera will now enter configuration
10. Option will be given to set Camera up Wireless or Remain Connected via Ethernet
(Select Desired Option)
11. If Wireless option selected, then select from 3 options:
• Scan for Wireless Networks (Select network, security type, key format,
enter password)
• If you have another camera, select
Copy
from another Camera (Copies the network
settings form an existing camera)
• Manually Configure Wireless Network (Manually enter all network settings)
12. When completed the camera can be tested. To test, do the following:
• Disconnect Power and Ethernet Cable
• Reconnect Power and wait for LED to turn Solid Green and test
13. Camera can now be mounted at desired location
If you require assistance with any step of your installation please
contact us at
1-866-476-0420
.


